GitHub workflow
Complete GitHub workflow
In this assignment, you will configure Git, commit changes, and create an issue on GitHub.
Step 1: Introduce yourself to git
- In Posit Cloud, open the md-01-assignments-USERNAME project that ends with your GitHub username. Ensure that you are in the workspace of ds4owd-002. You can verify this by looking at the top left corner next to your repository name. If this says Your Workspace, then you are in the wrong place. In this case, return to the previous assignment and ensure to clone the repository into the ds4owd-002 workspace.

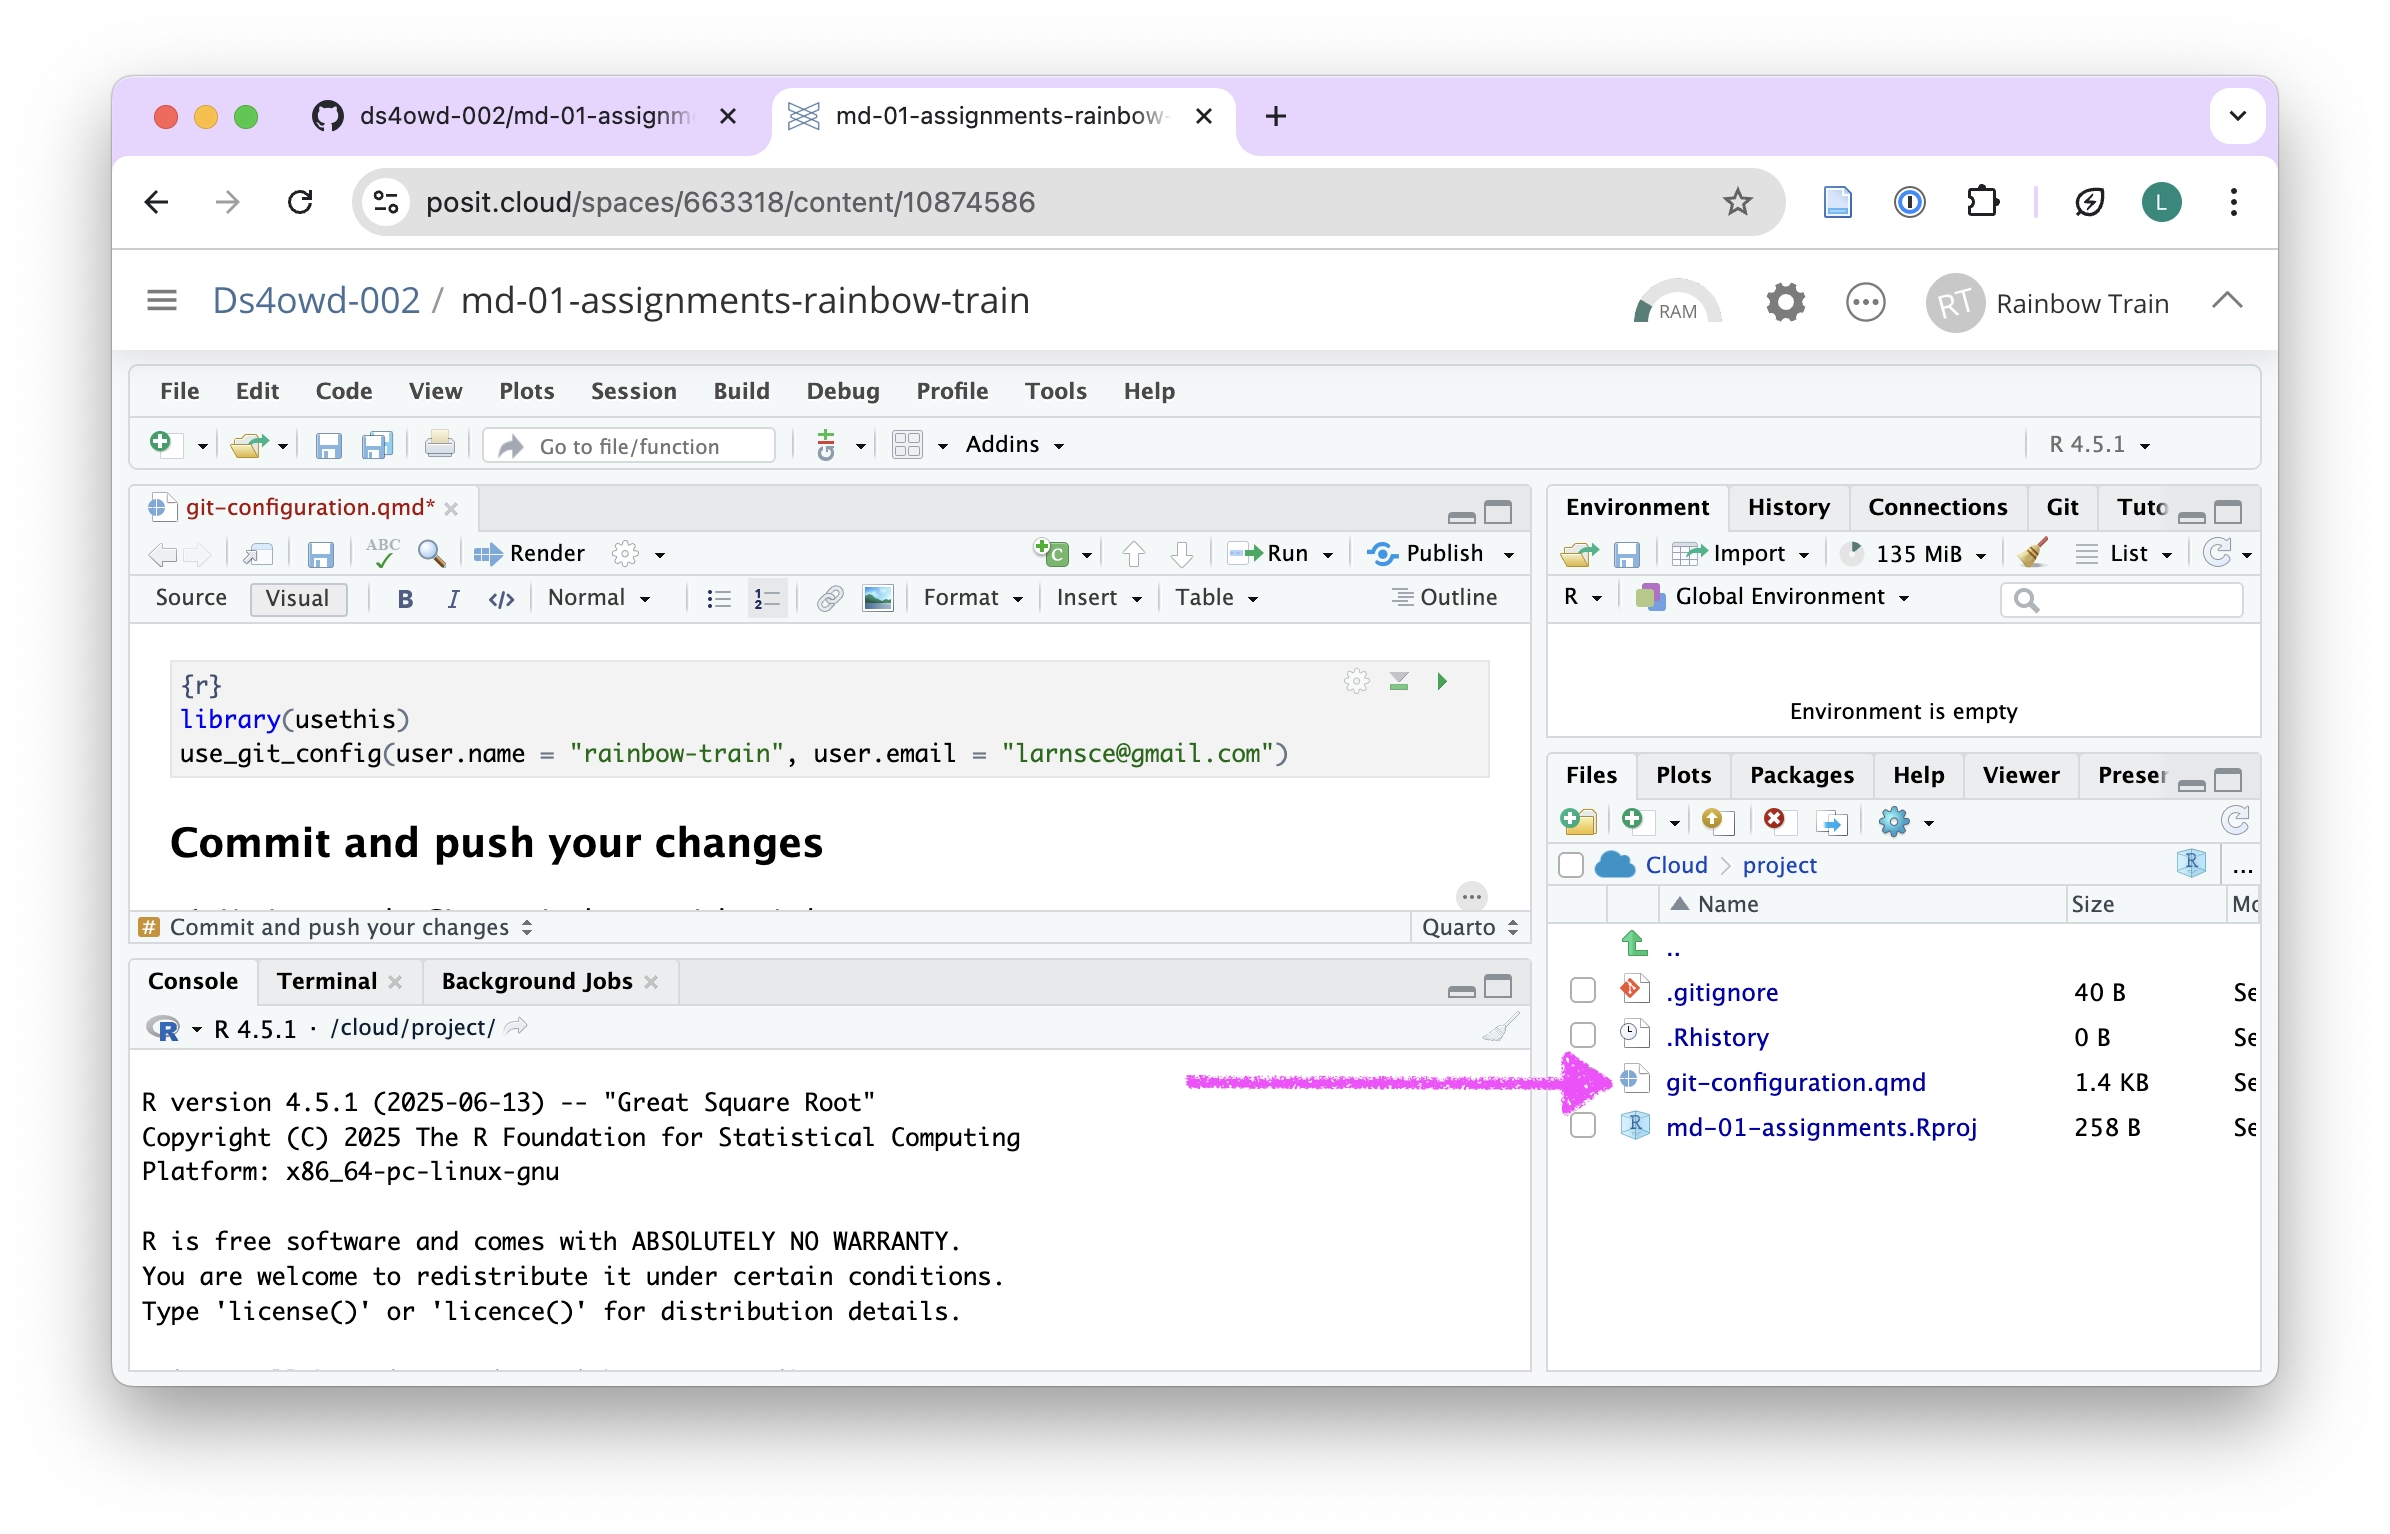
- Open the git-configuration.qmd file from the bottom right window of RStudio by clicking on the file name in the Files pane. The file opens in the Source pane in the top-left window of RStudio.
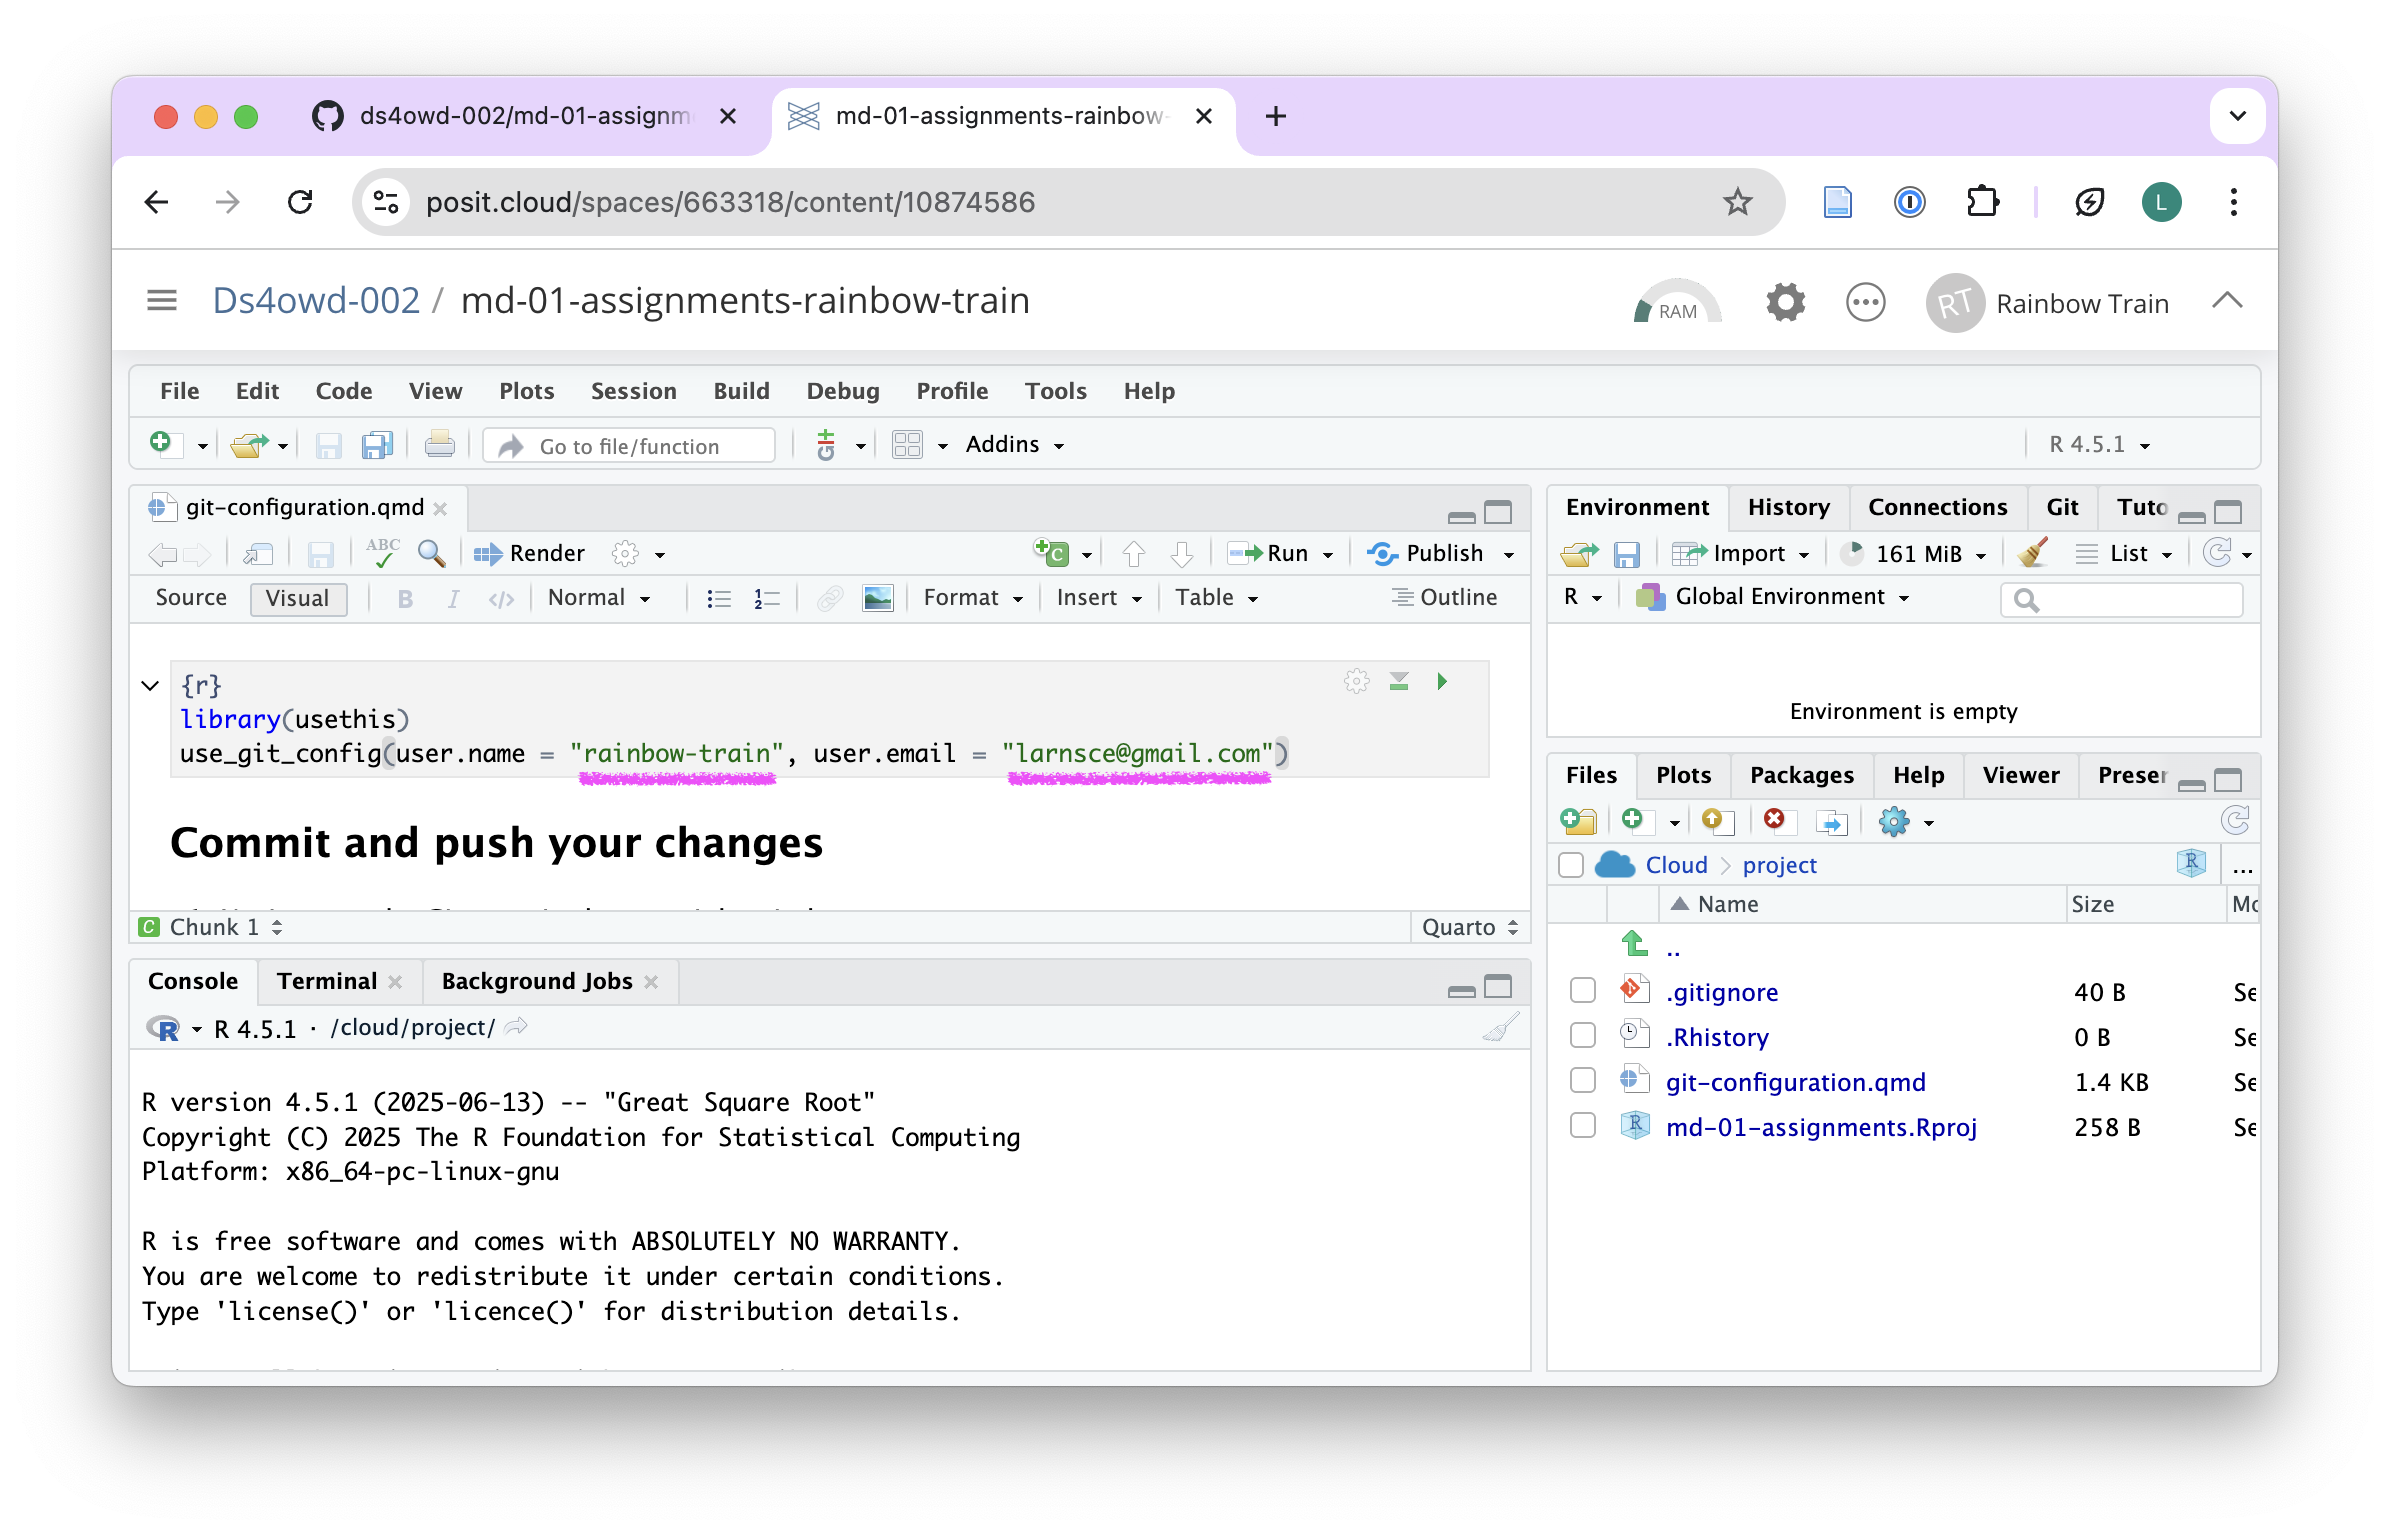
- Under the heading Git configuration edit the code in the code chunk:
- Replace the placeholder Your Name with your GitHub username
- Replace Your Email with your email address
- Keep the quotes!
These will be the details that git will use to identify you when you make changes to your work.
Save the file by clicking on the Save icon in the Source pane or by pressing
Ctrl + S(Windows/Linux) orCmd + S(Mac).Render the document by clicking the Render button in the Source pane.
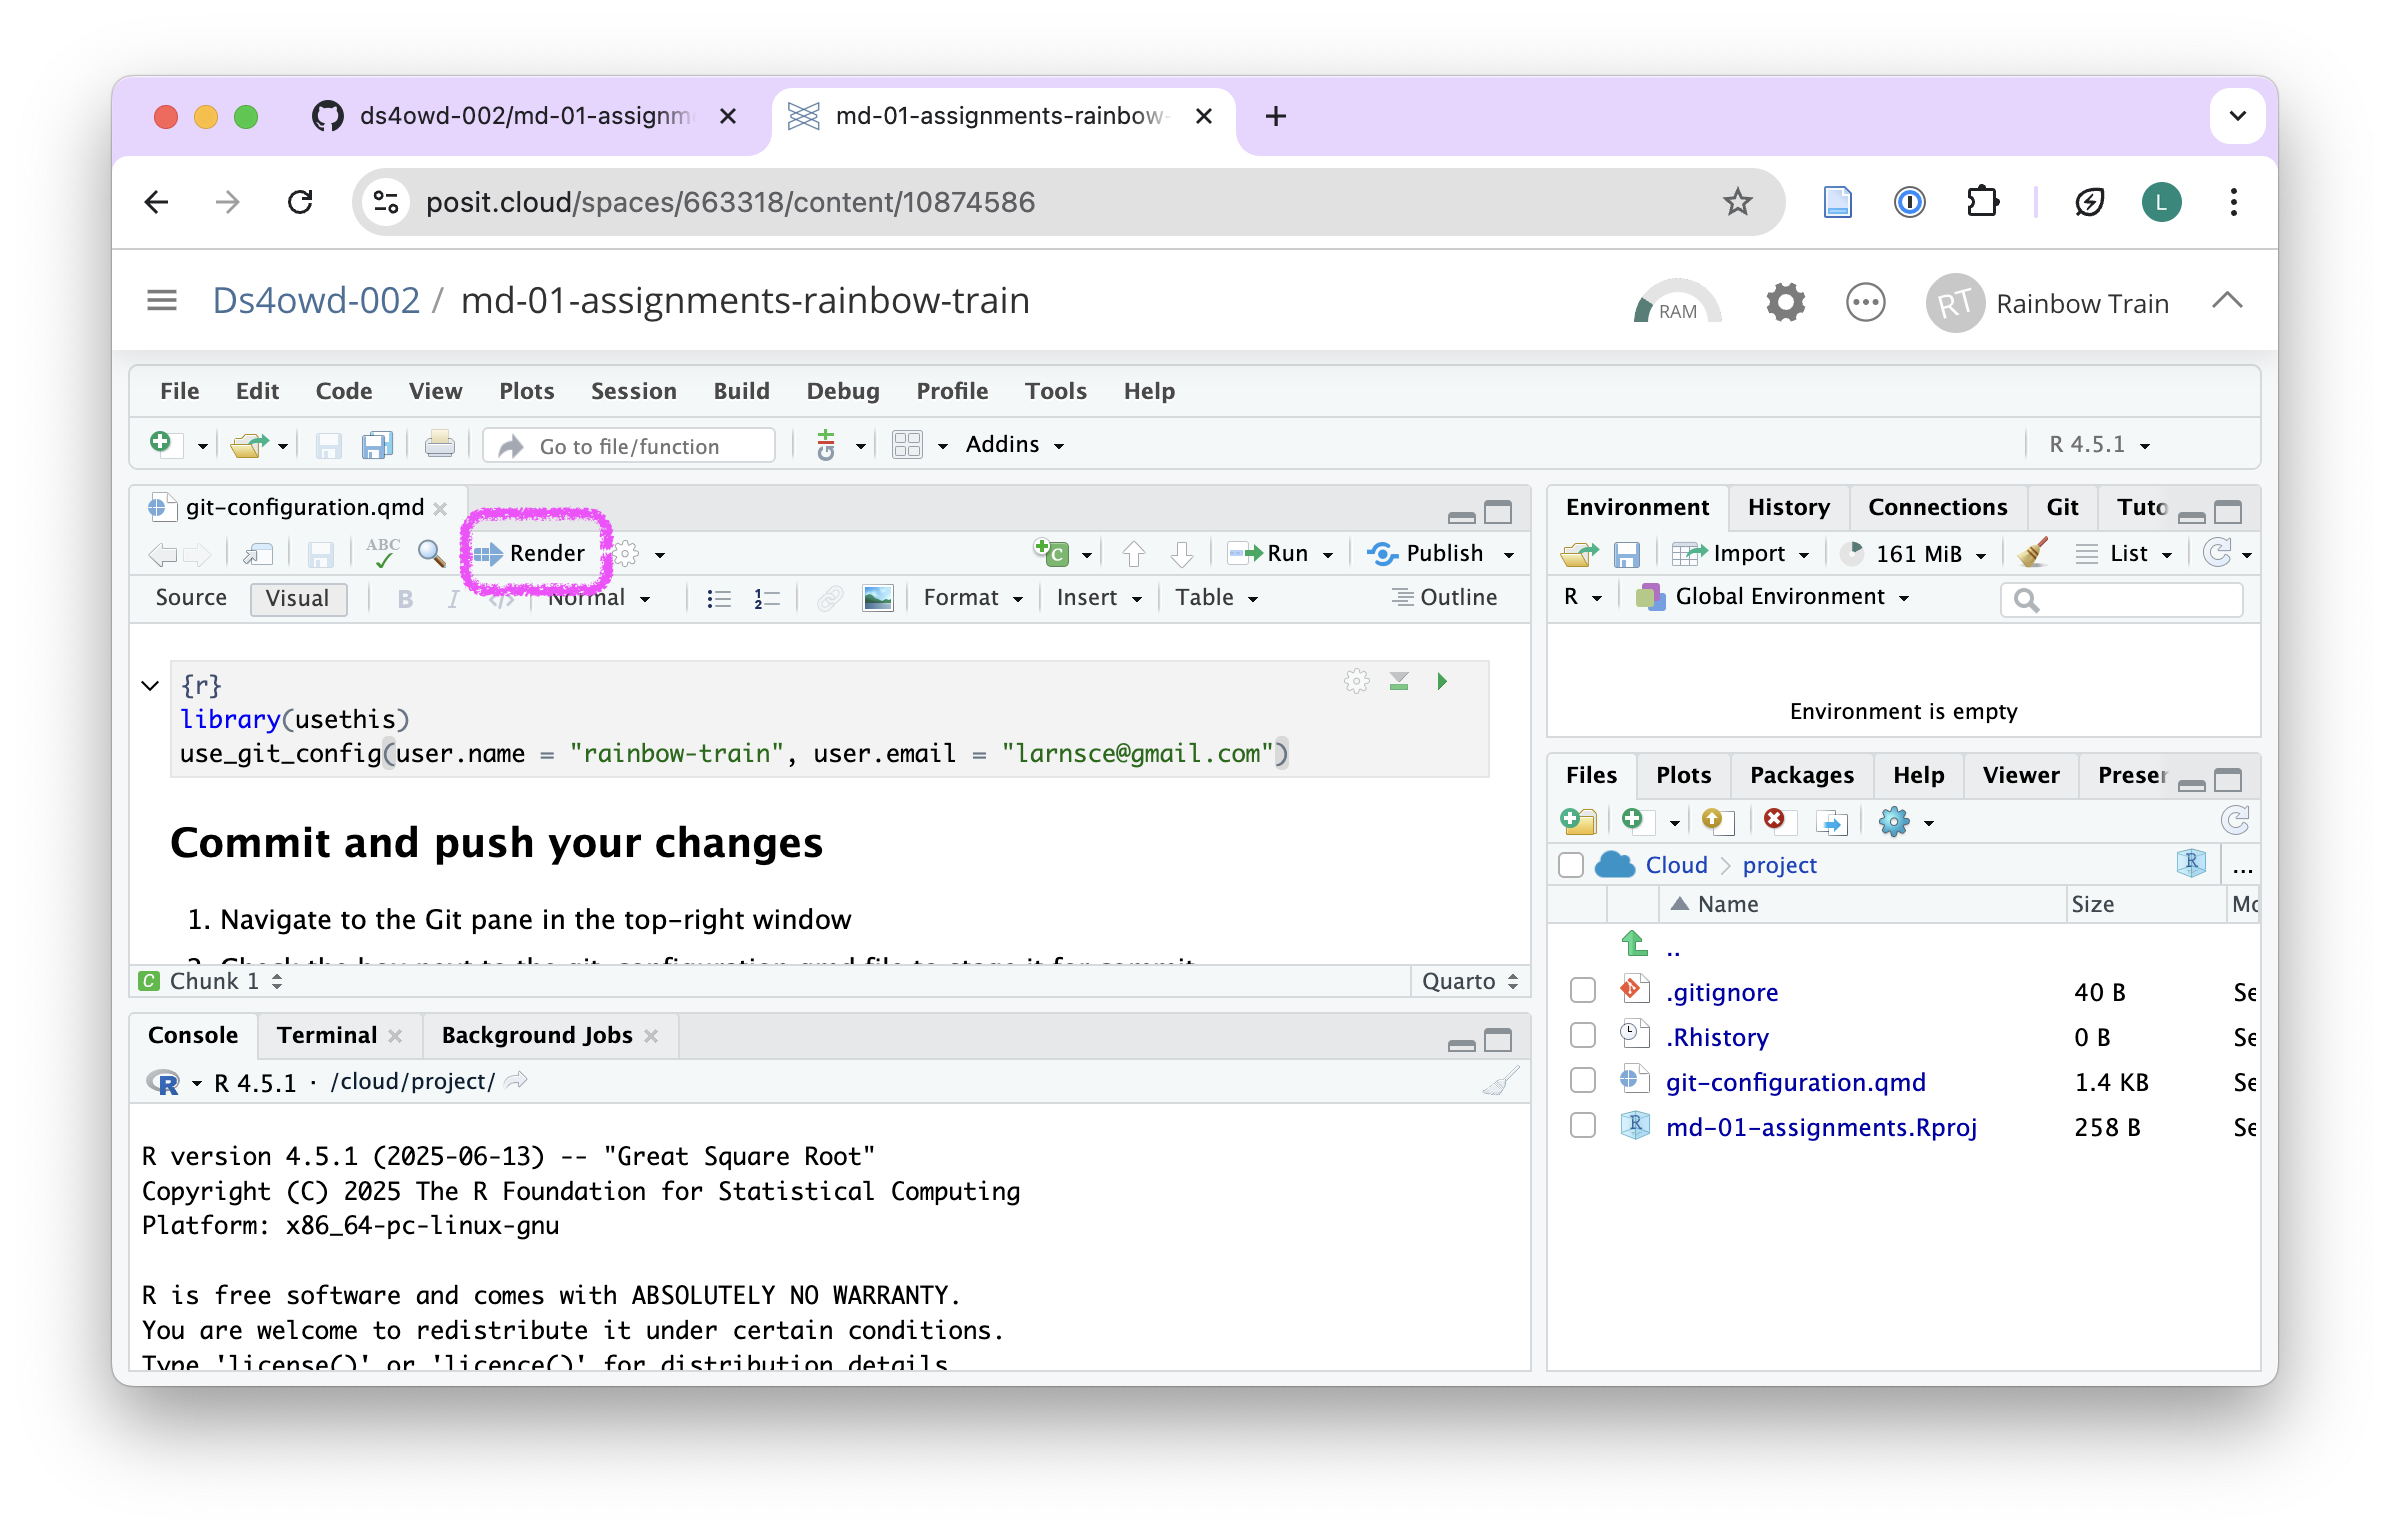
- Continue with the next step
Step 2: Commit and push your changes
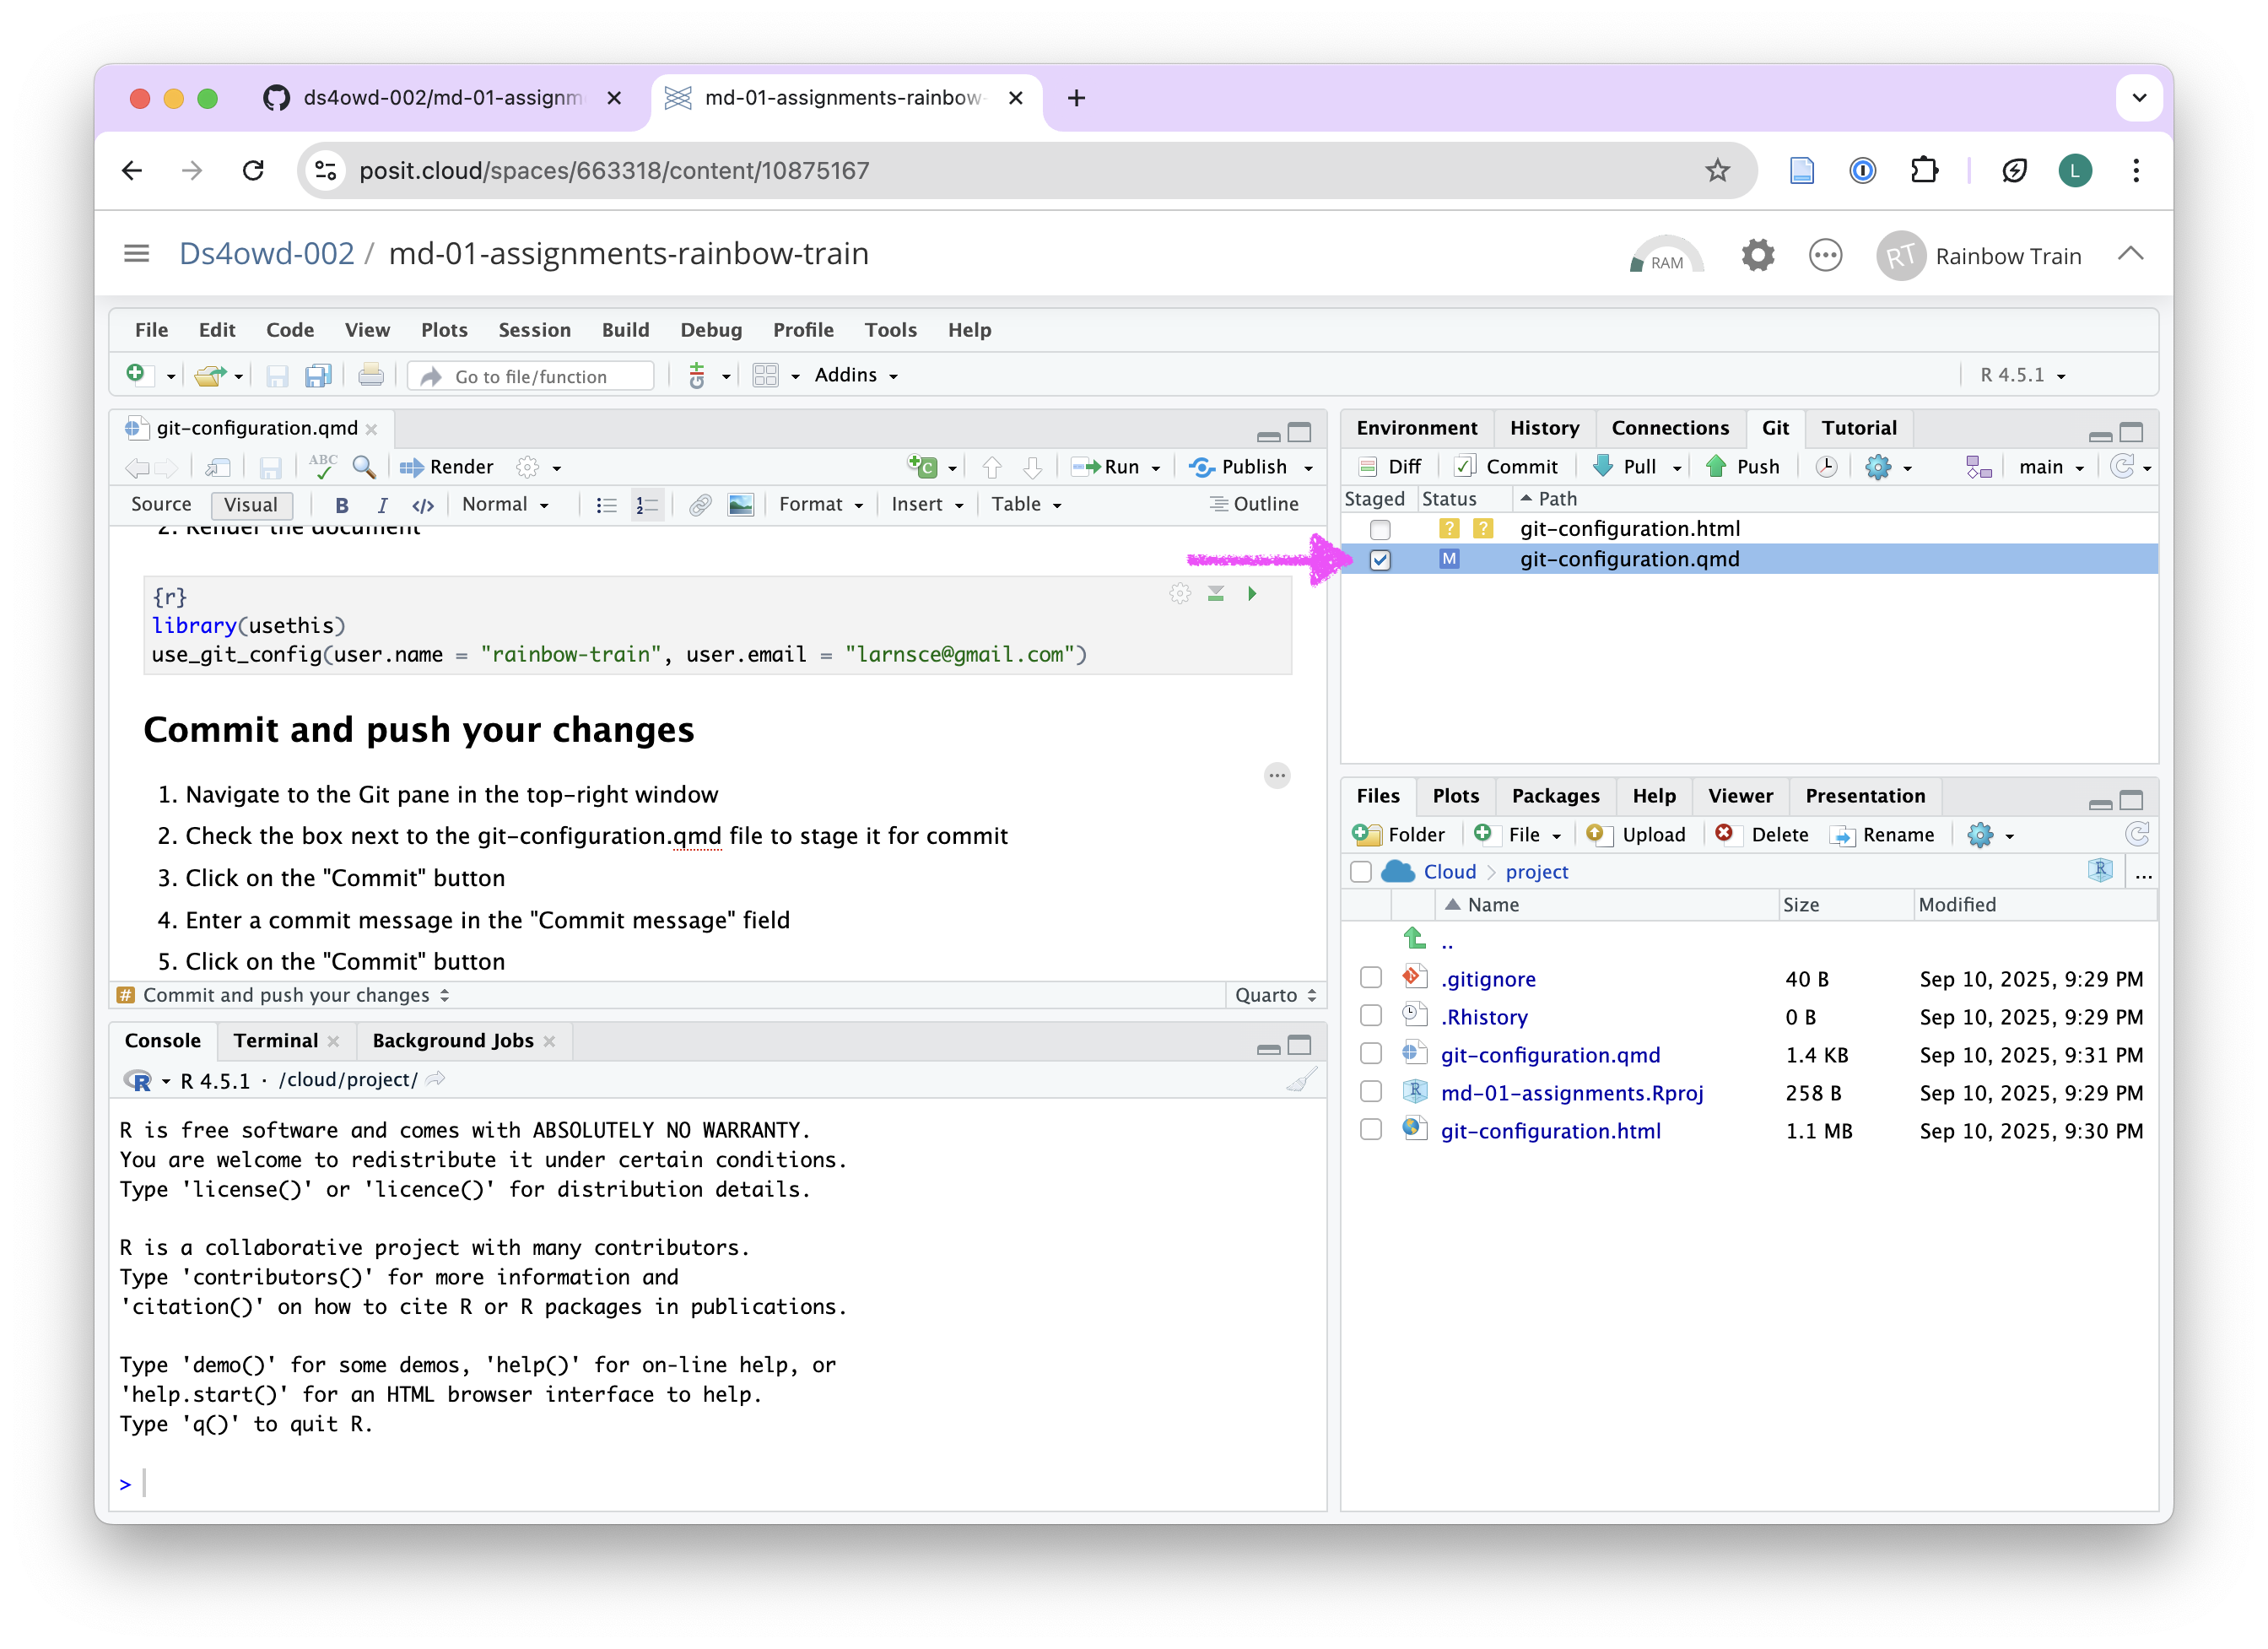
- Navigate to the Git pane in the top-right window of RStudio
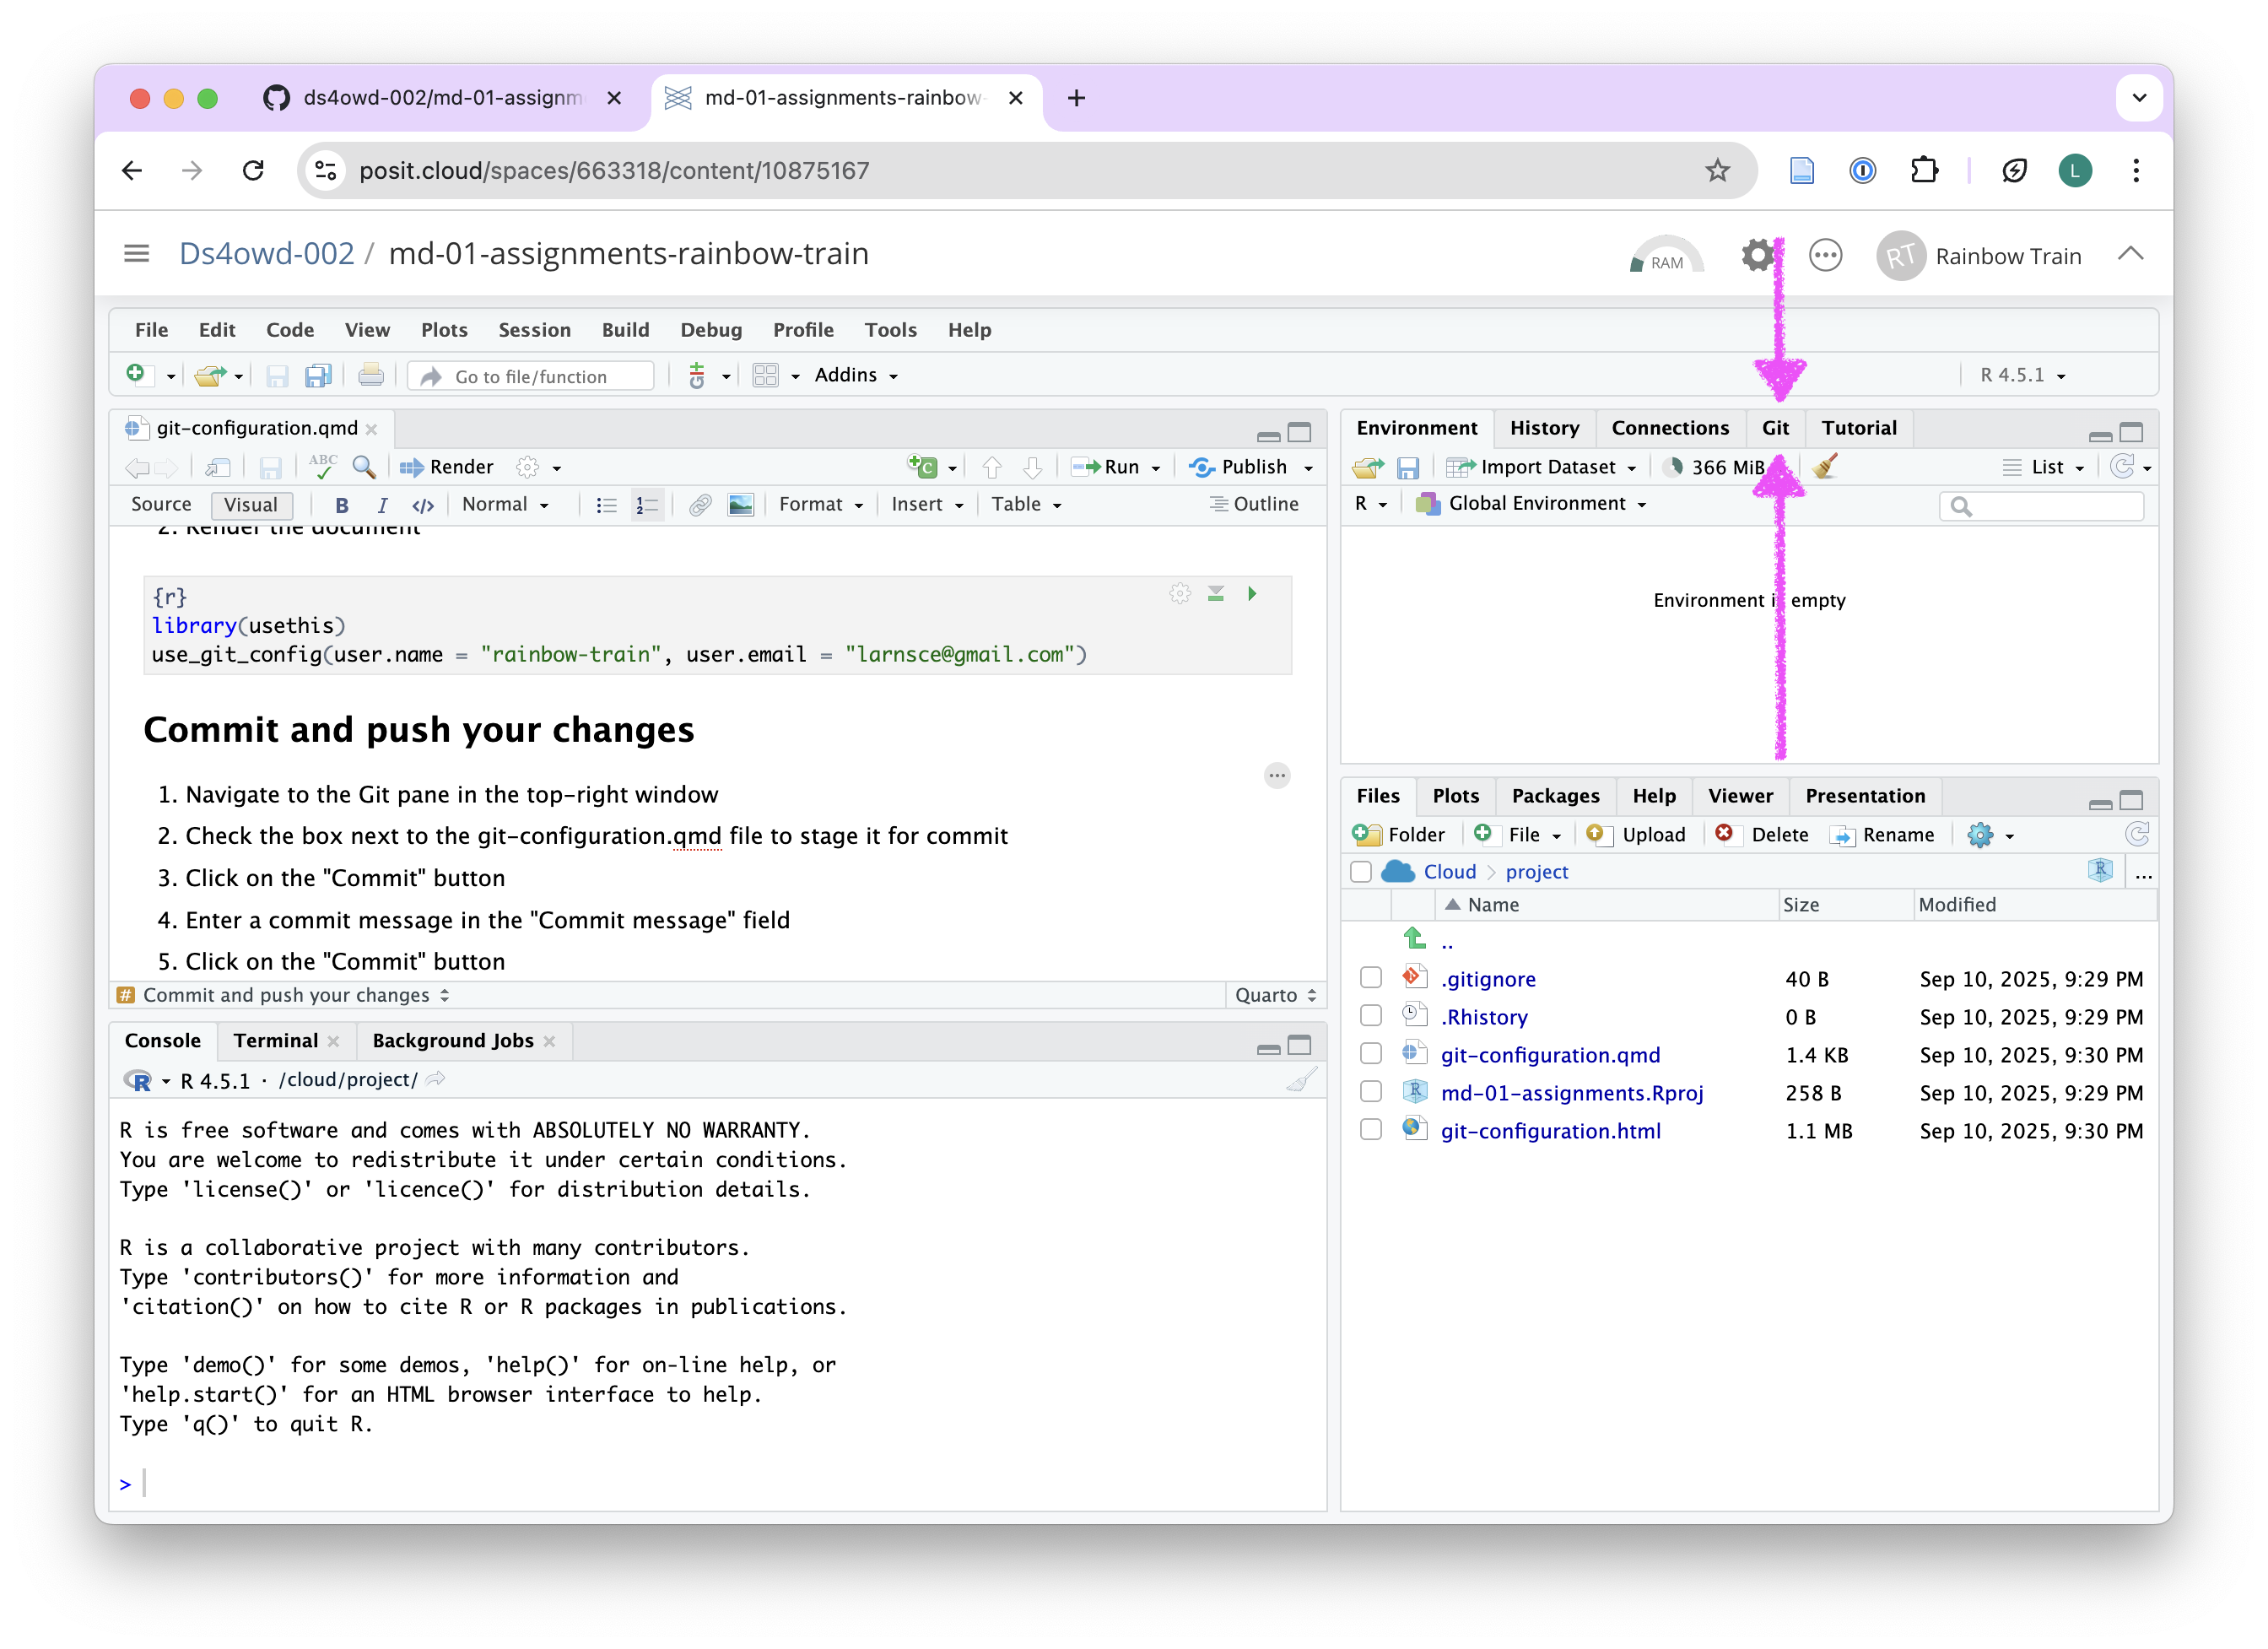
- Check the box next to the git-configuration.qmd file to stage it for commit
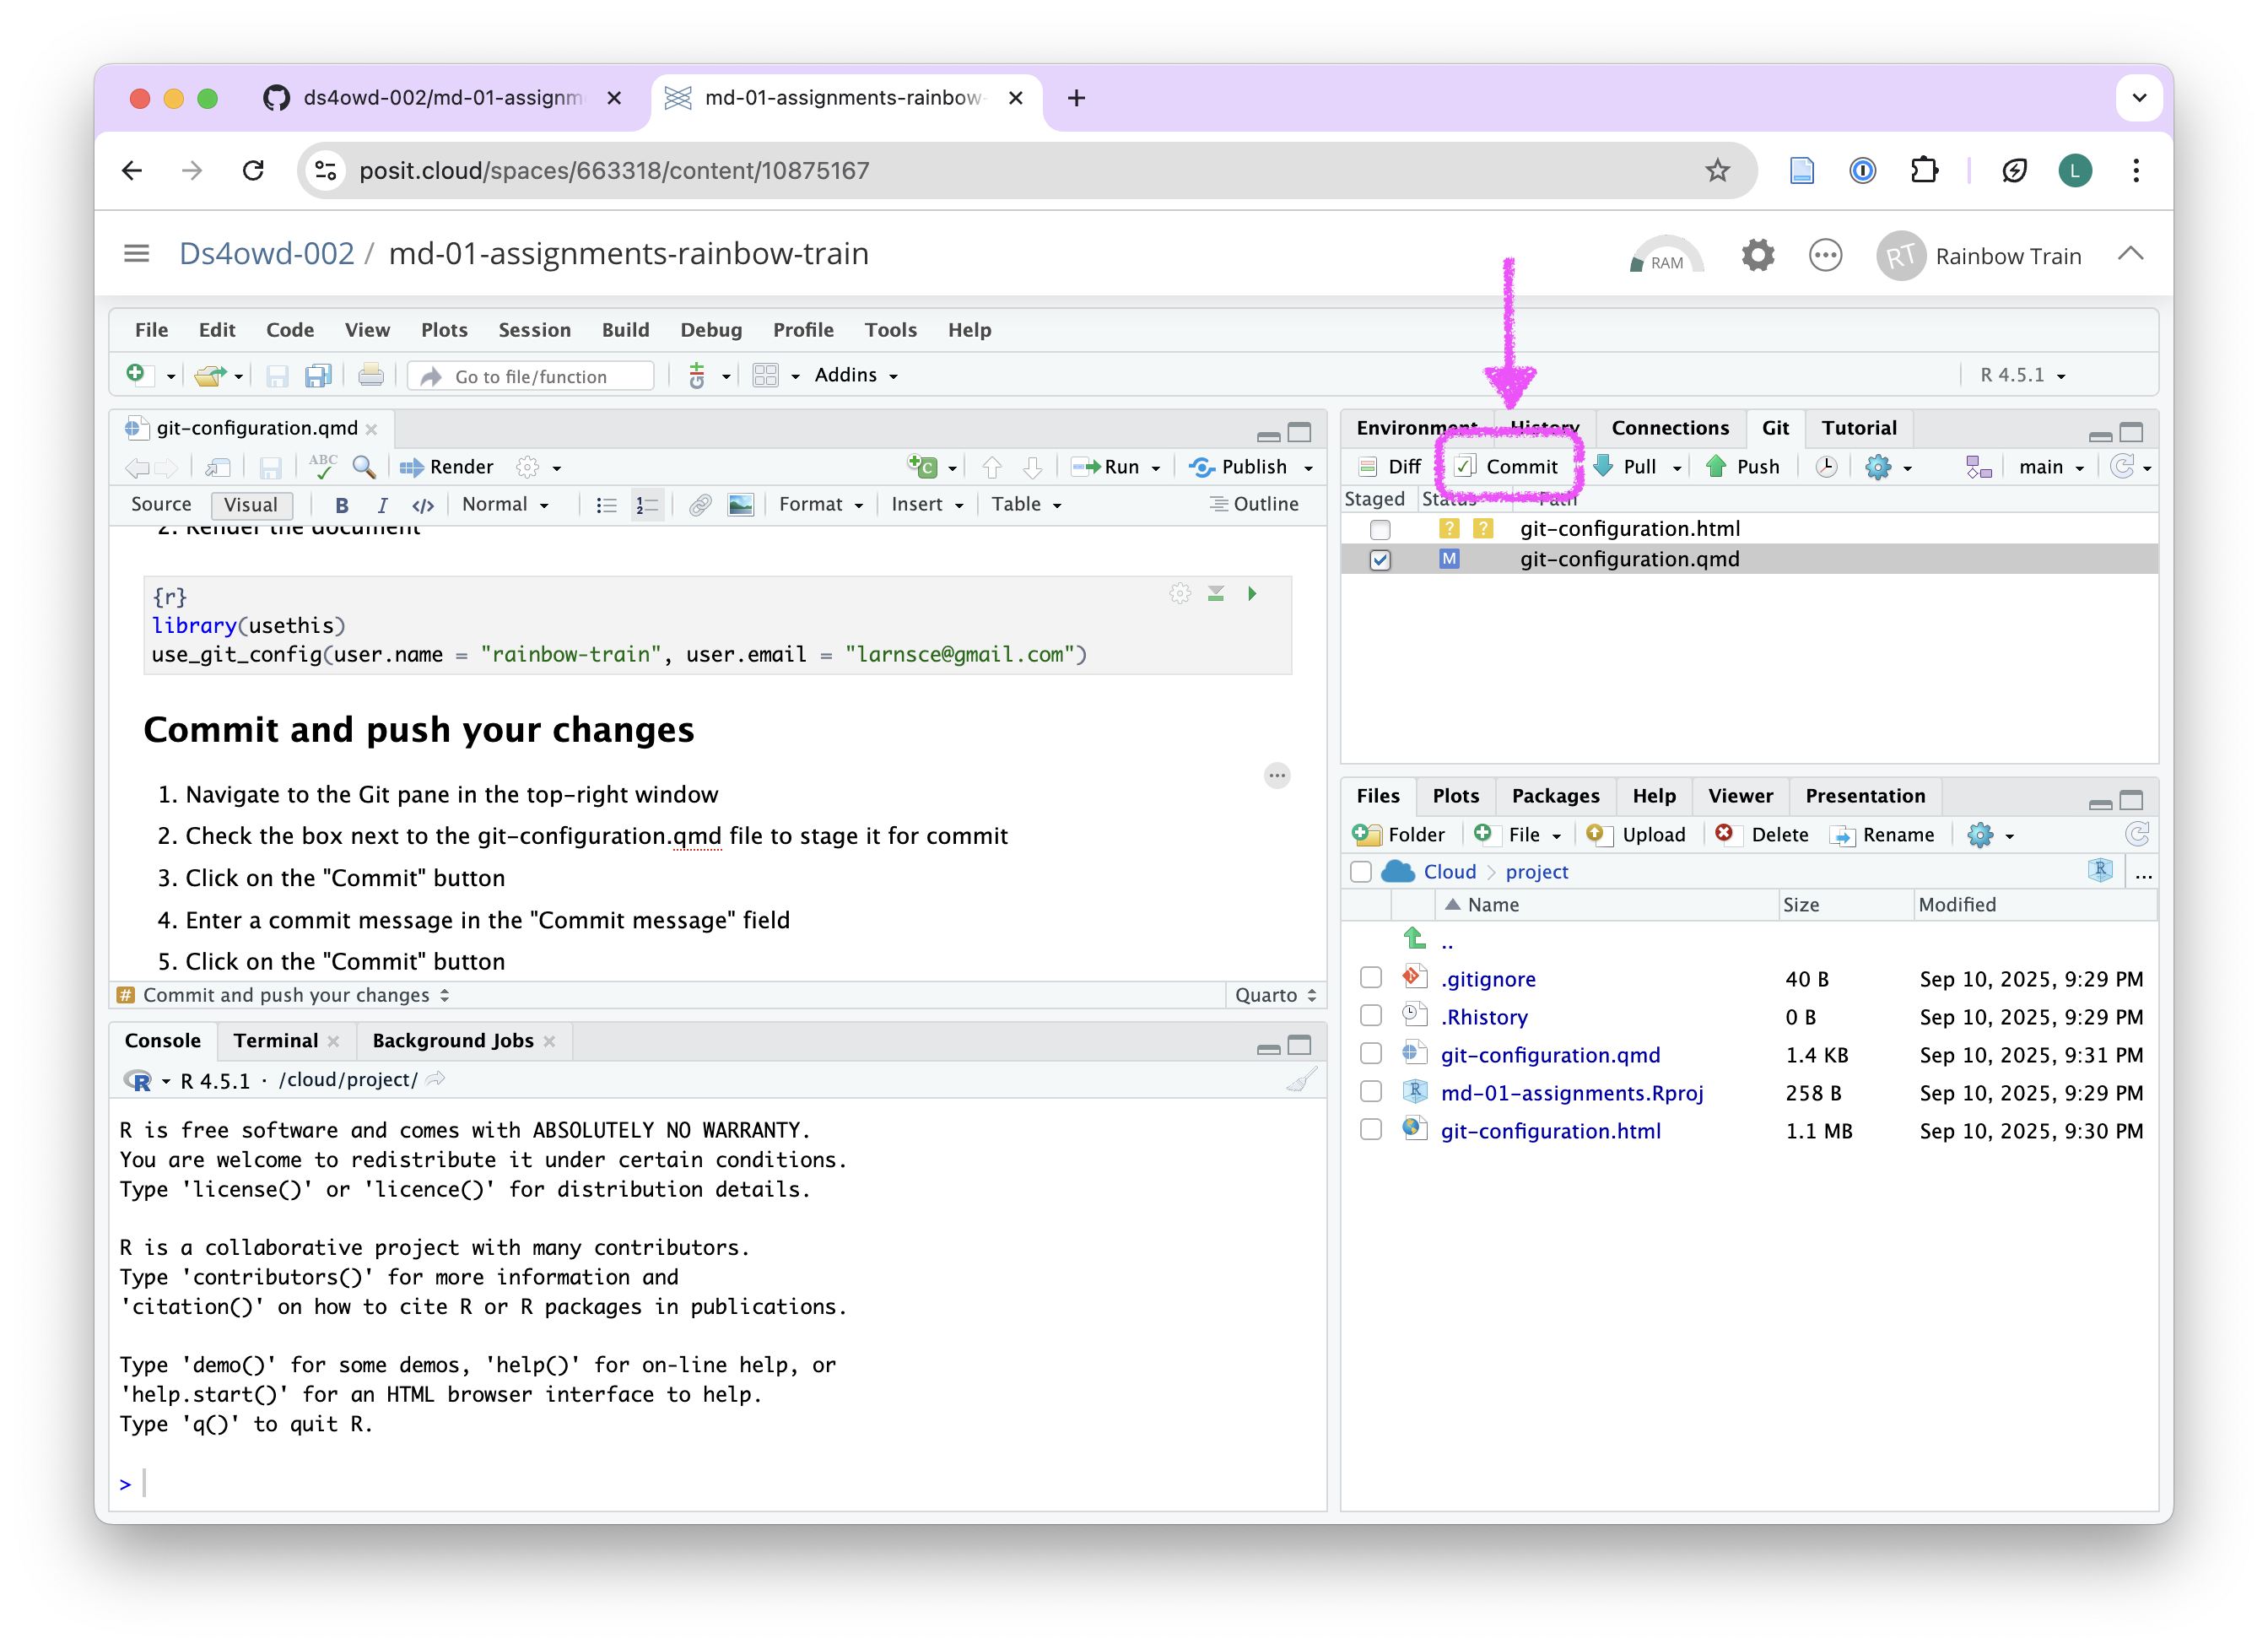
- Click on the Commit button. A new window opens.
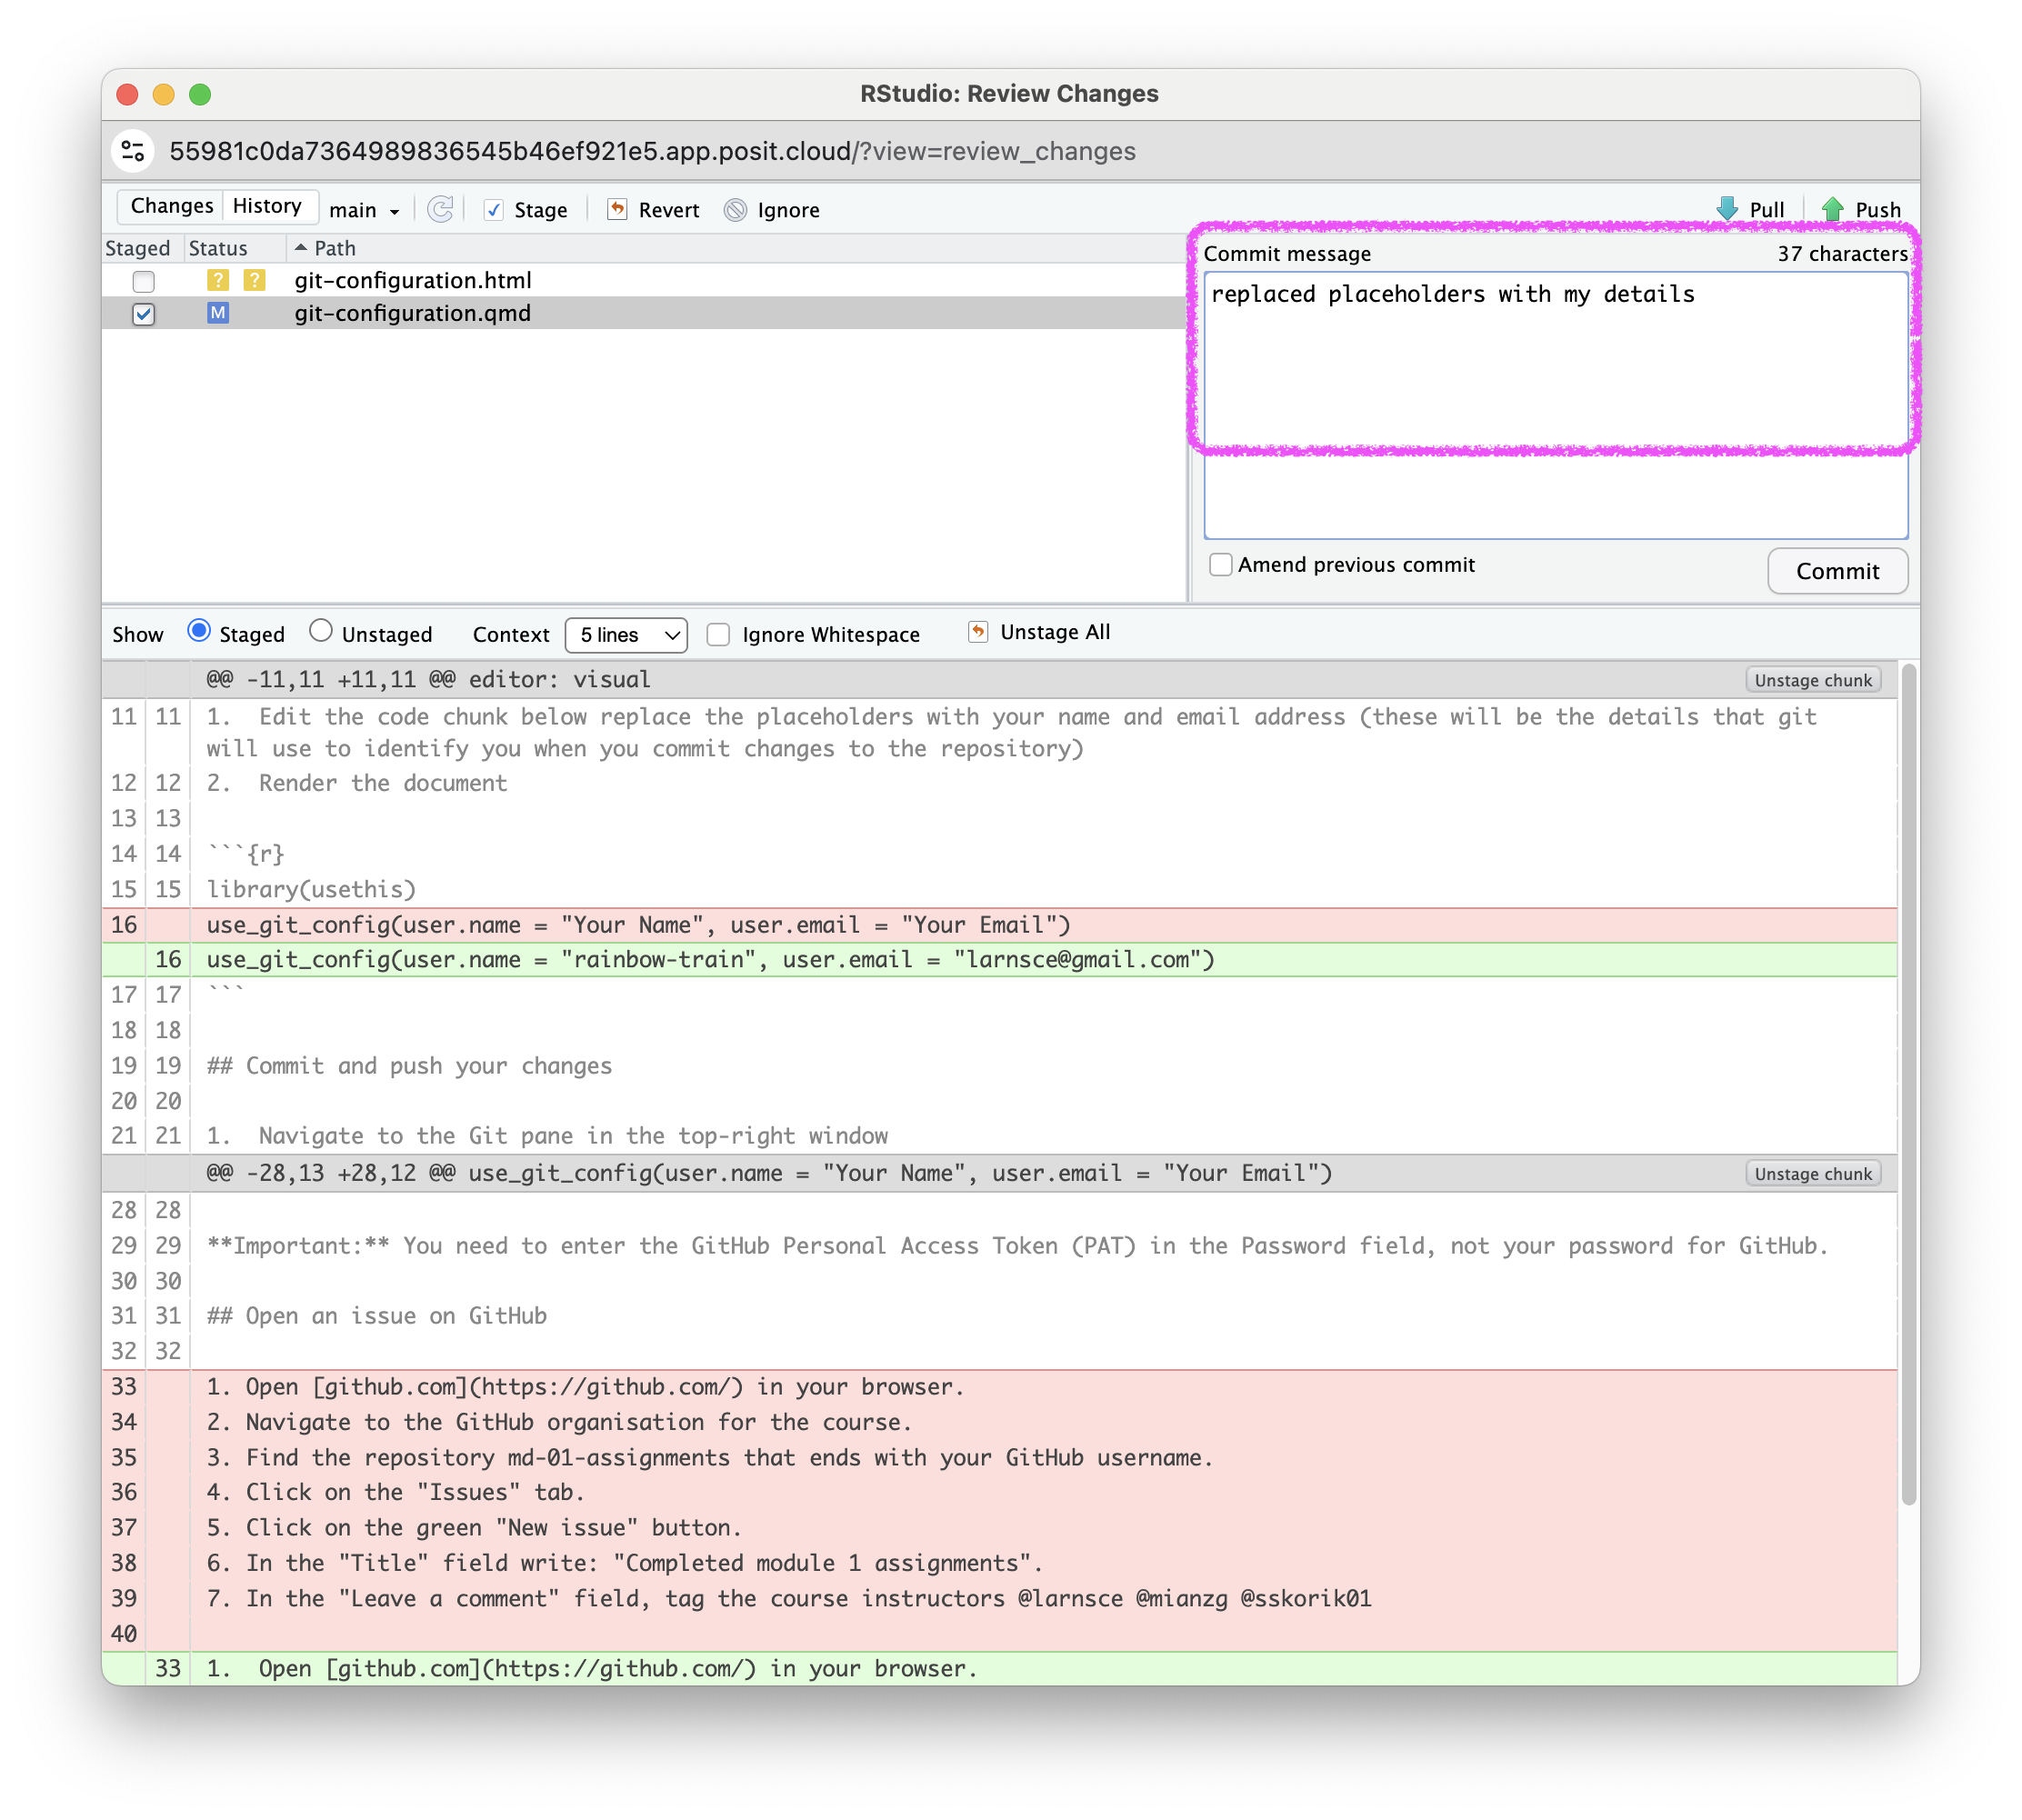
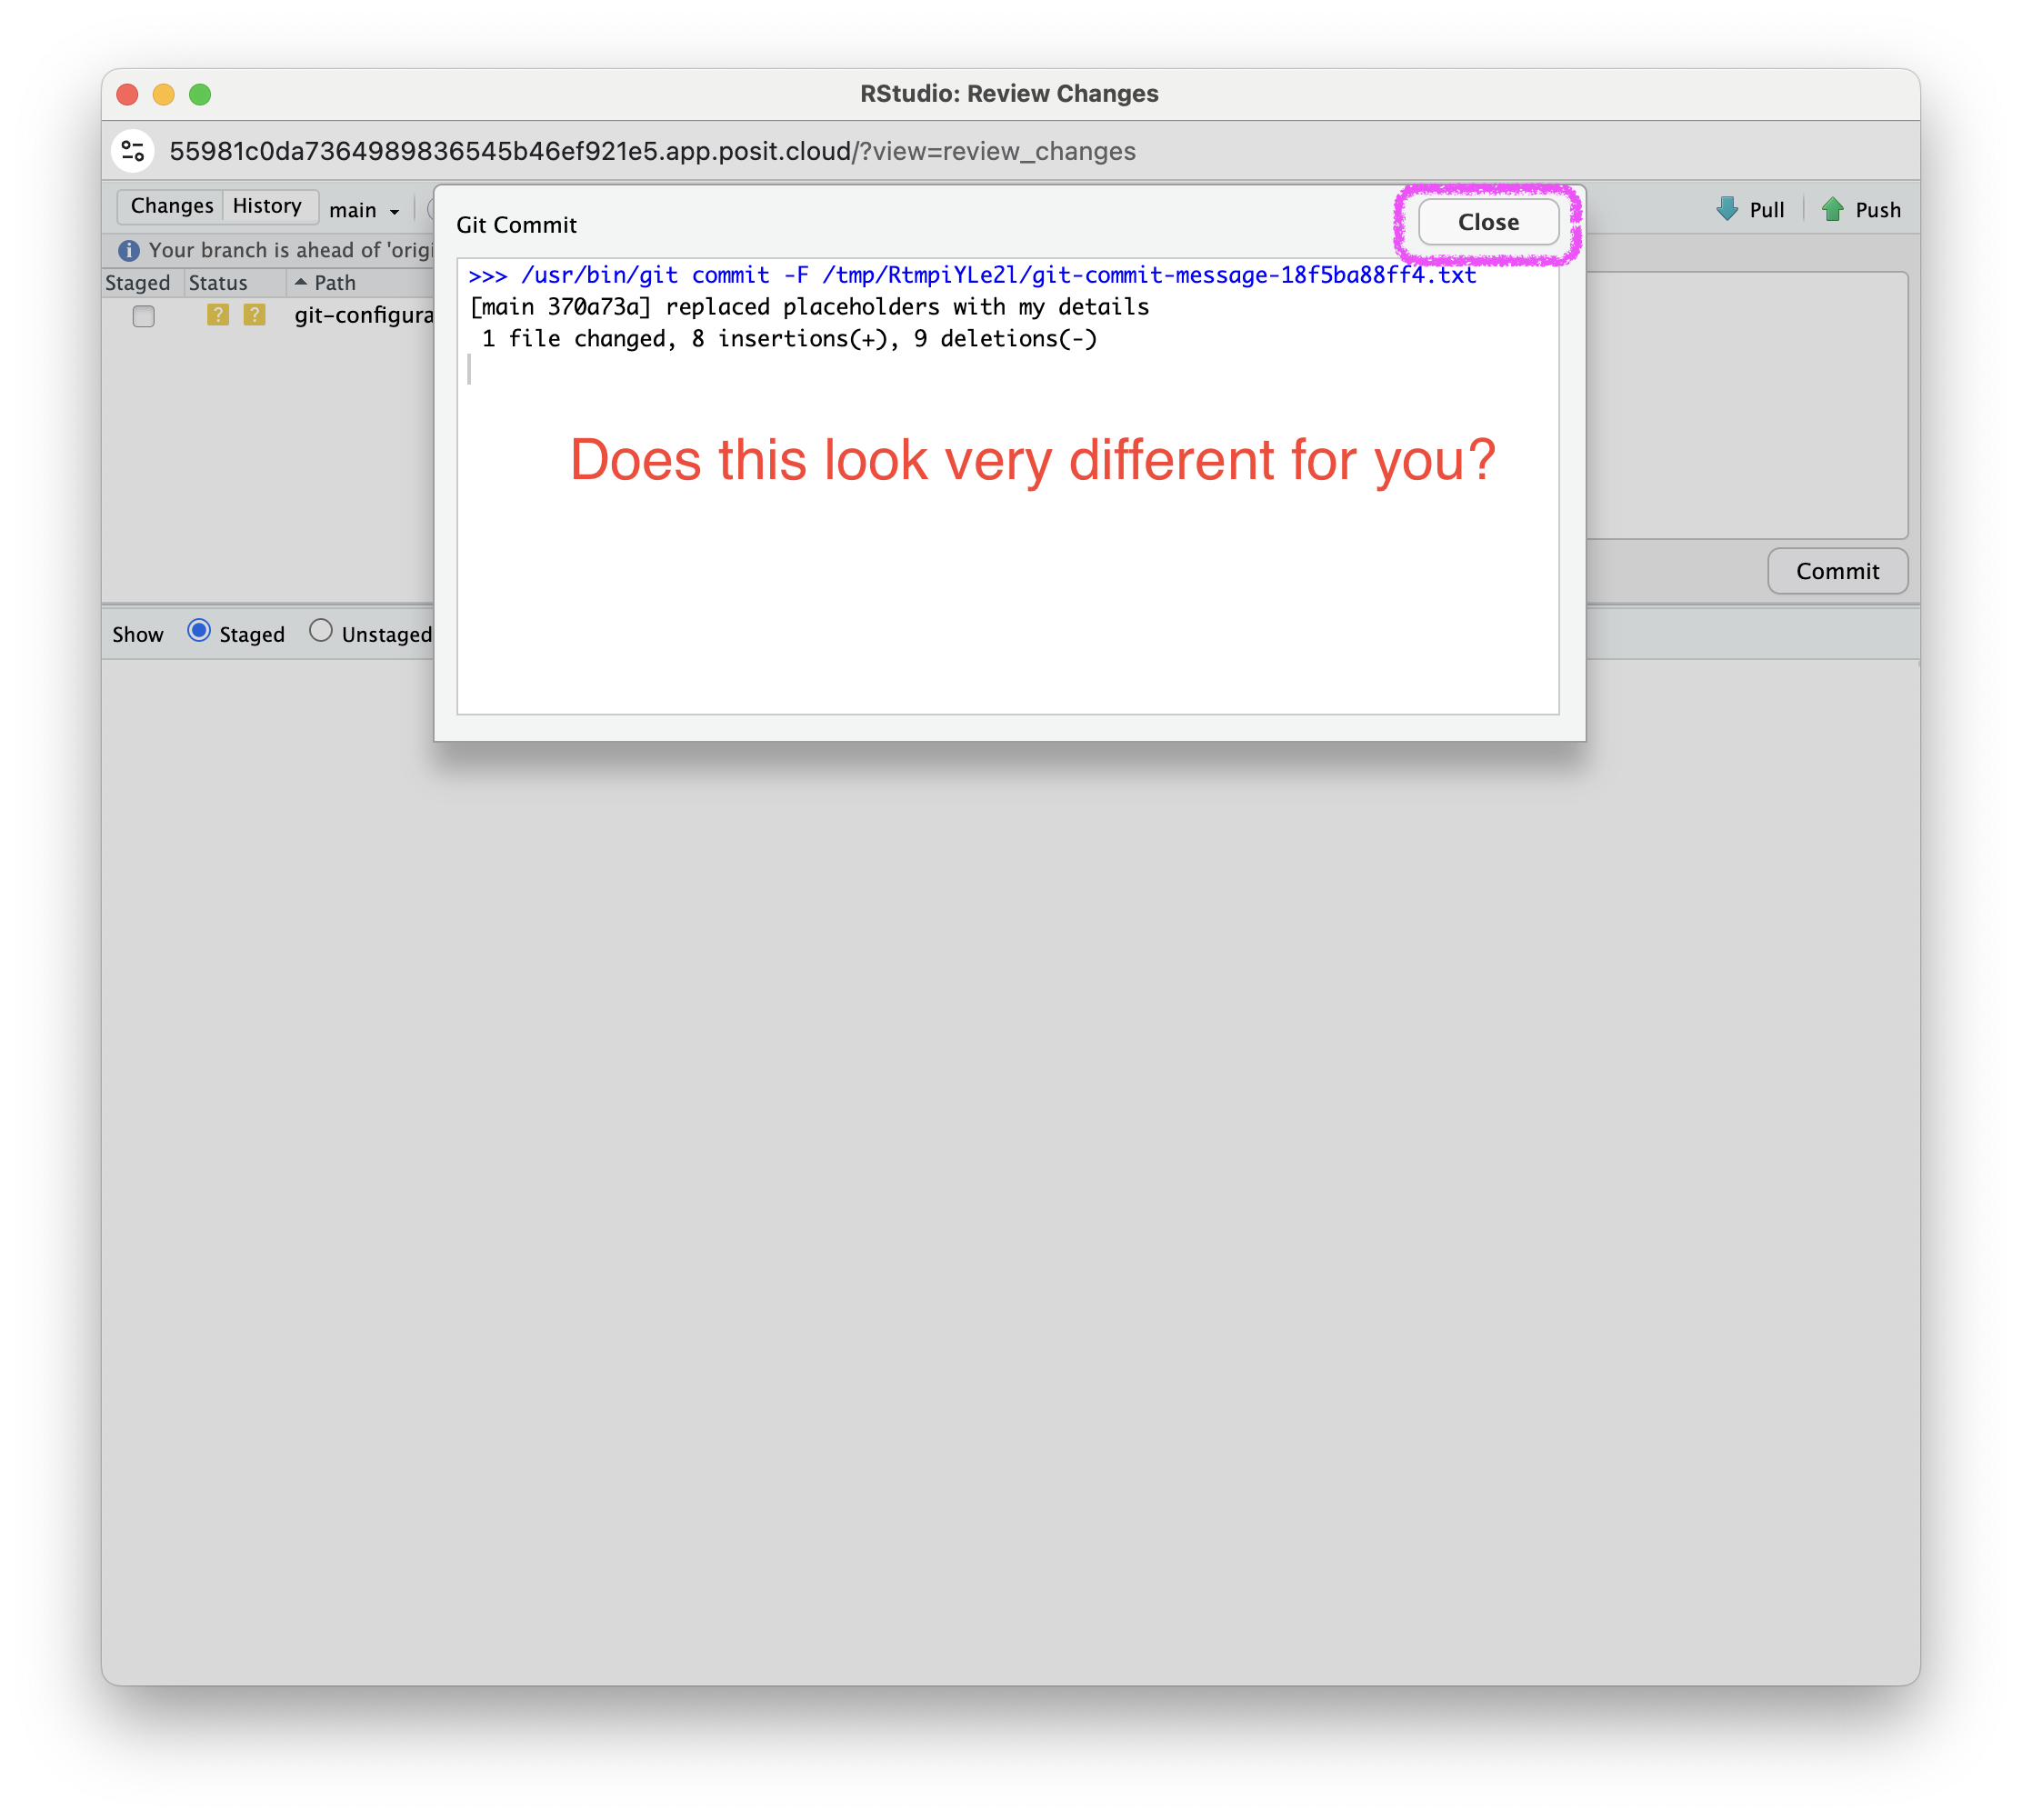
- Enter a commit message in the Commit message field in the top right corner. For example: replaced placeholders with my details
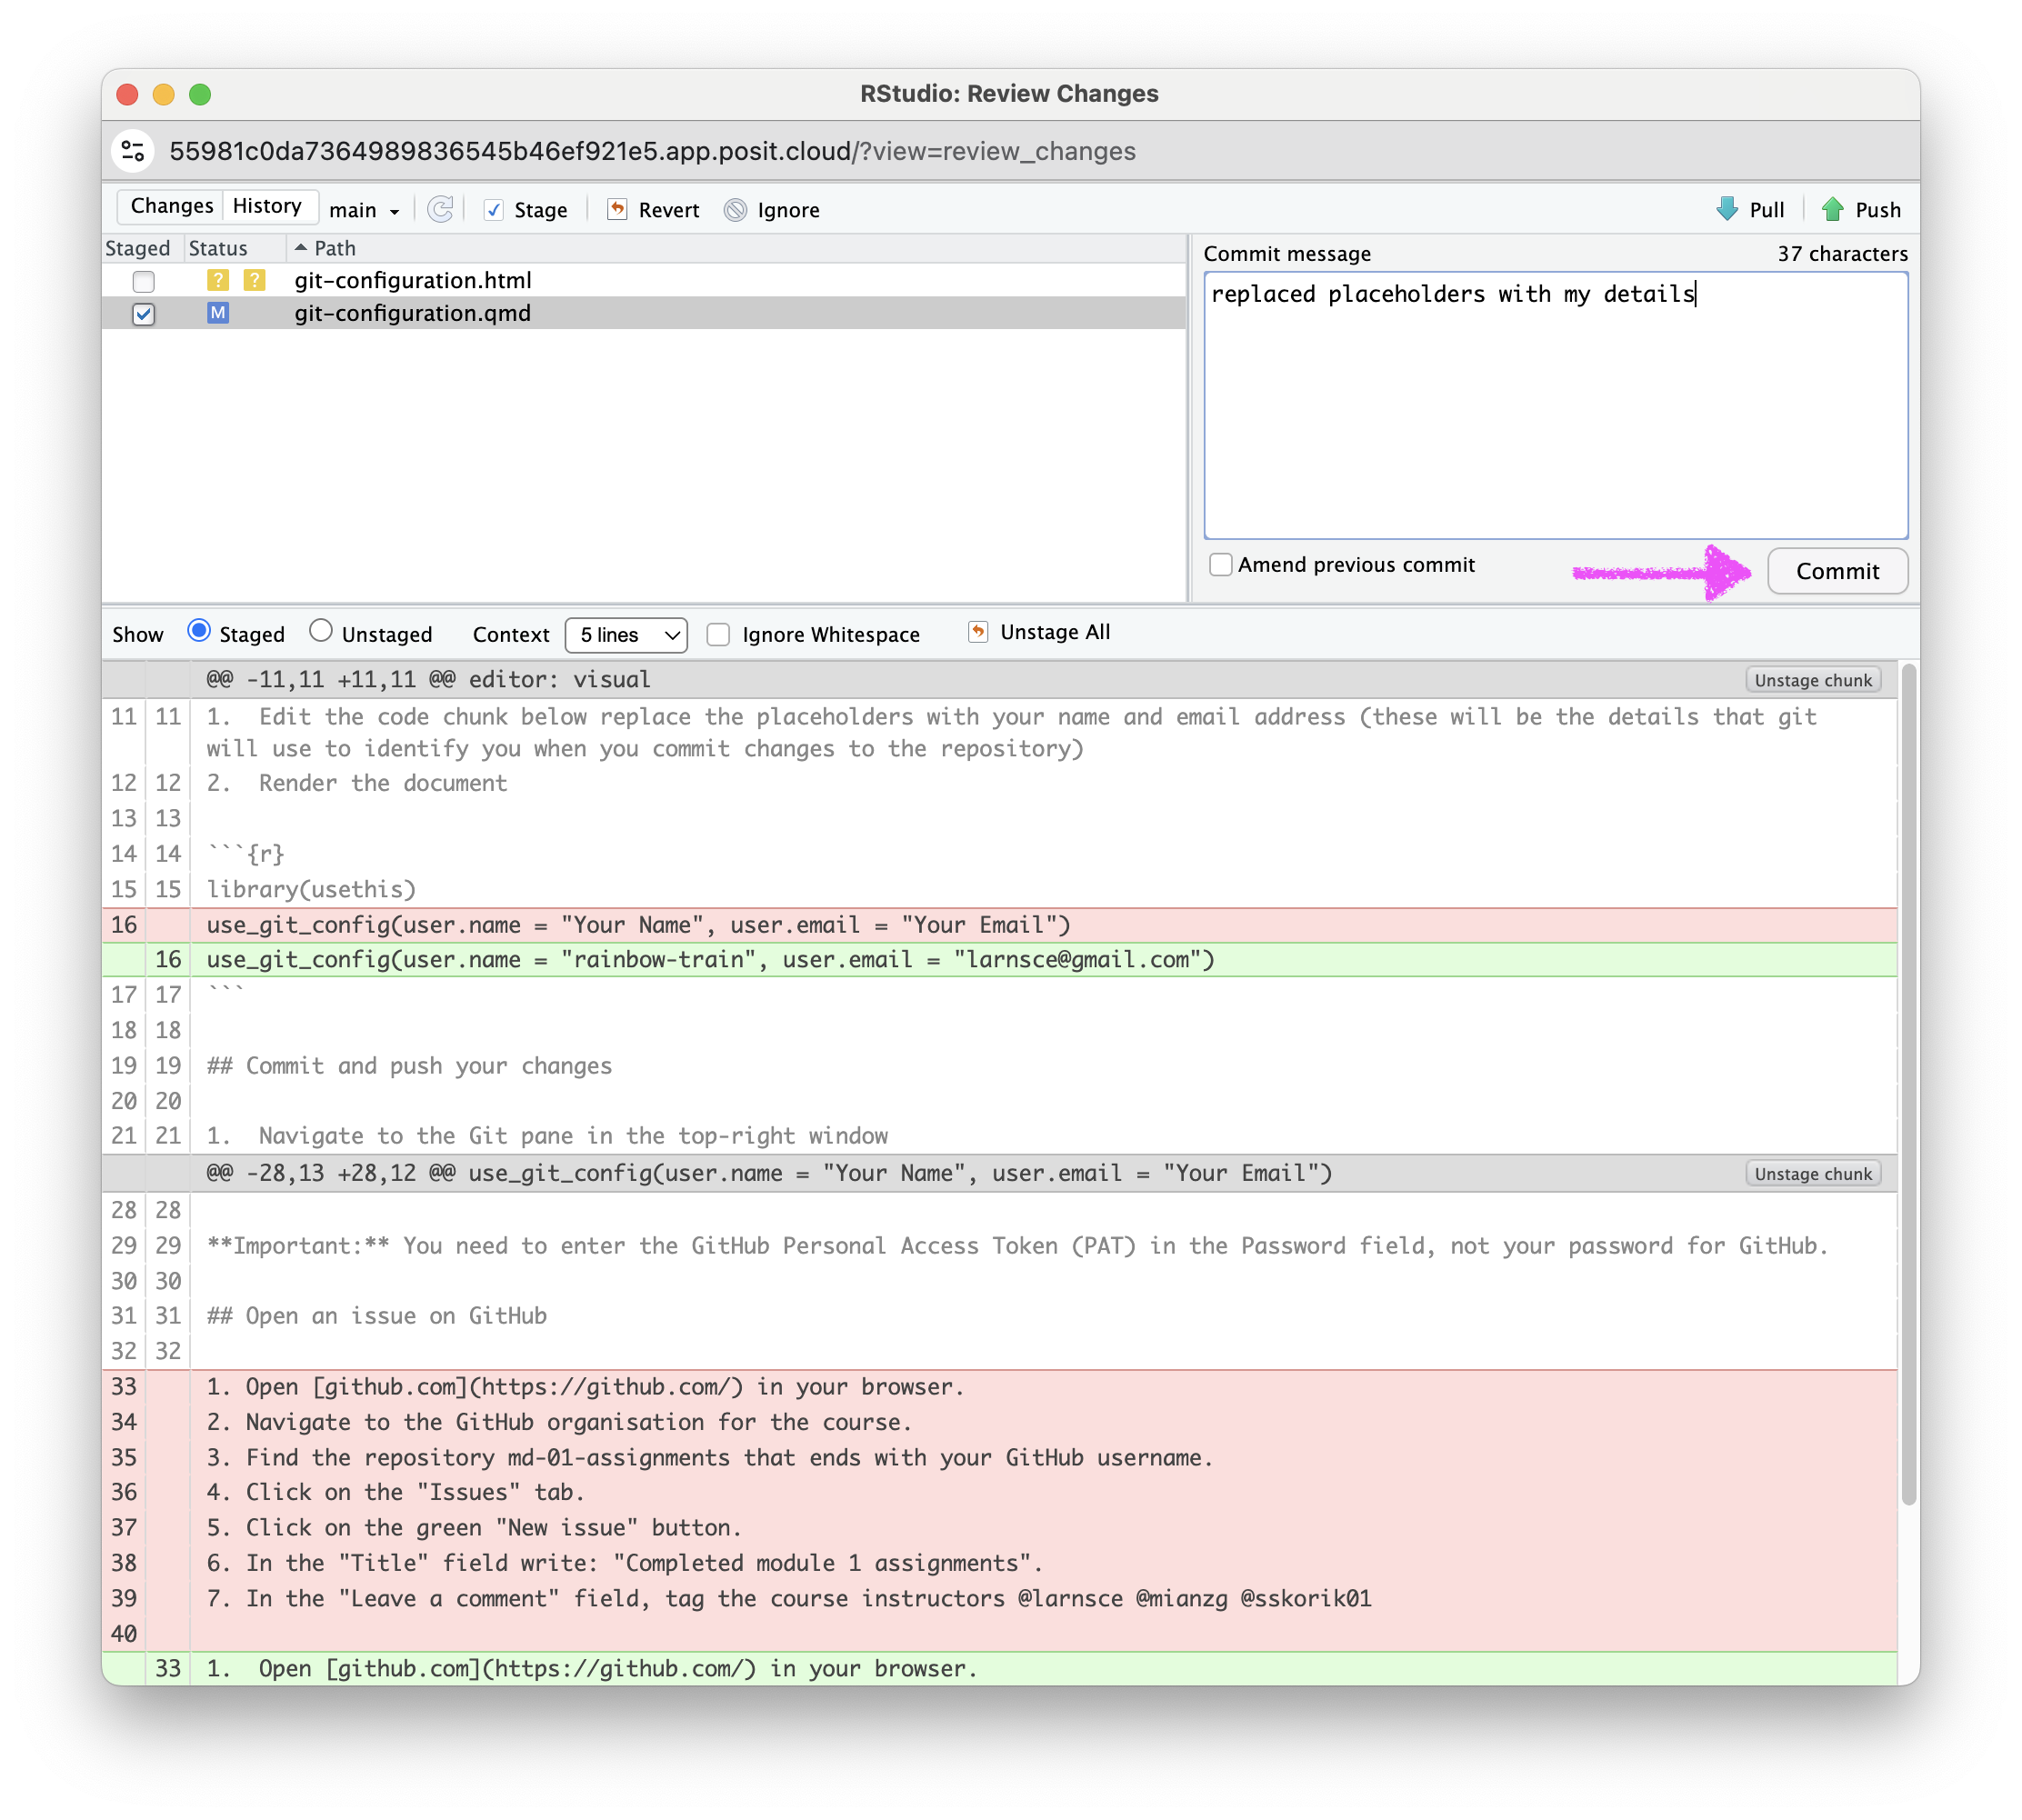
- Click on the Commit button
- If you see a message similar to the screenshot, you have successfully committed your changes to the local repository. Click on Close. If you do not see this message, make sure you have staged the file (checked the box next to it) for commit and entered a commit message.
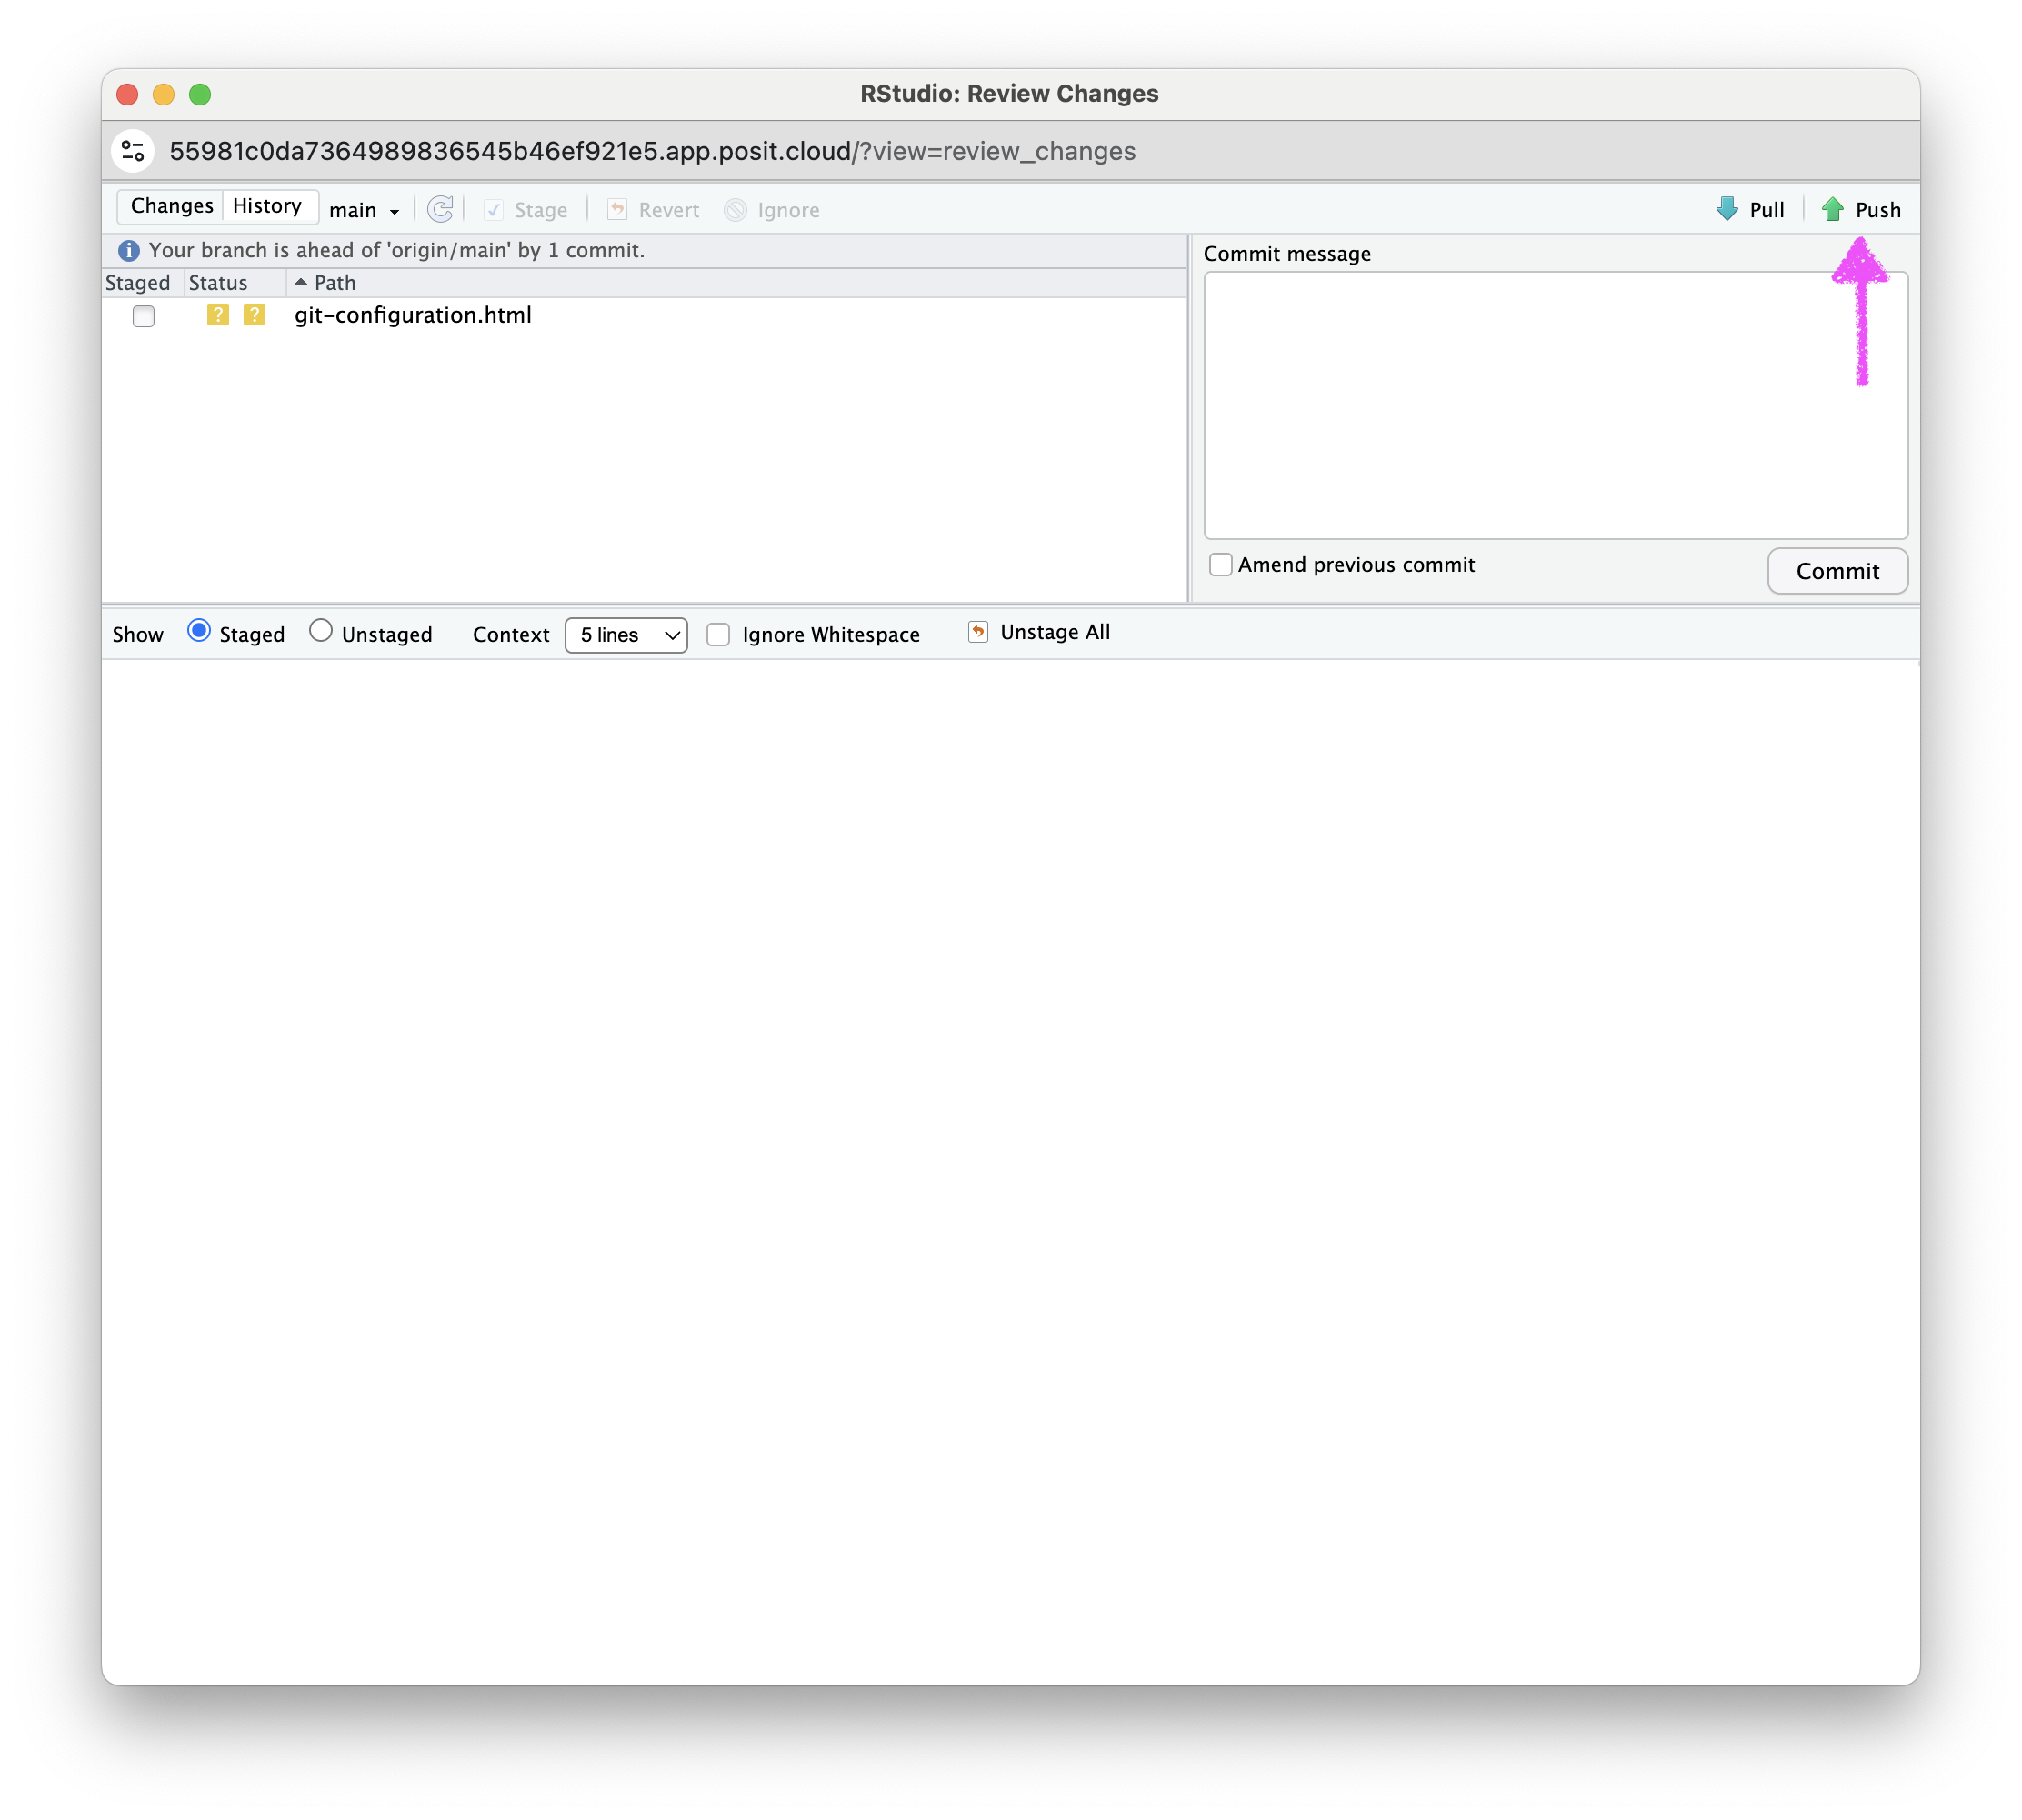
- Click on the Push button in the top right corner.
- Enter your GitHub username and click OK

- Enter your GitHub Personal Access Token (PAT) in the field and click OK. This is the personal access token you created in Assignment 1.3.
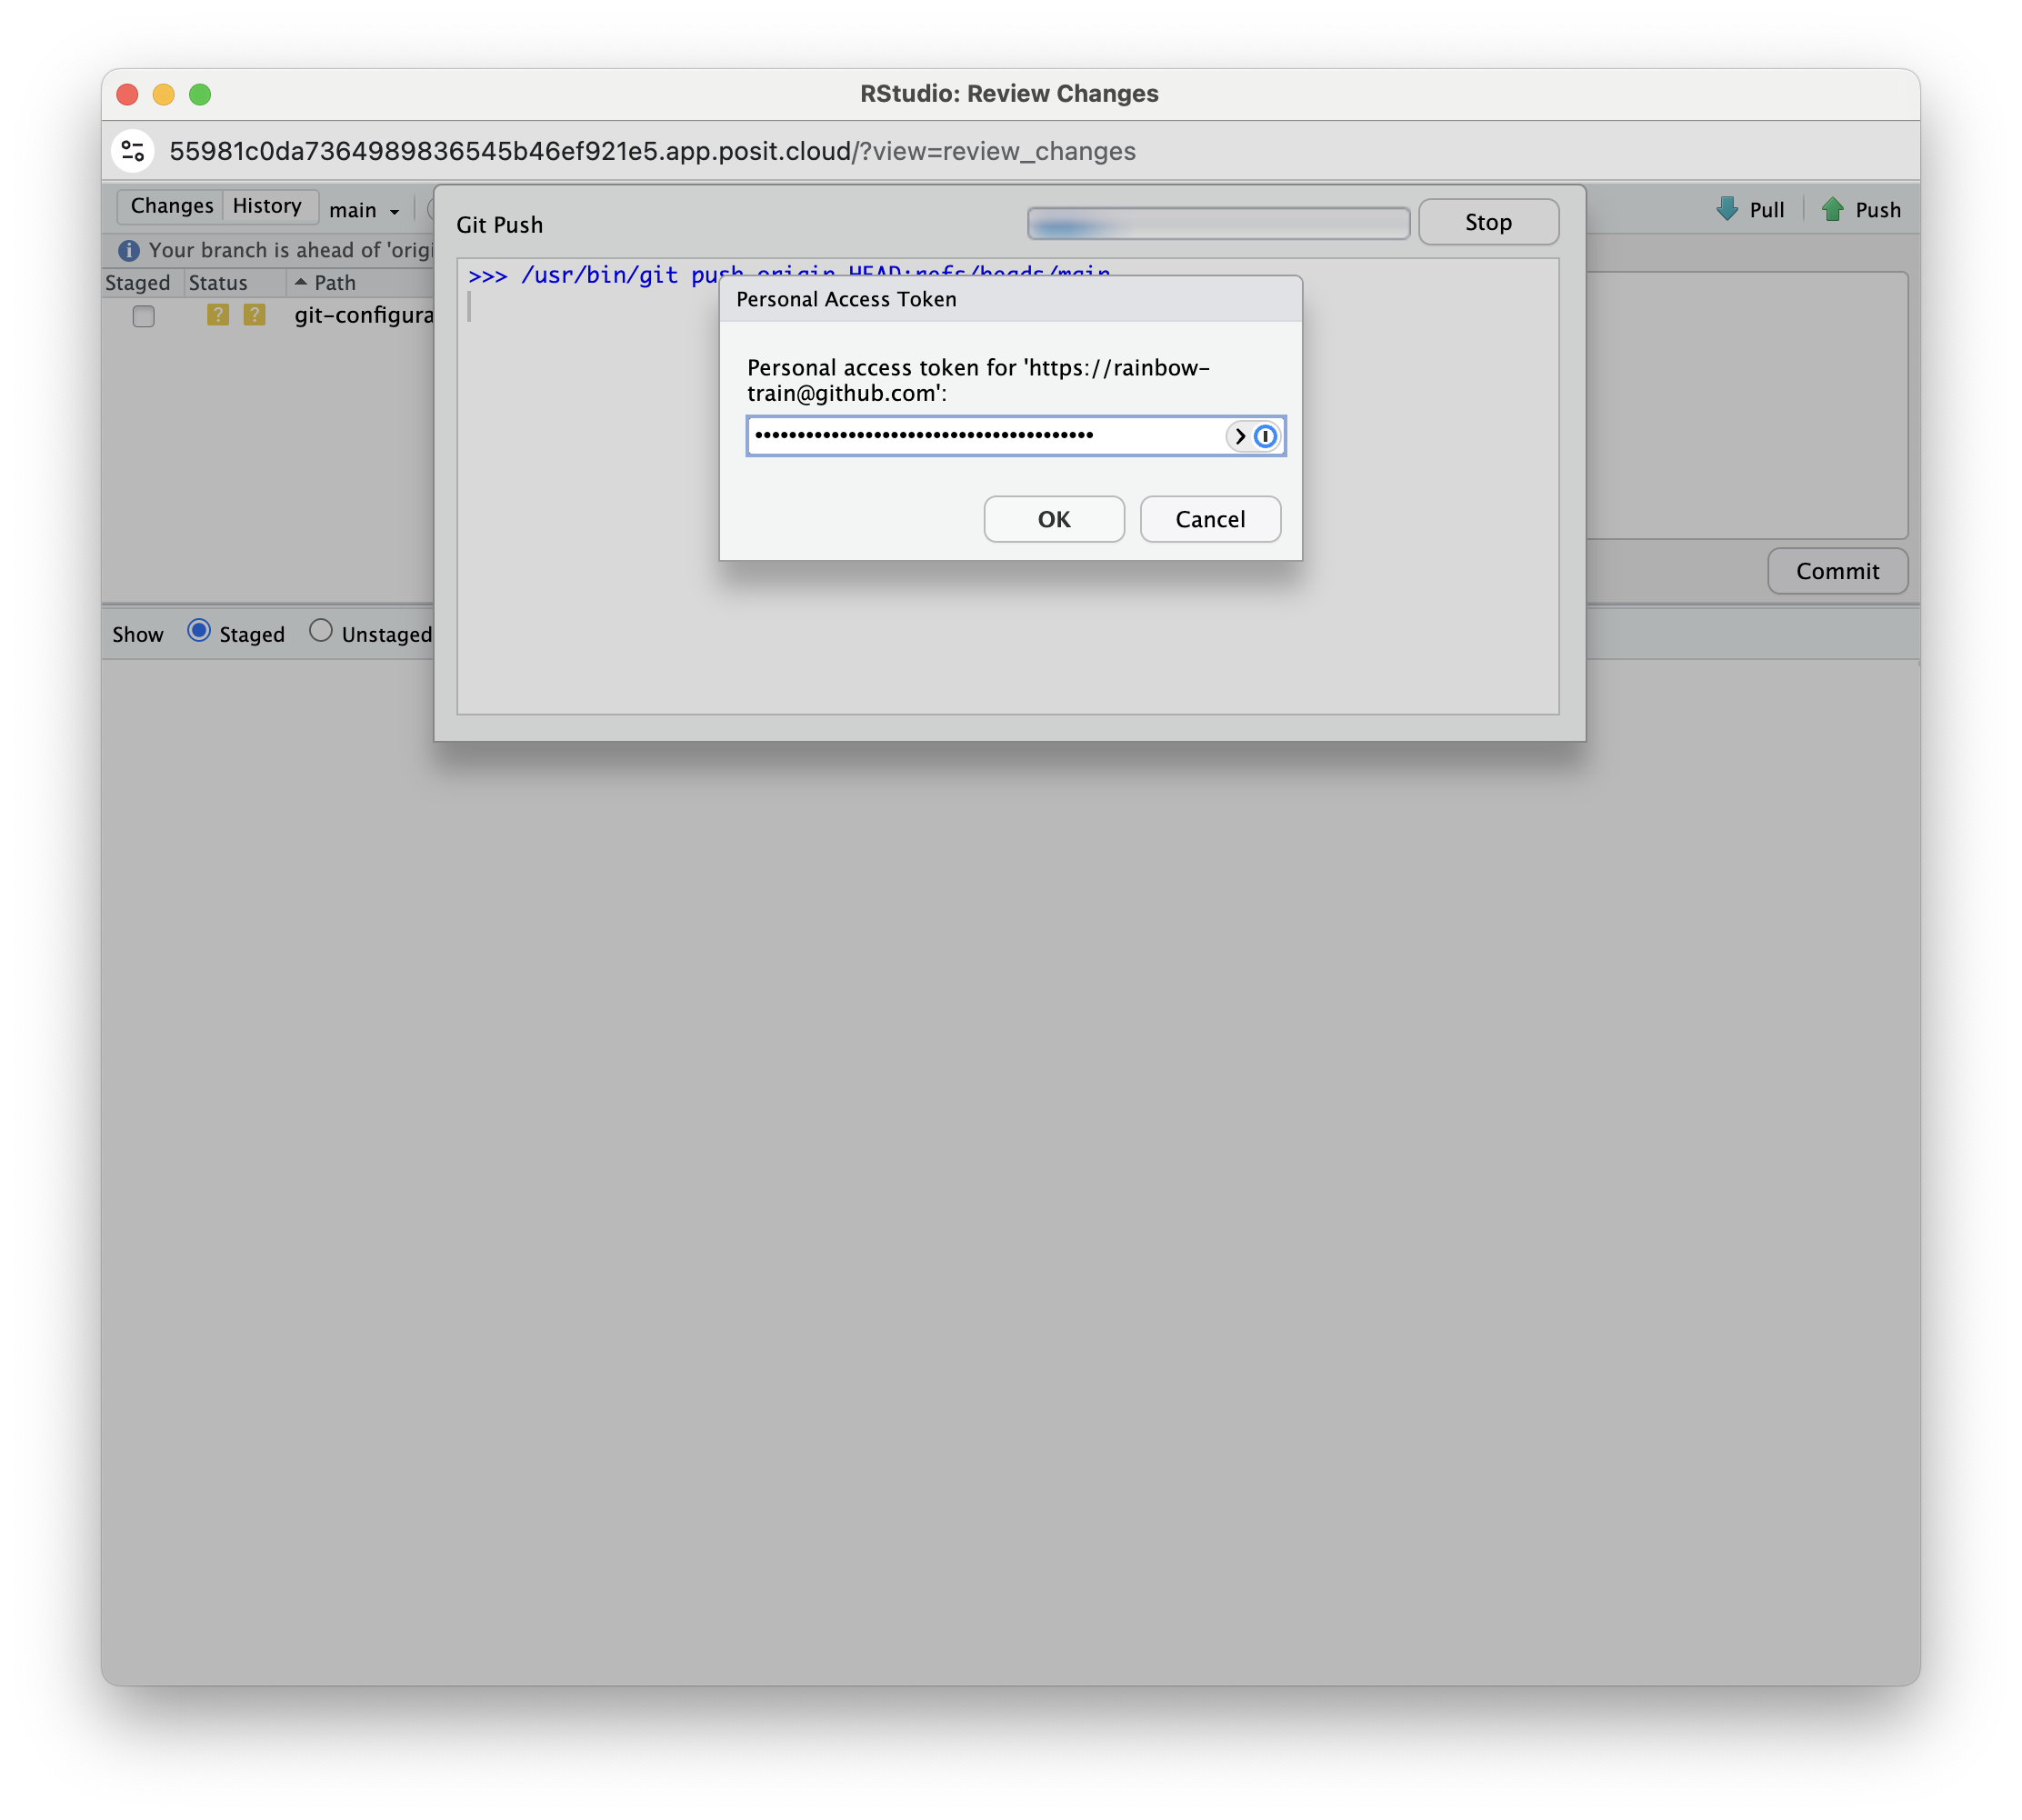
If you see a message that says HEAD -> main, then you have successfully pushed your changes to the remote repository on GitHub. Click Close. If you do not see this message, make sure you have entered your GitHub username and GitHub PAT correctly.
If you have stored your PAT in a Word file, a blank space might have been copied along with the PAT. We recommend using a TXT file (Notepad on Windows or TextEdit on Mac) or a password manager to store your PAT securely.
Step 3: Open an issue on GitHub
- Open https://github.com/ in your browser.
- Navigate to the GitHub organization for the course: https://github.com/ds4owd-002
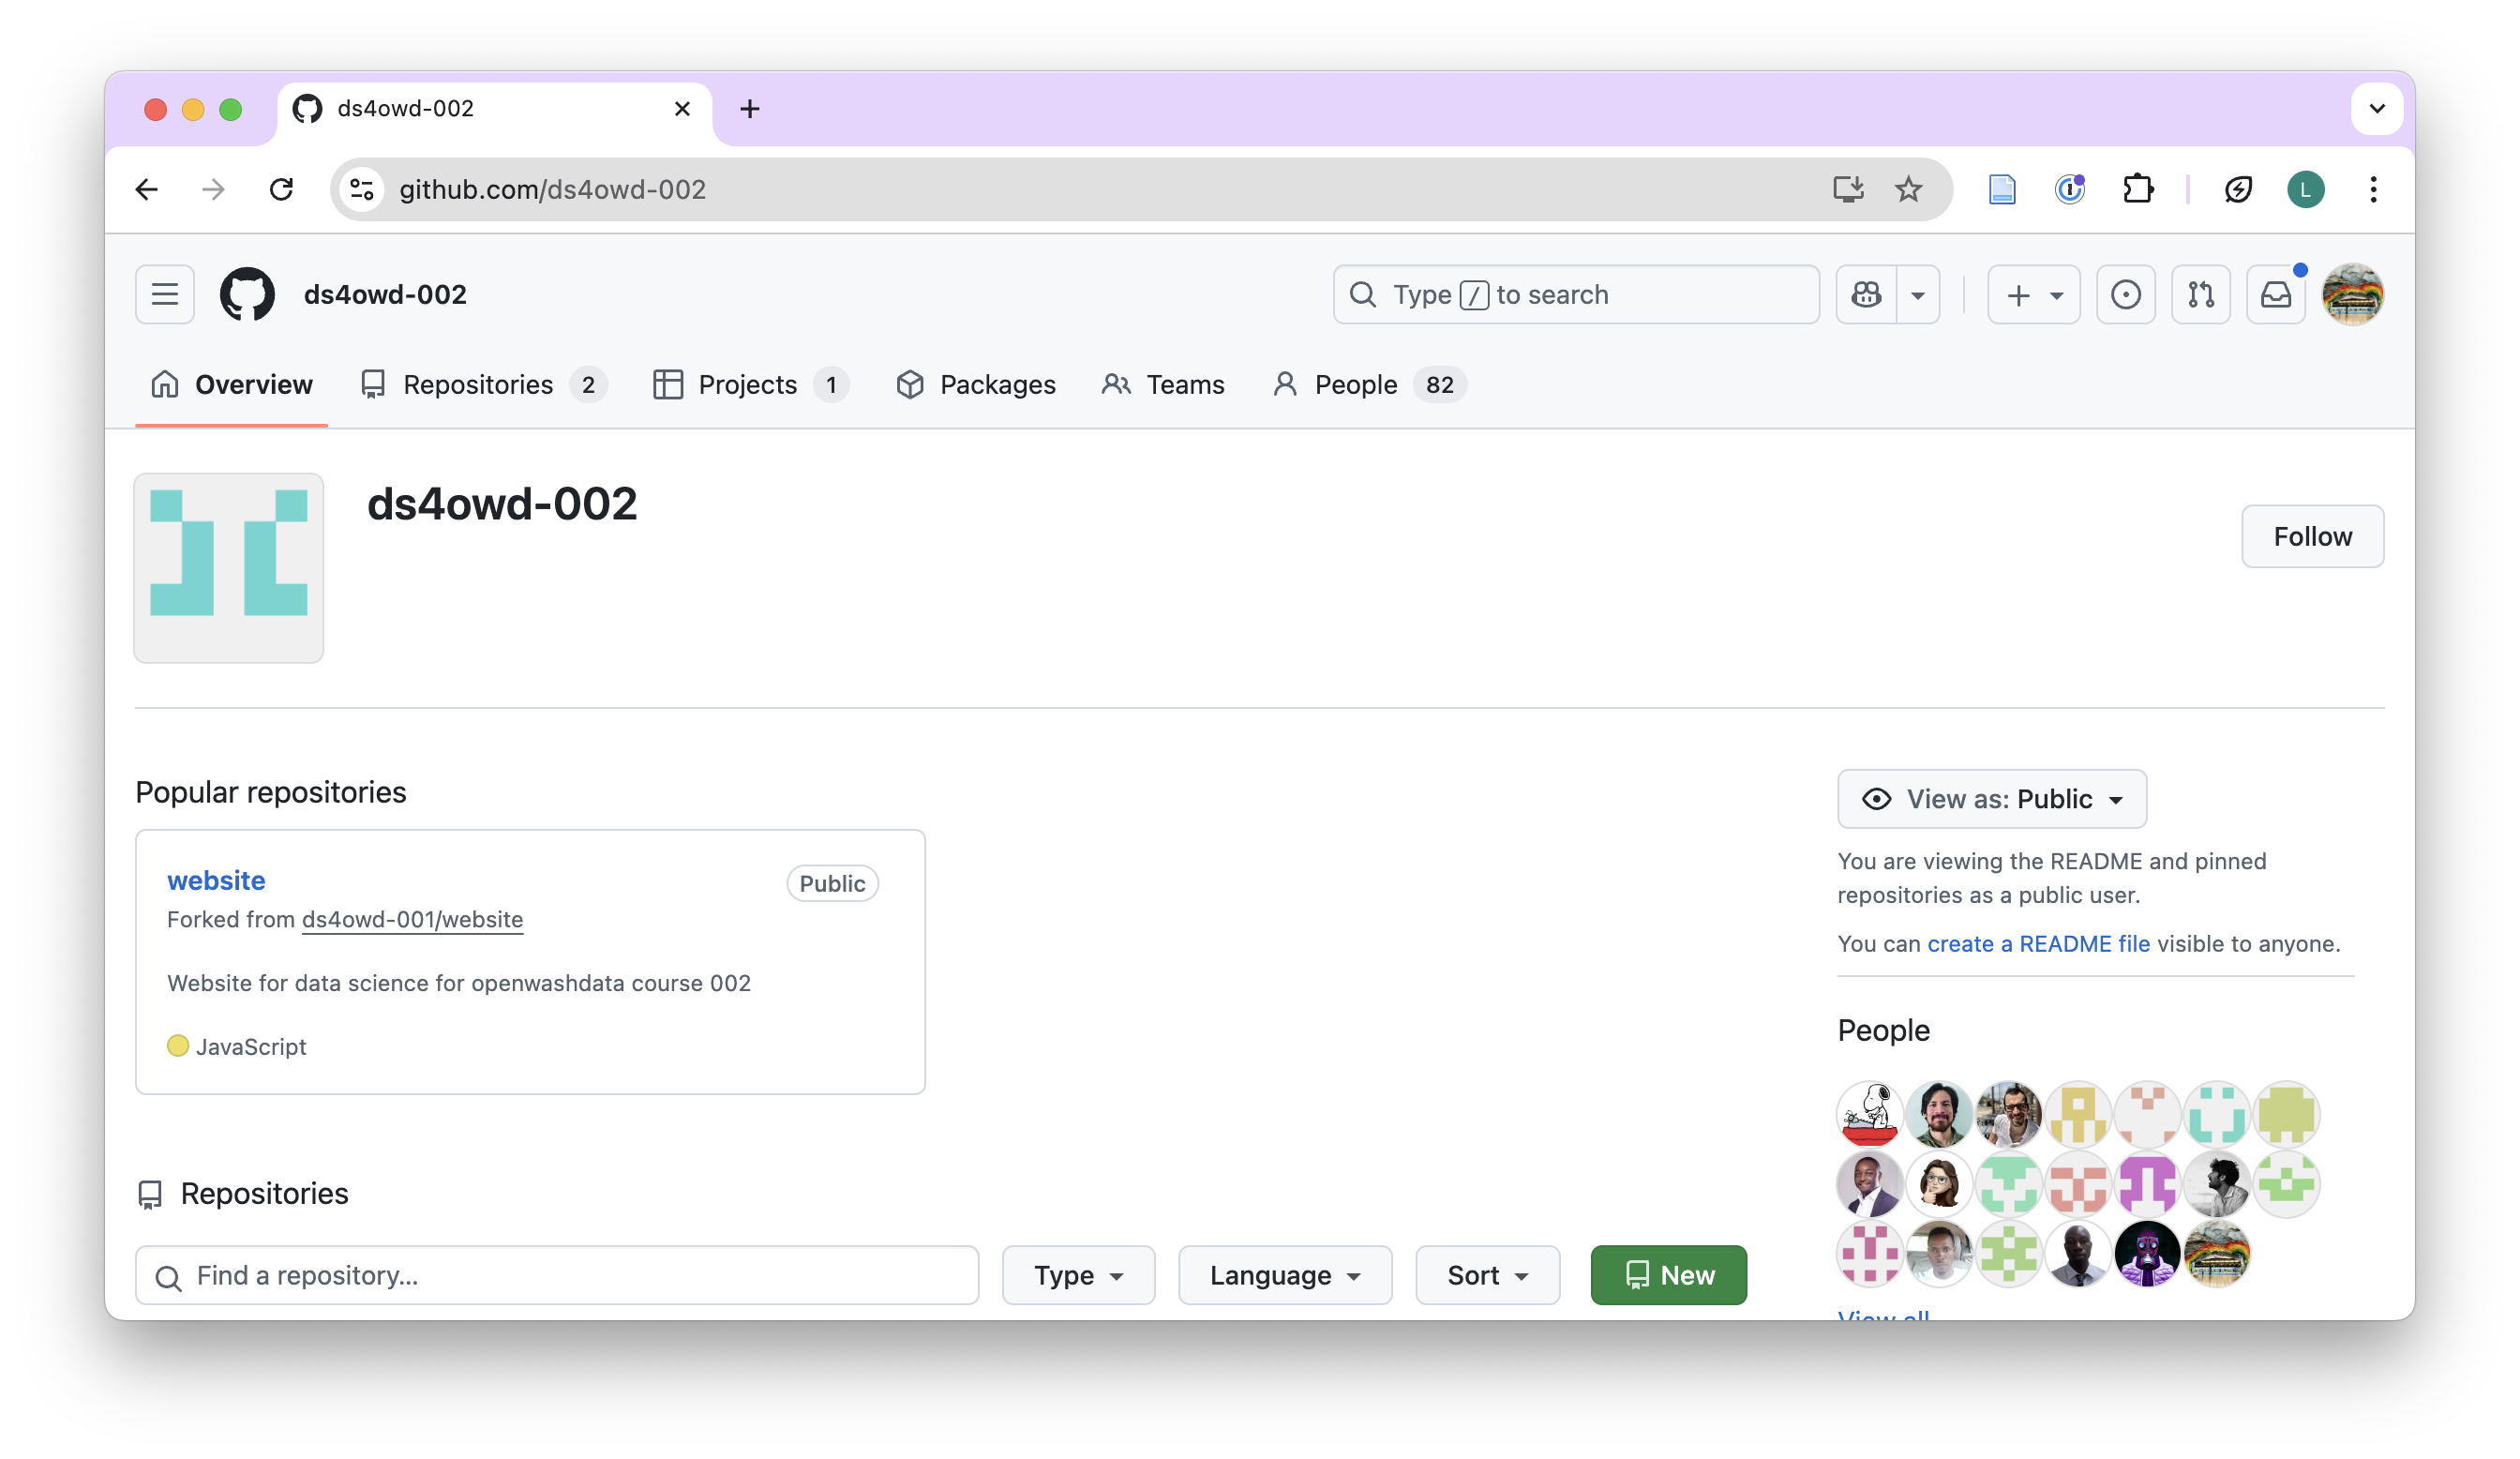
- Find the repository
md-01-assignments-USERNAMEthat ends with your GitHub username, and open it by clicking on the repository name.
- Replace
USERNAMEwith your actual GitHub username. - For example, if your username is
johnsmith, the repository will bemd-01-assignments-johnsmith.
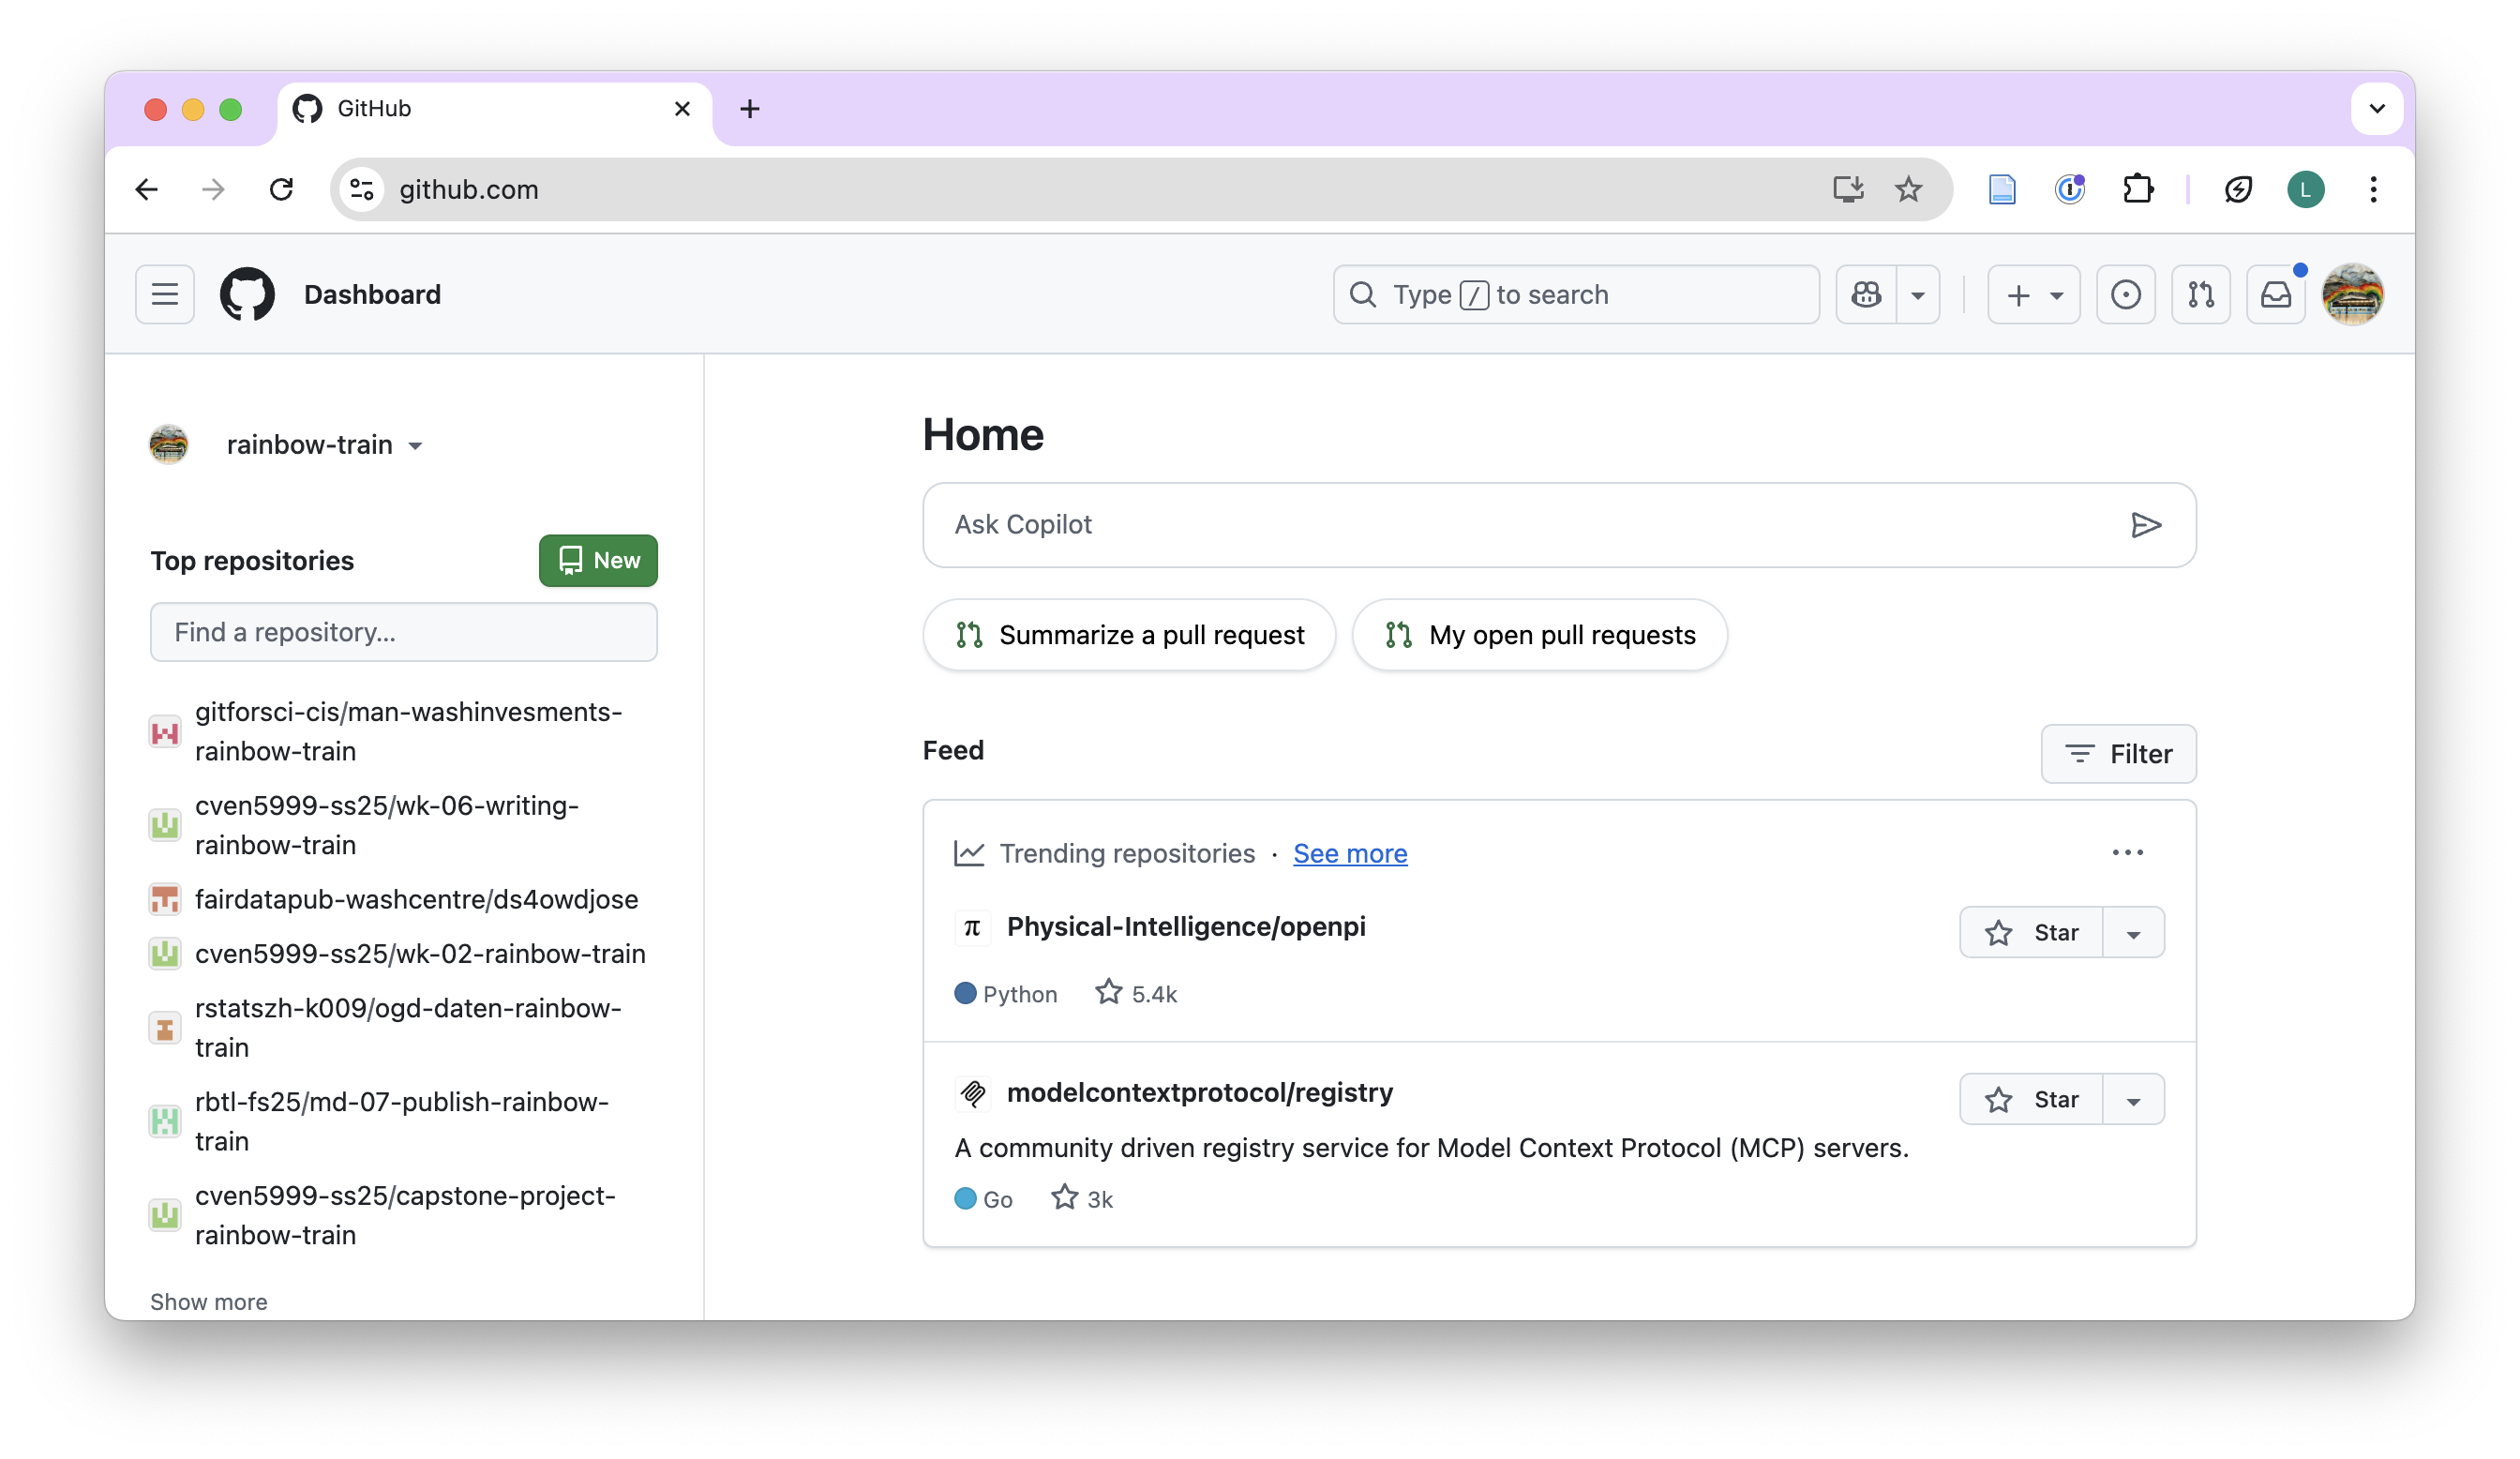
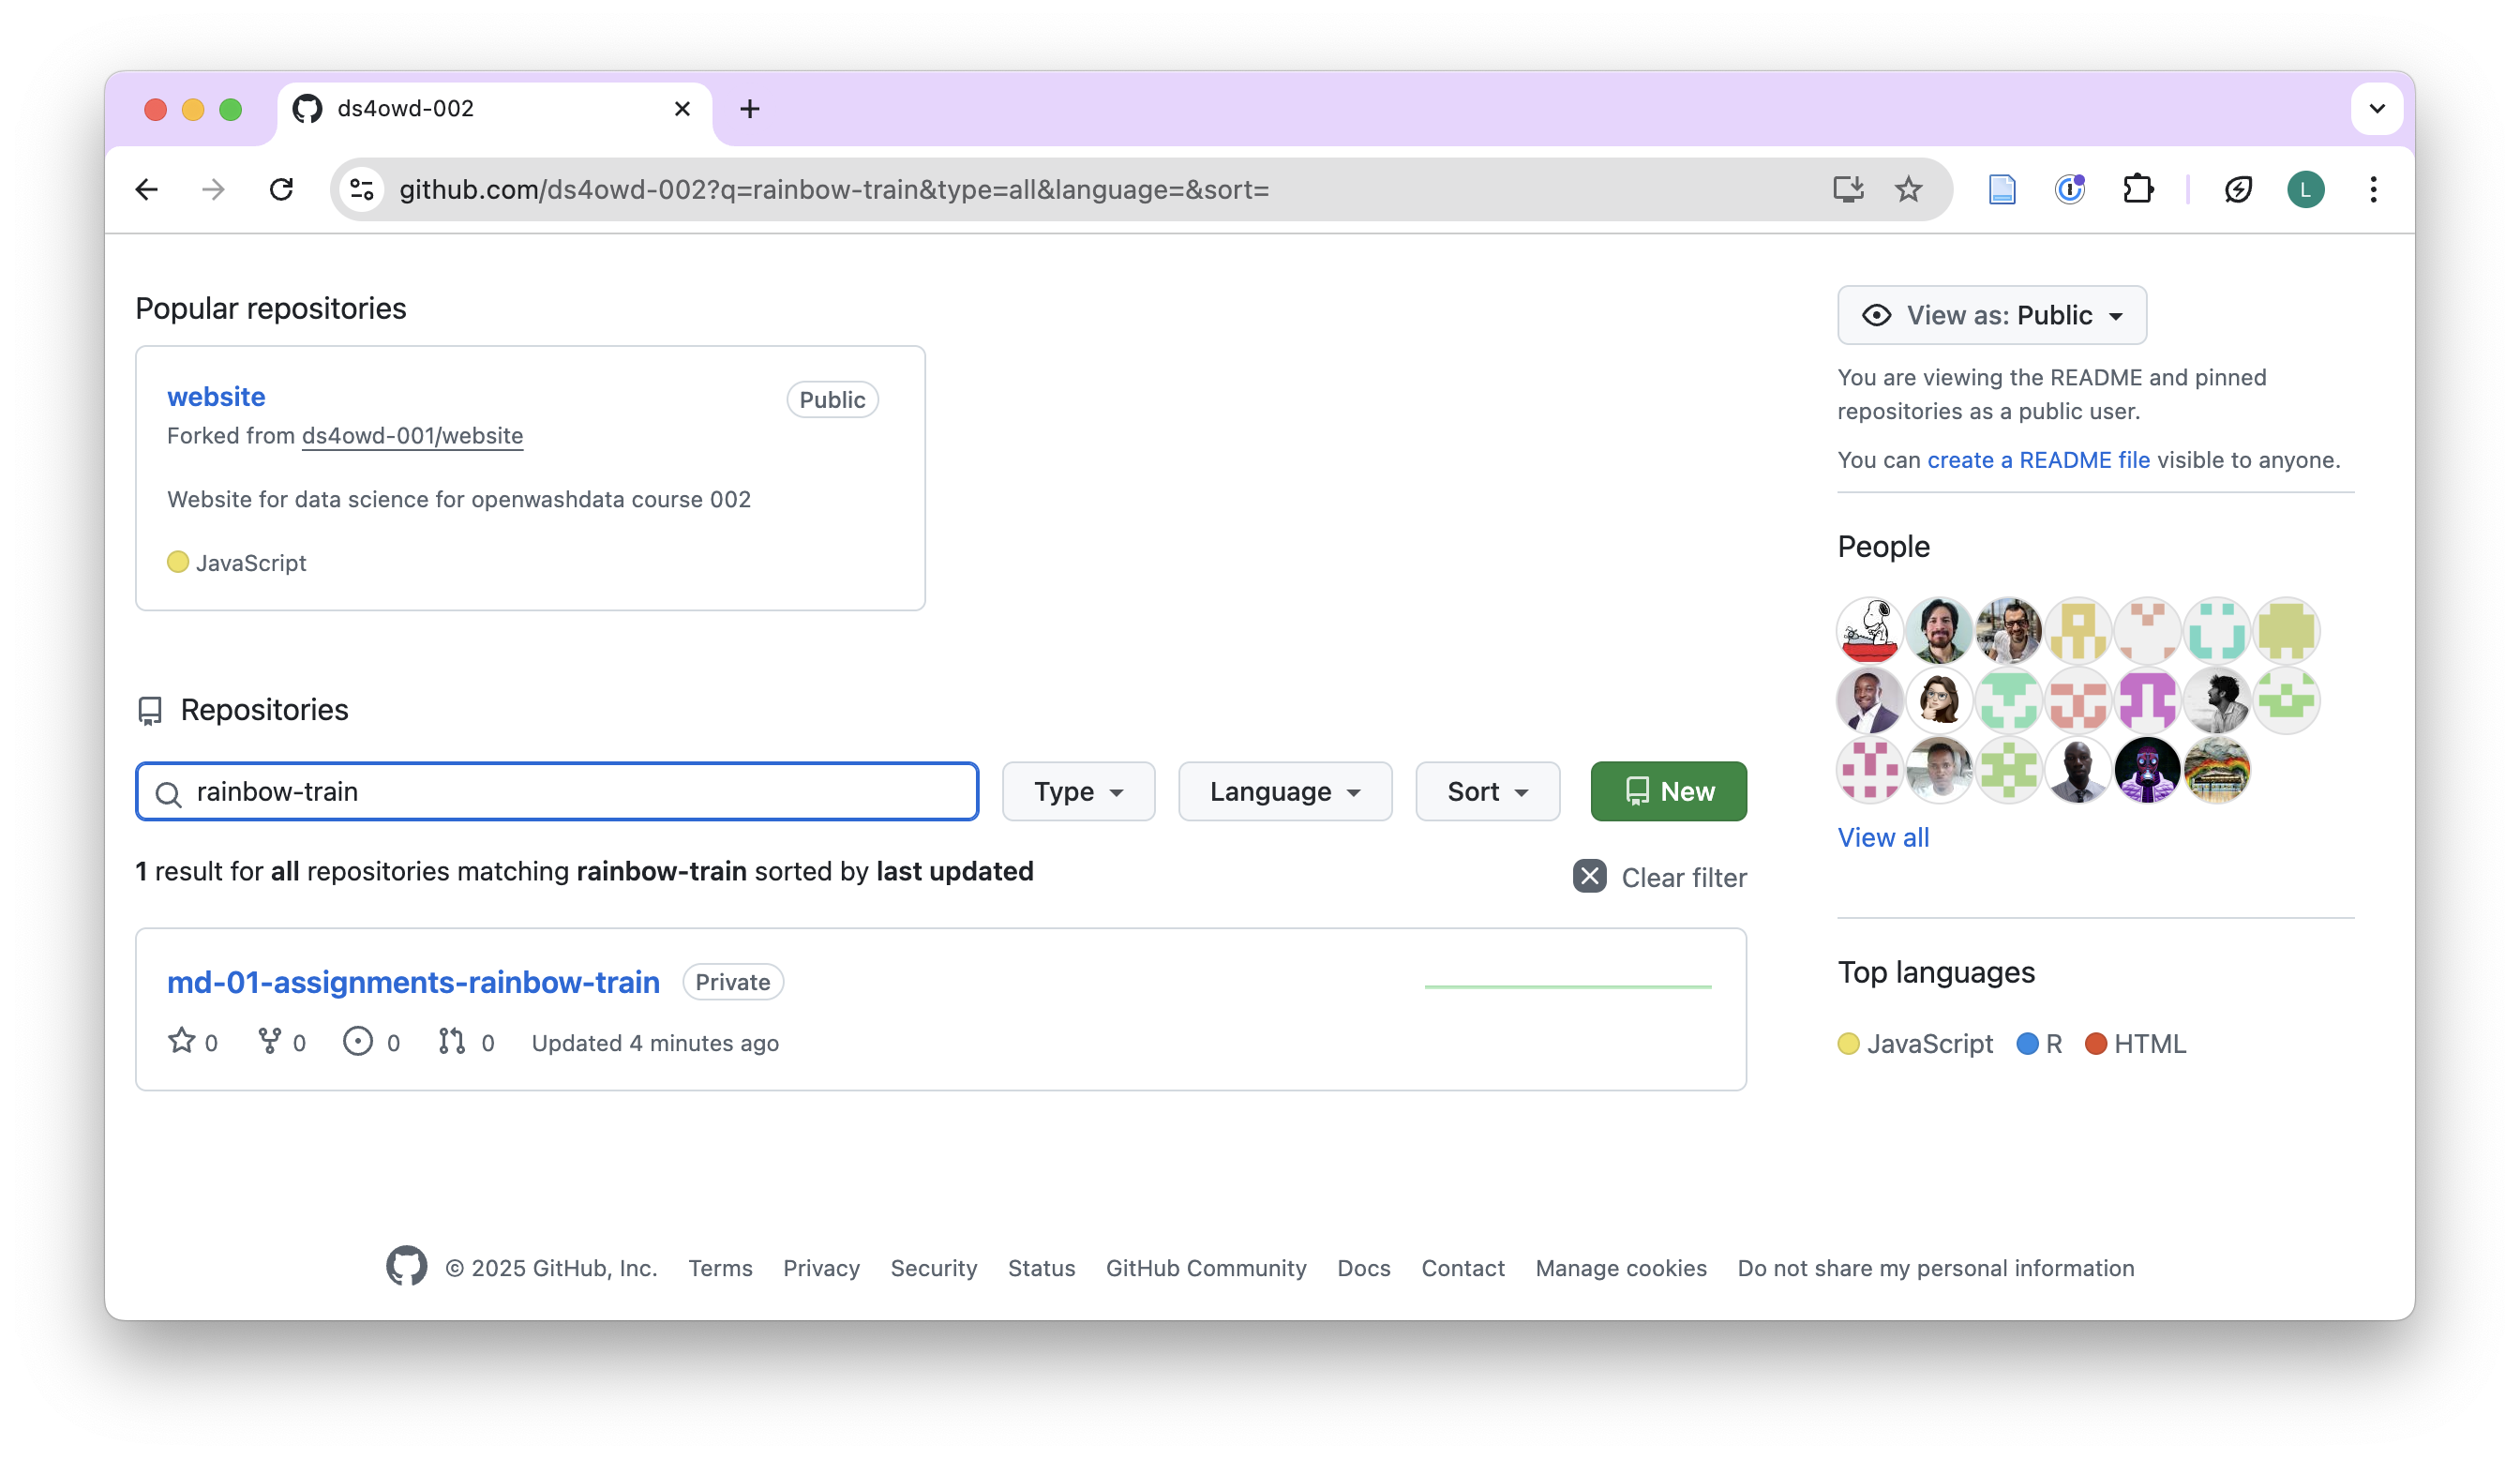
You can search for your repository by typing your username in the search bar just below the Repository heading. See rainbow-train in screenshot.
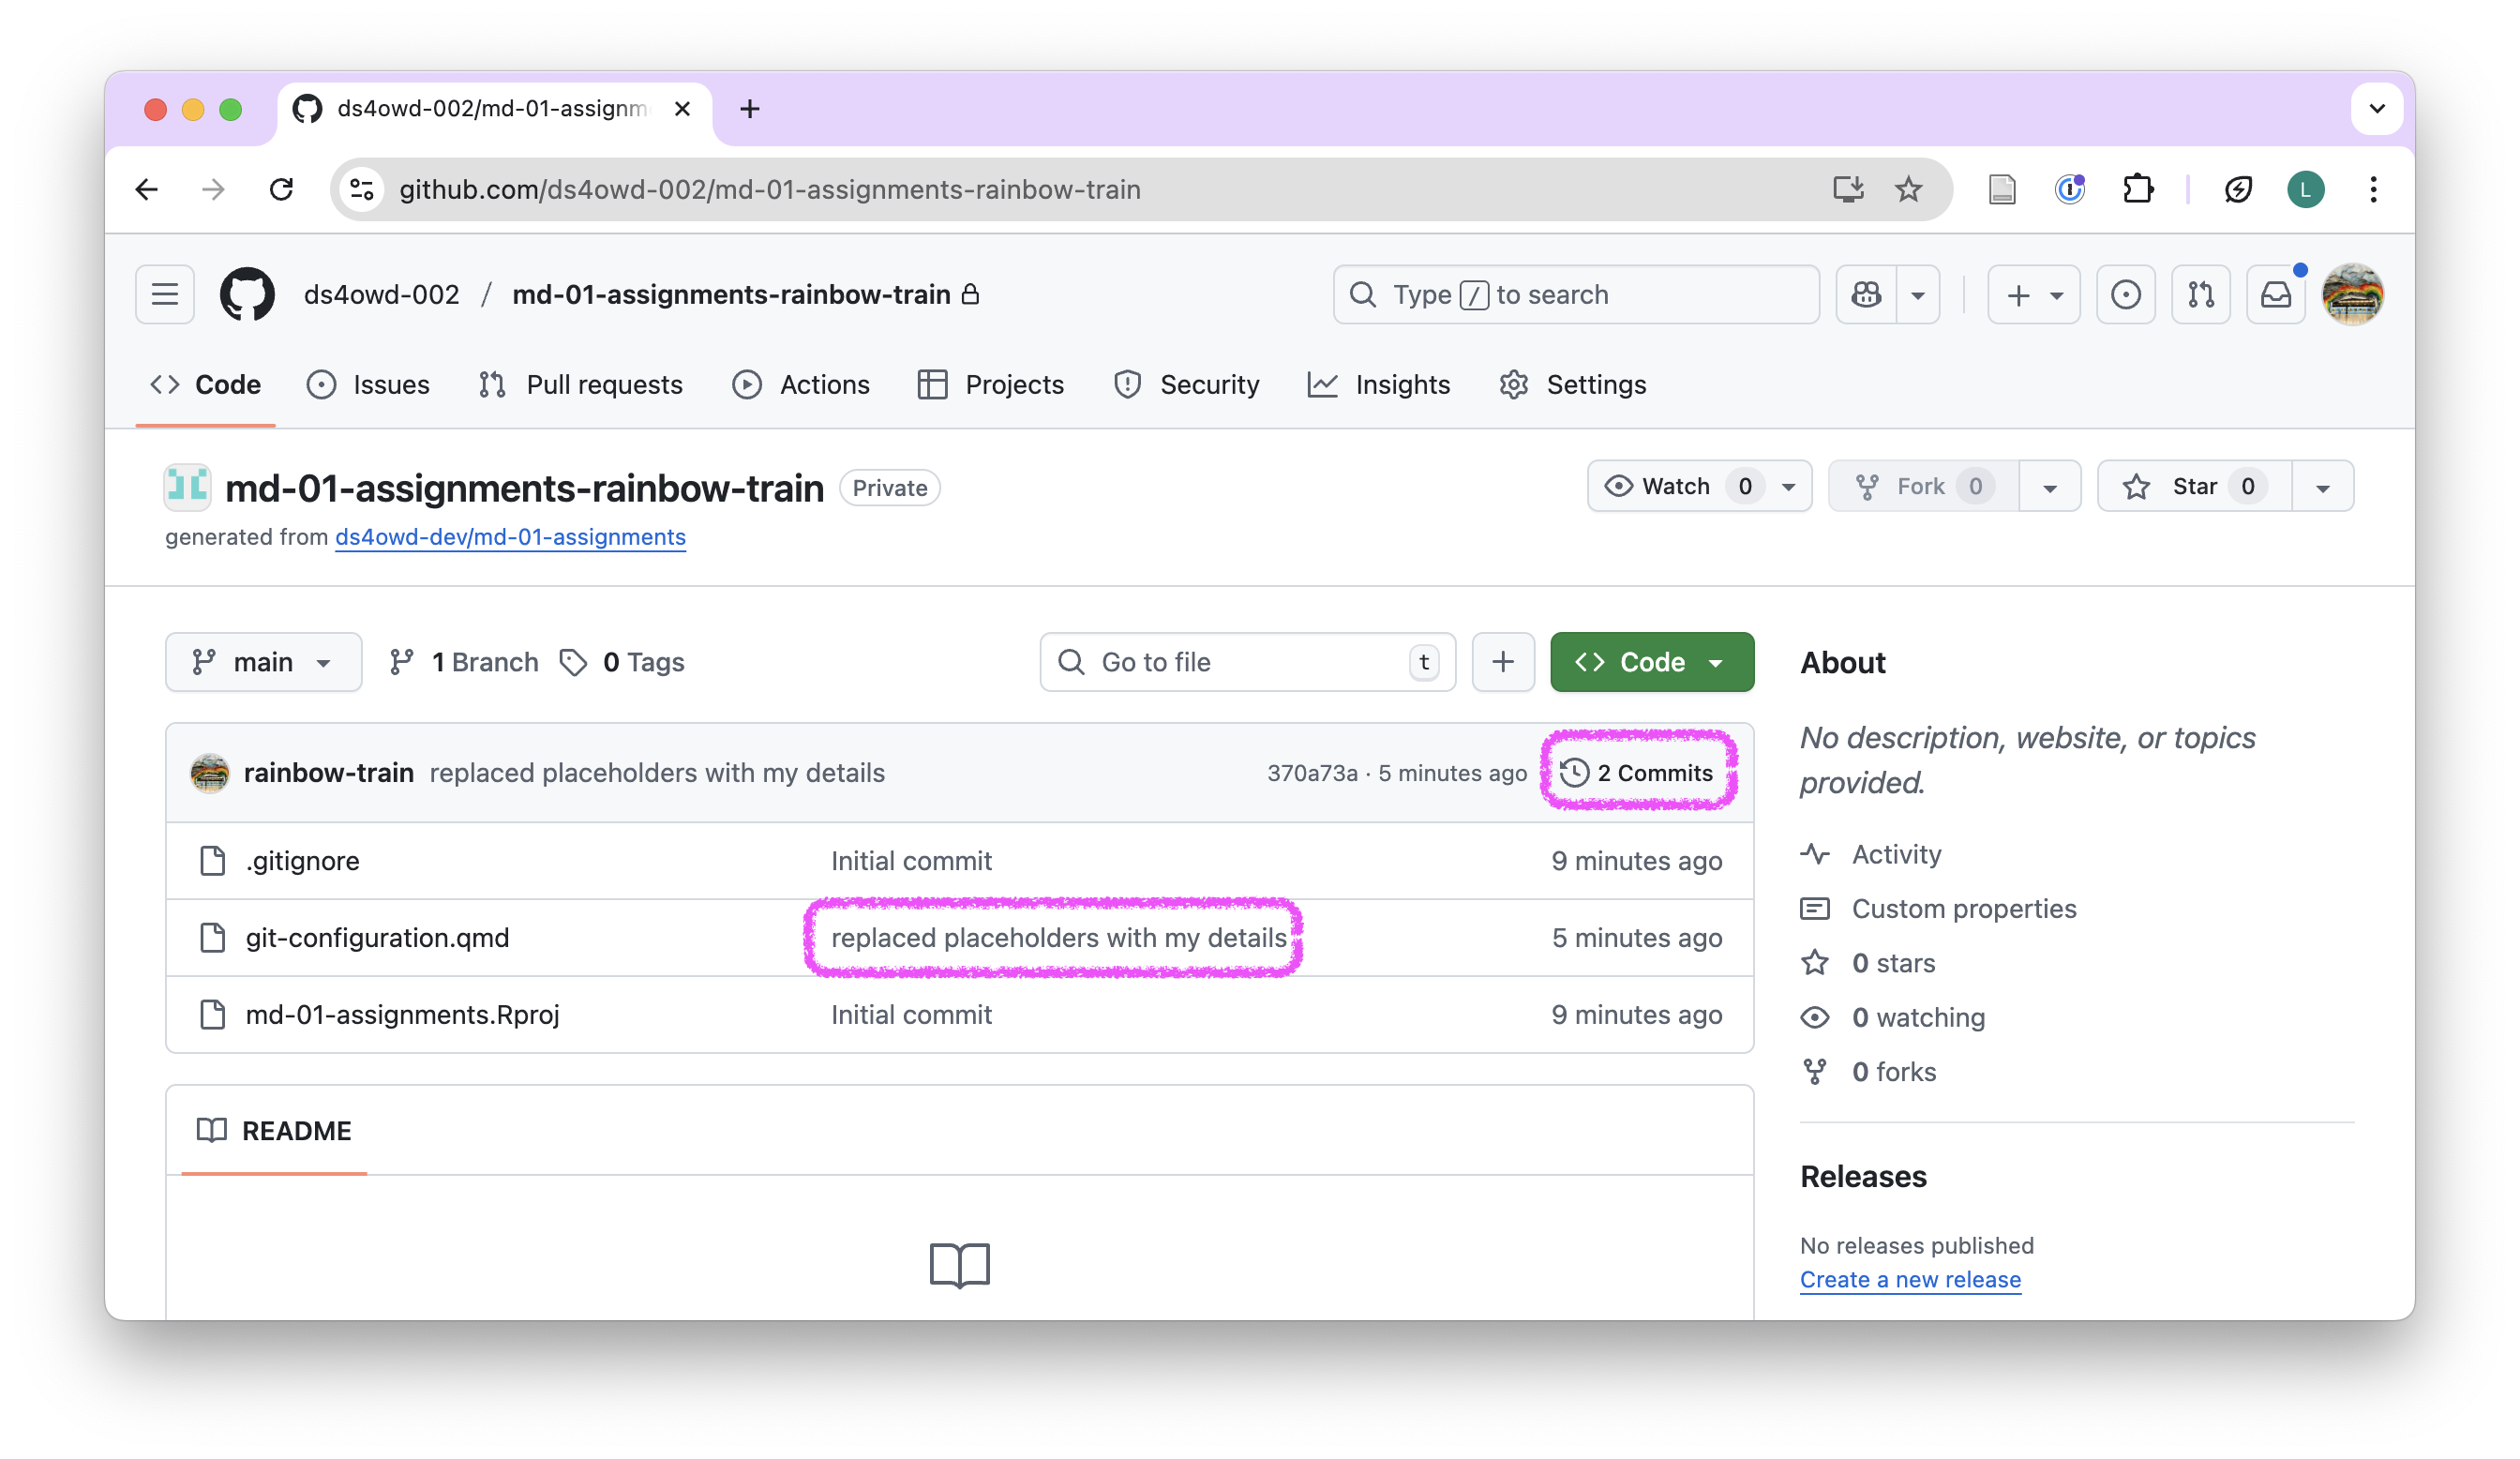
- You can verify here that your changes have been pushed to the remote repository by looking at the text next to the
git-configuration.qmdfile. It should display the commit message you entered in the previous step, e.g., replaced placeholders with my details. You can also verify by identifying the number of commits, here 2 commits. Click on it and you can see them.
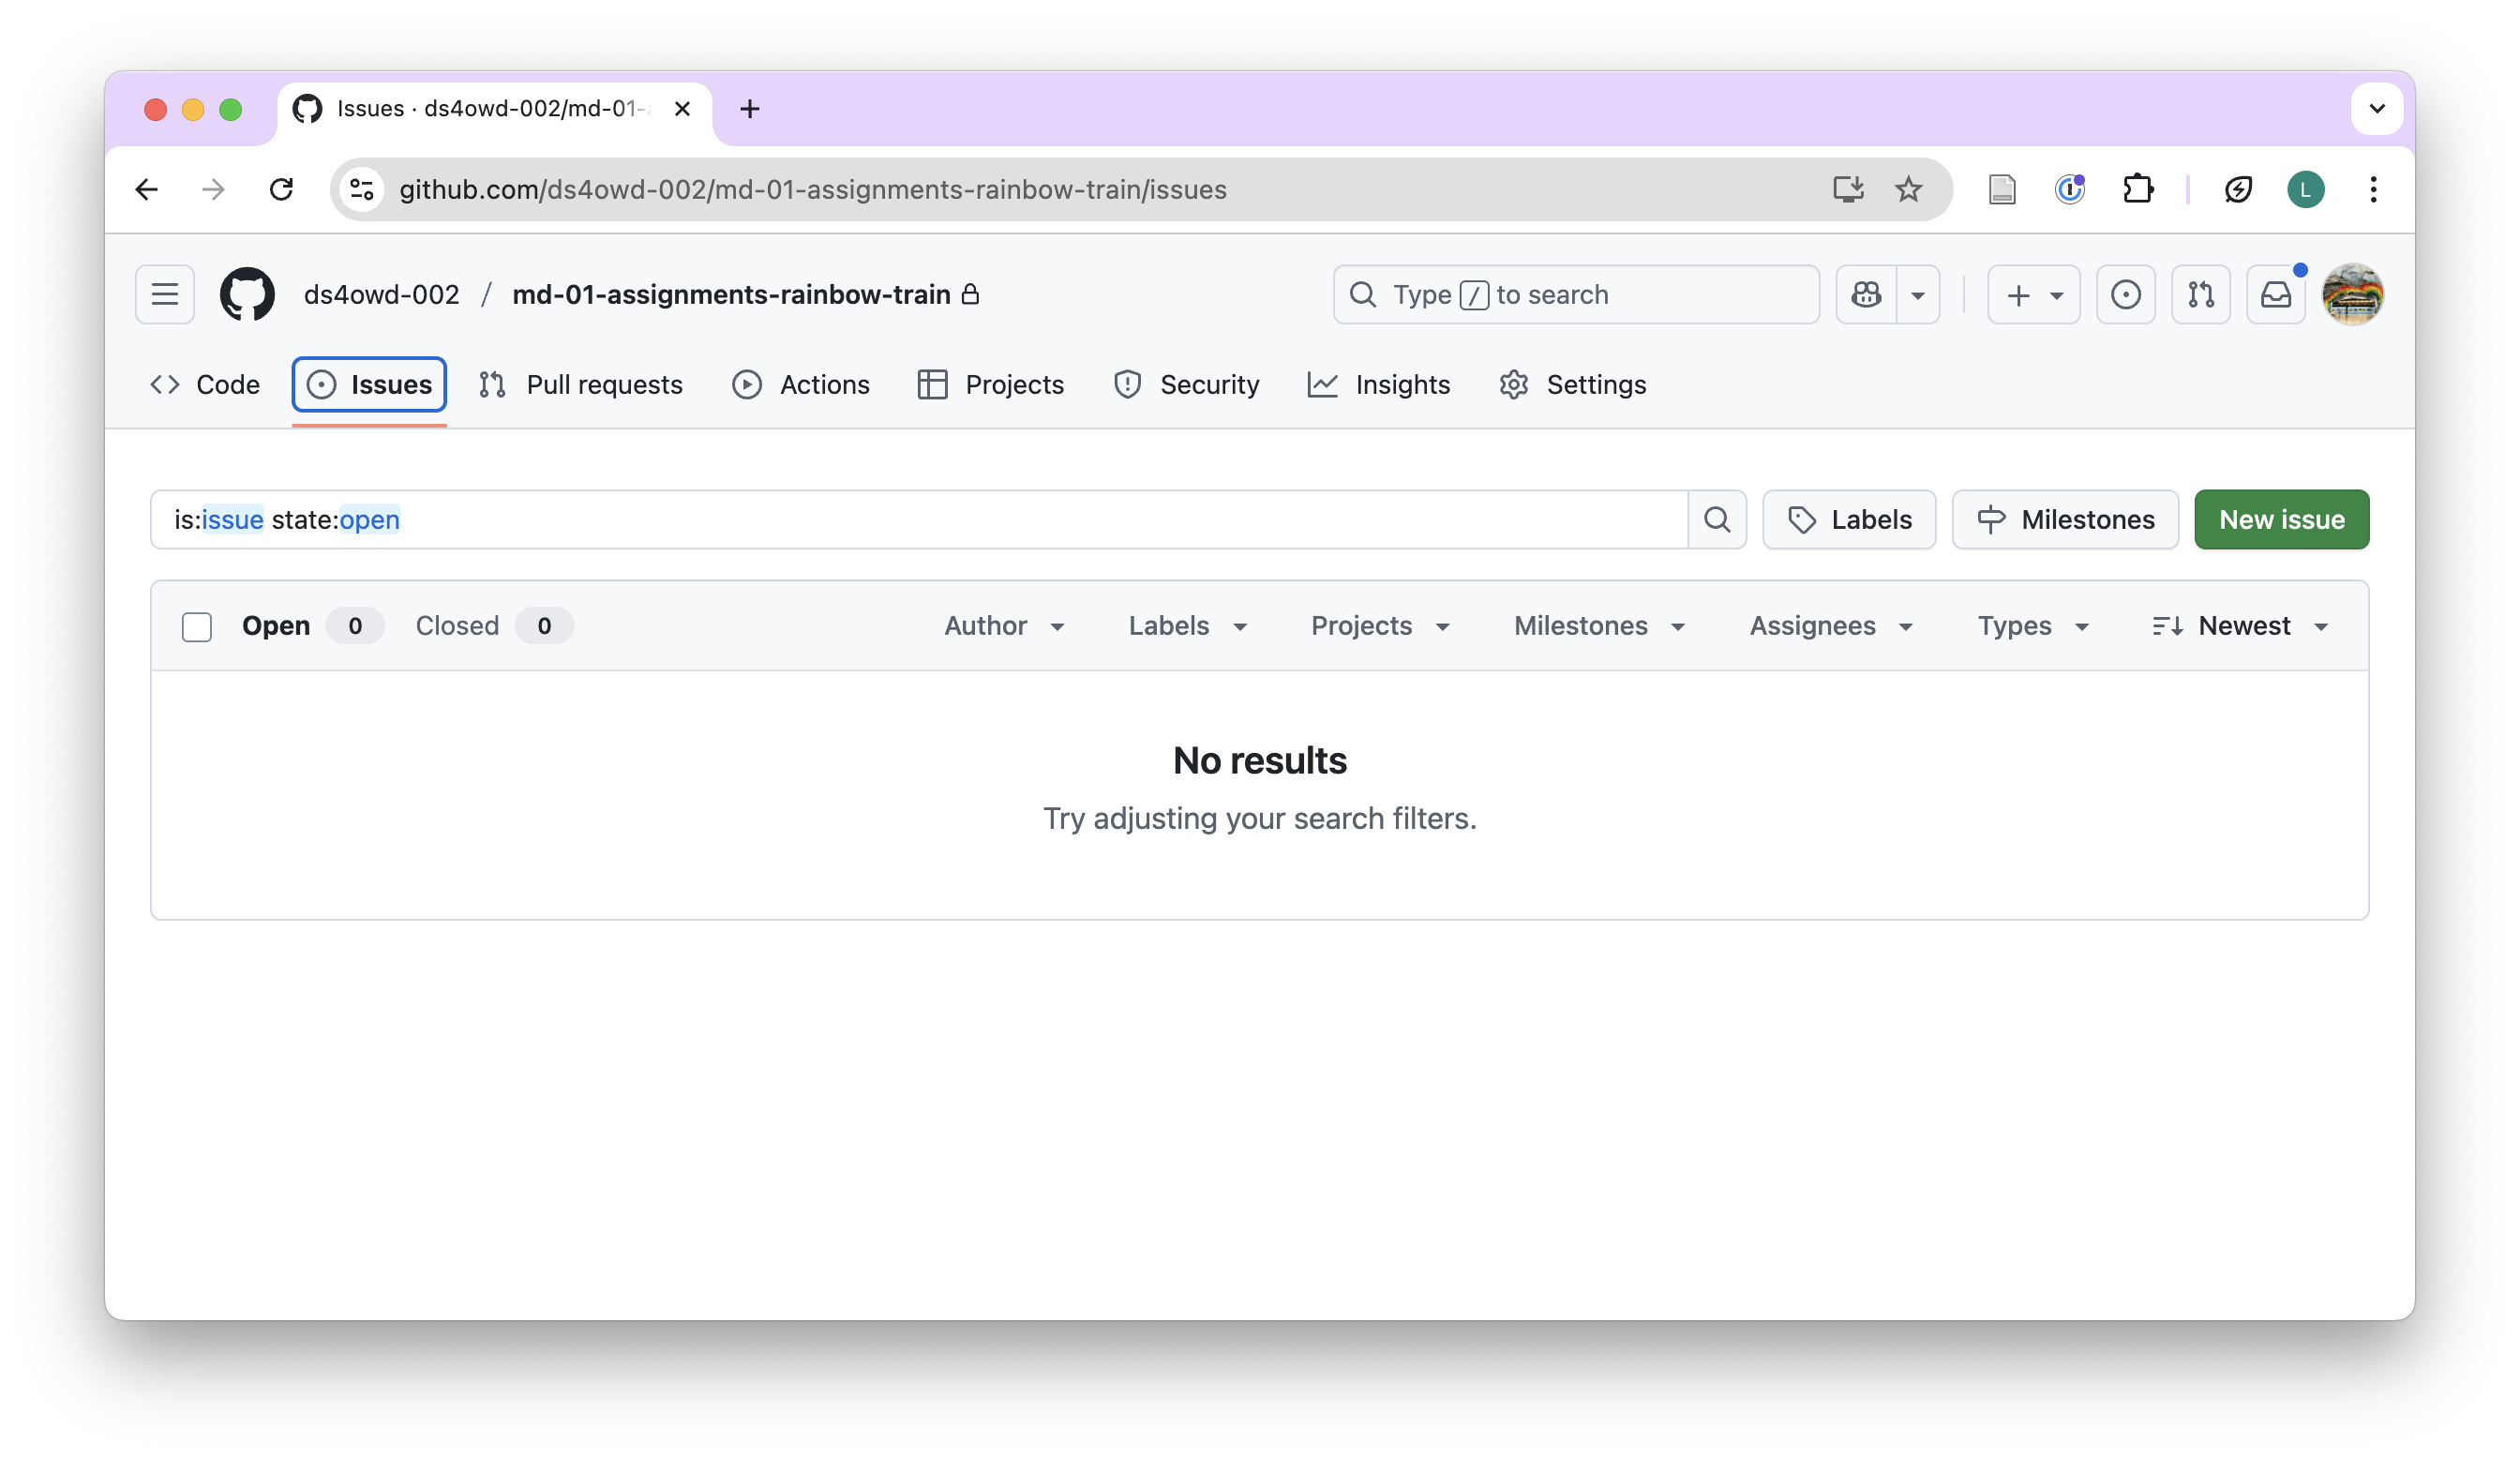
- Click on the Issues tab.
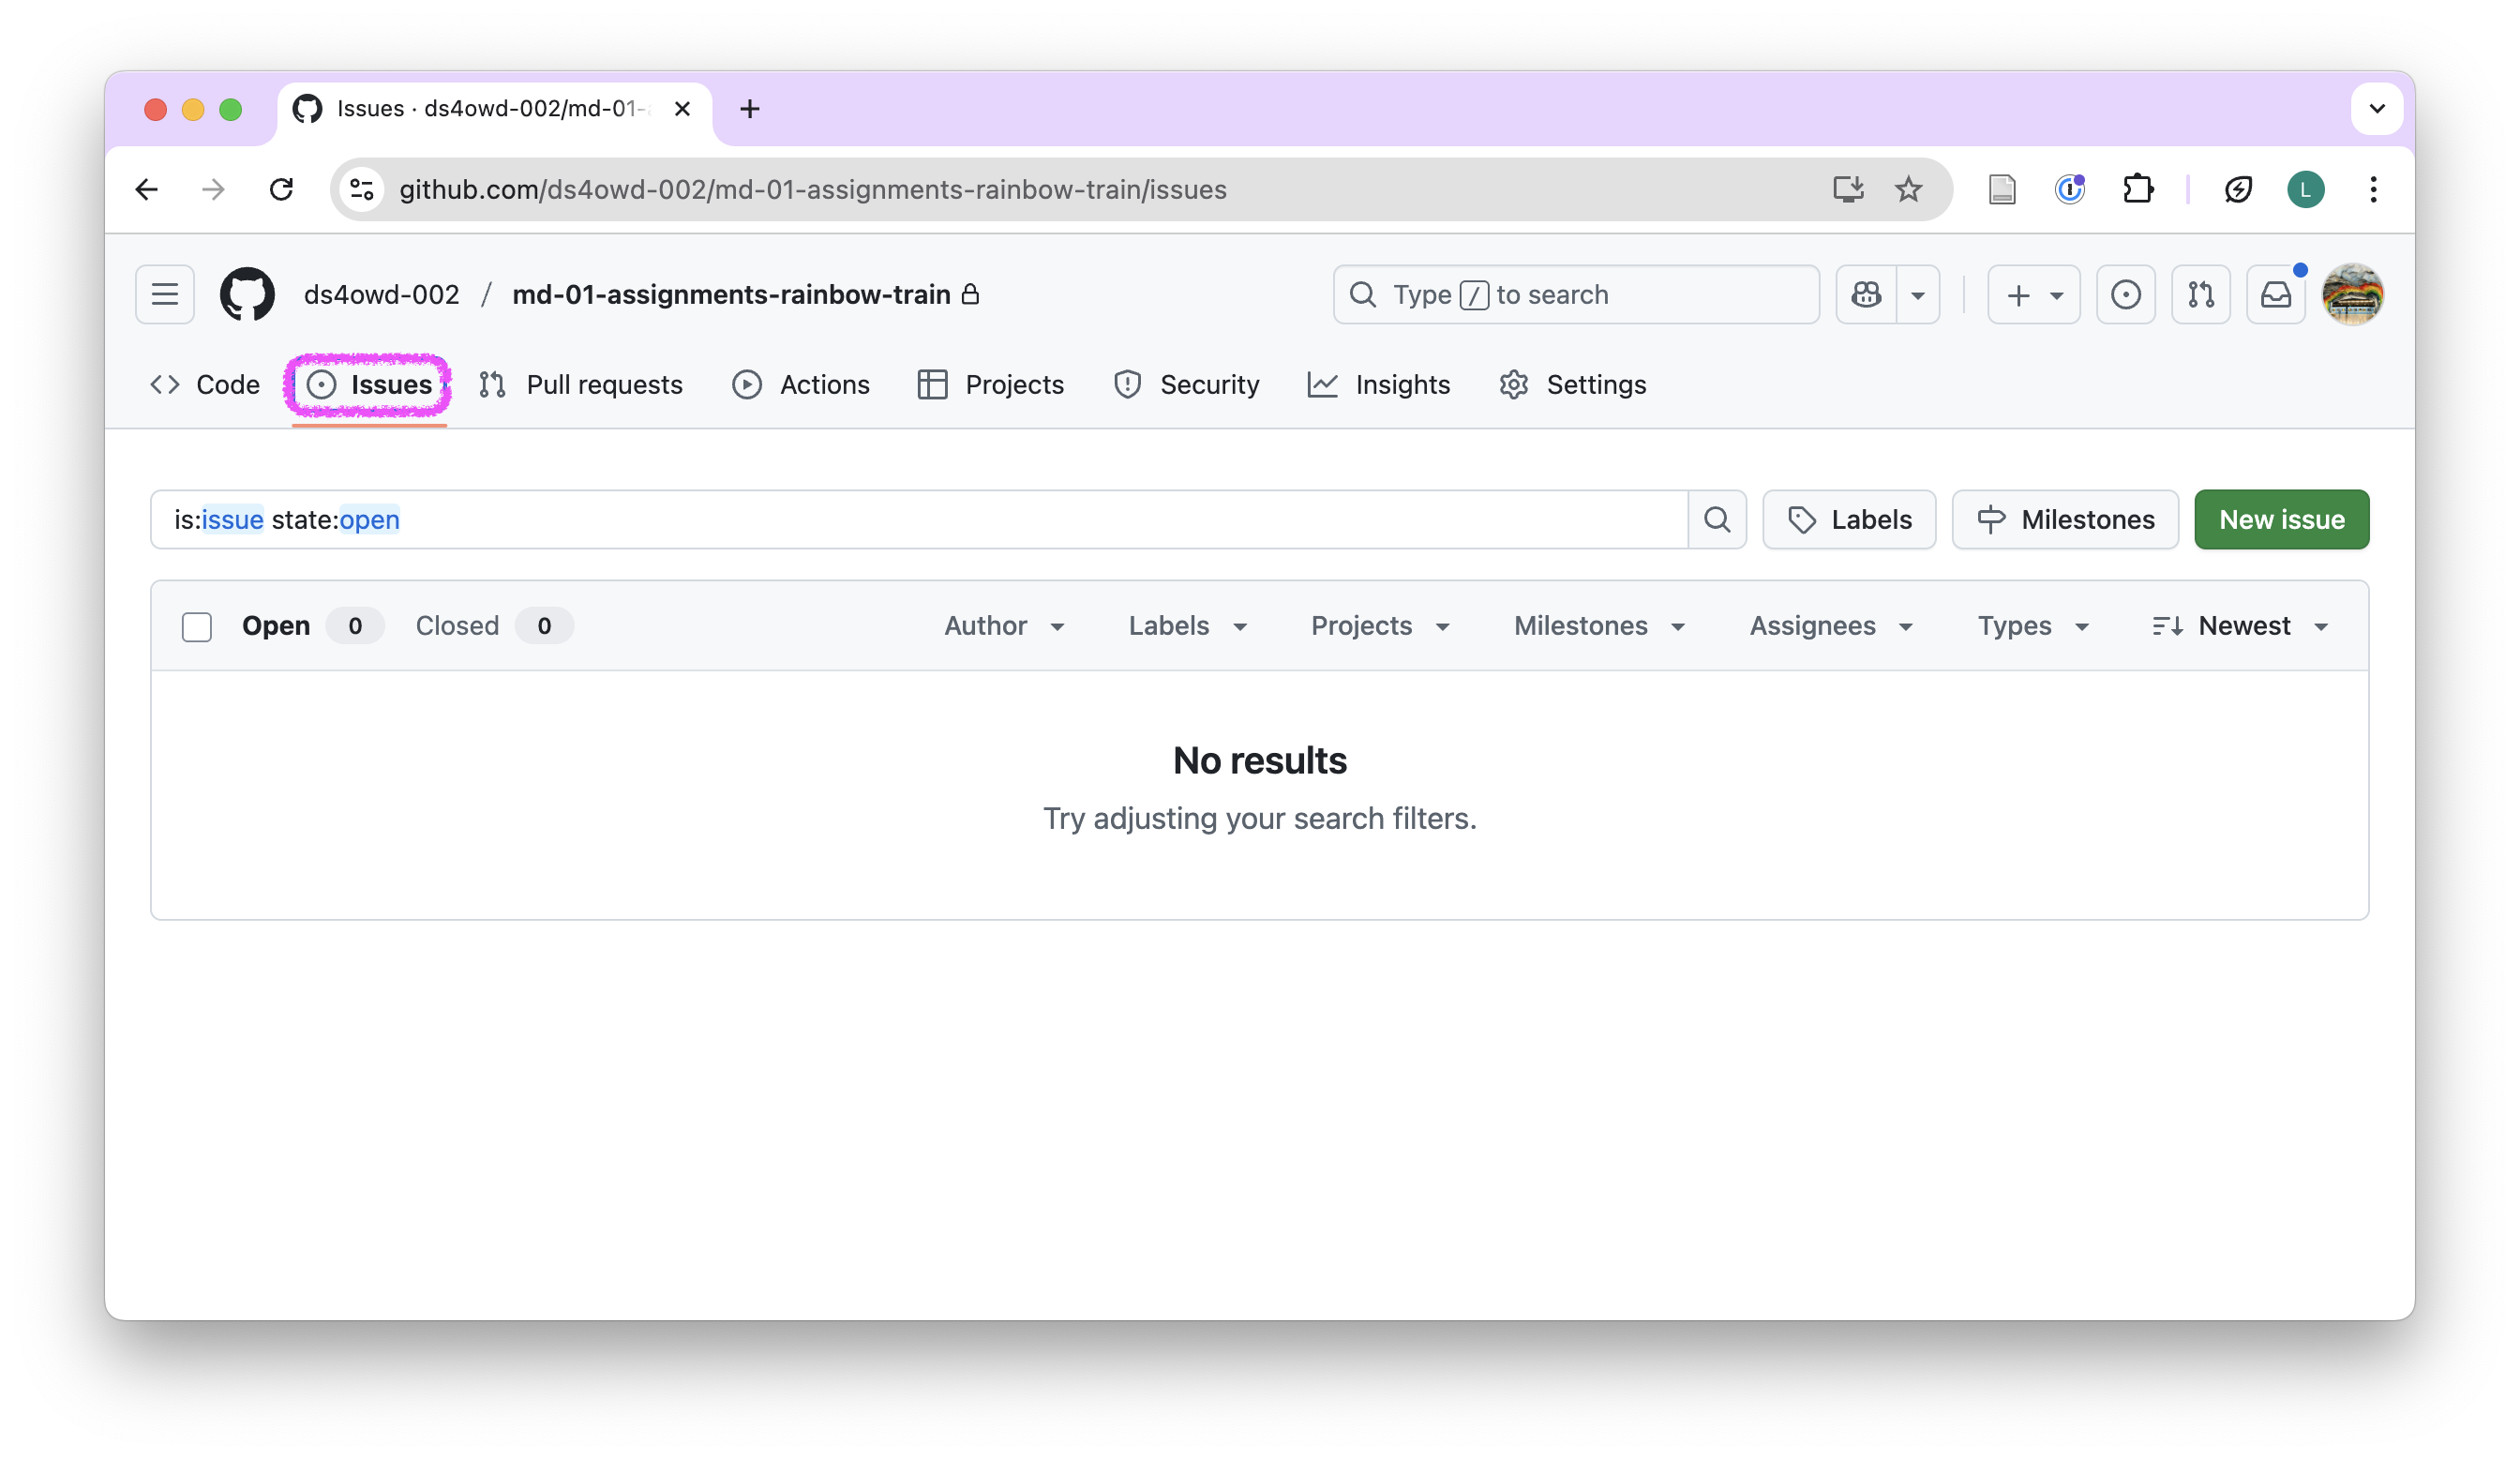
- Click on the green New issue button.
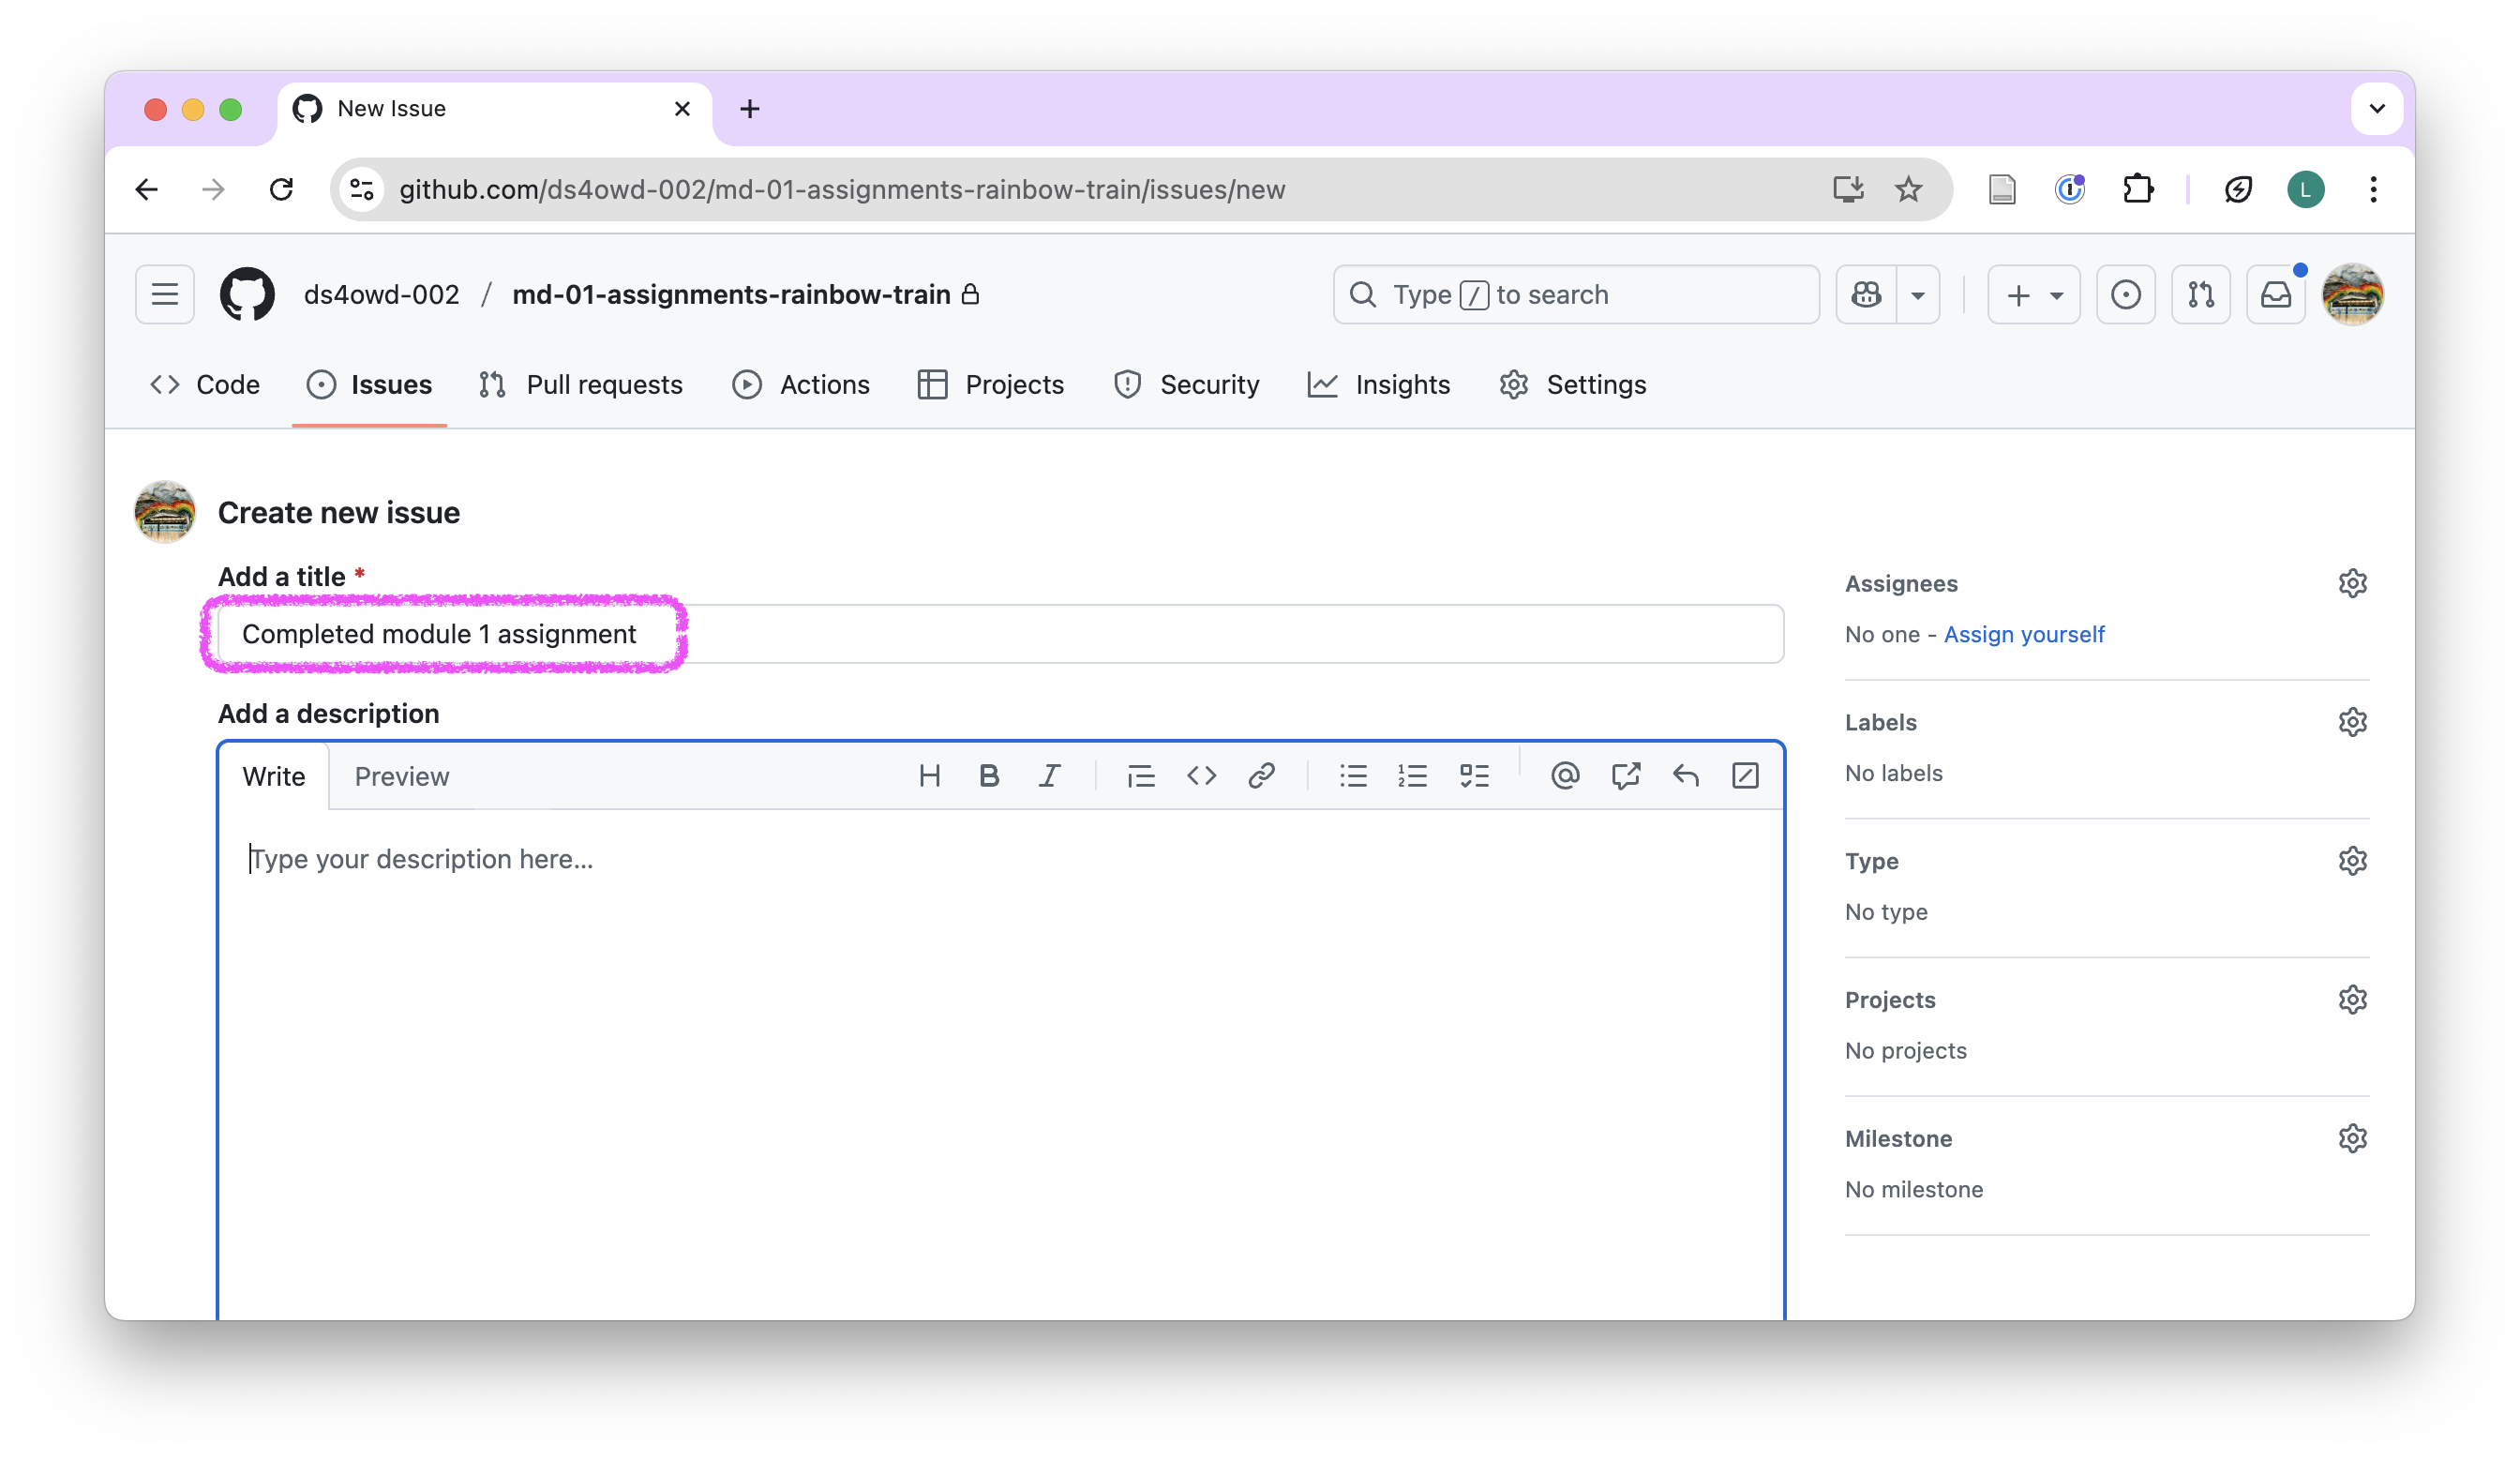
- In the Title field write: Completed module 1 assignment.
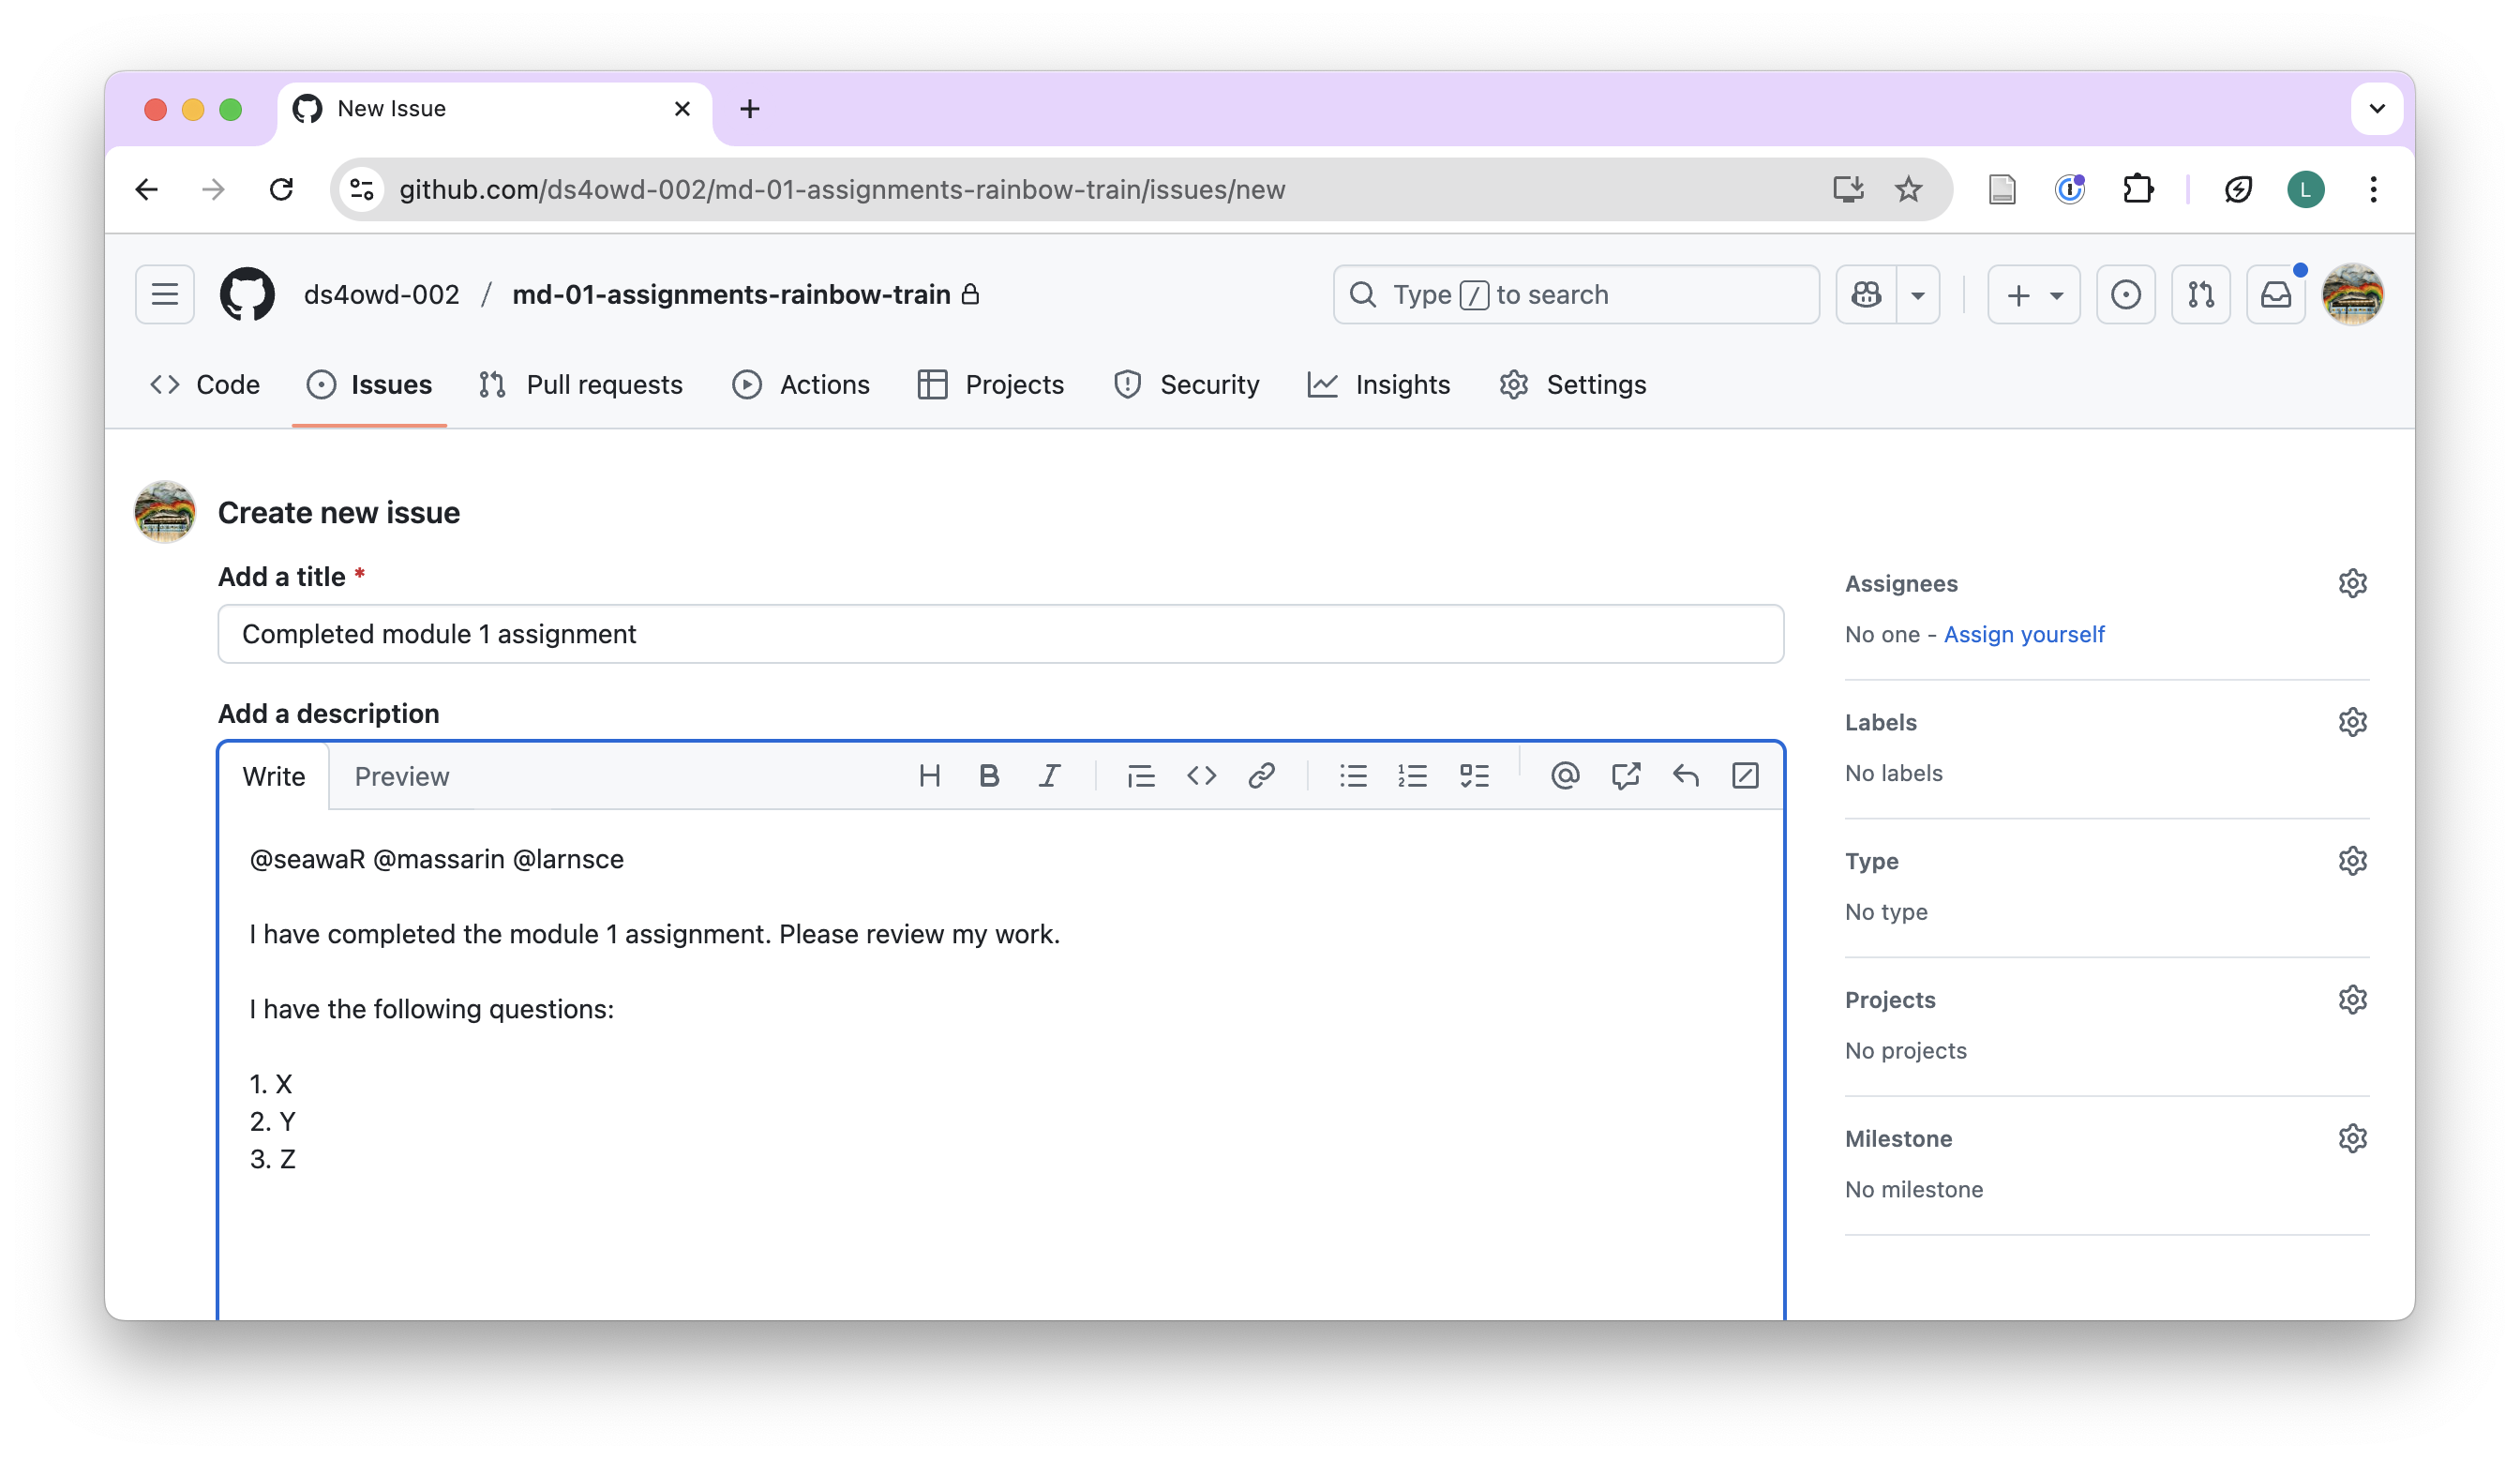
- In the Leave a comment field, tag the course instructors
@seawaR@massarin@larnsceand write a short message, e.g., I have completed the module 1 assignment. Please review my work. You can also add any questions you have or other comments you would like to share with the instructors.
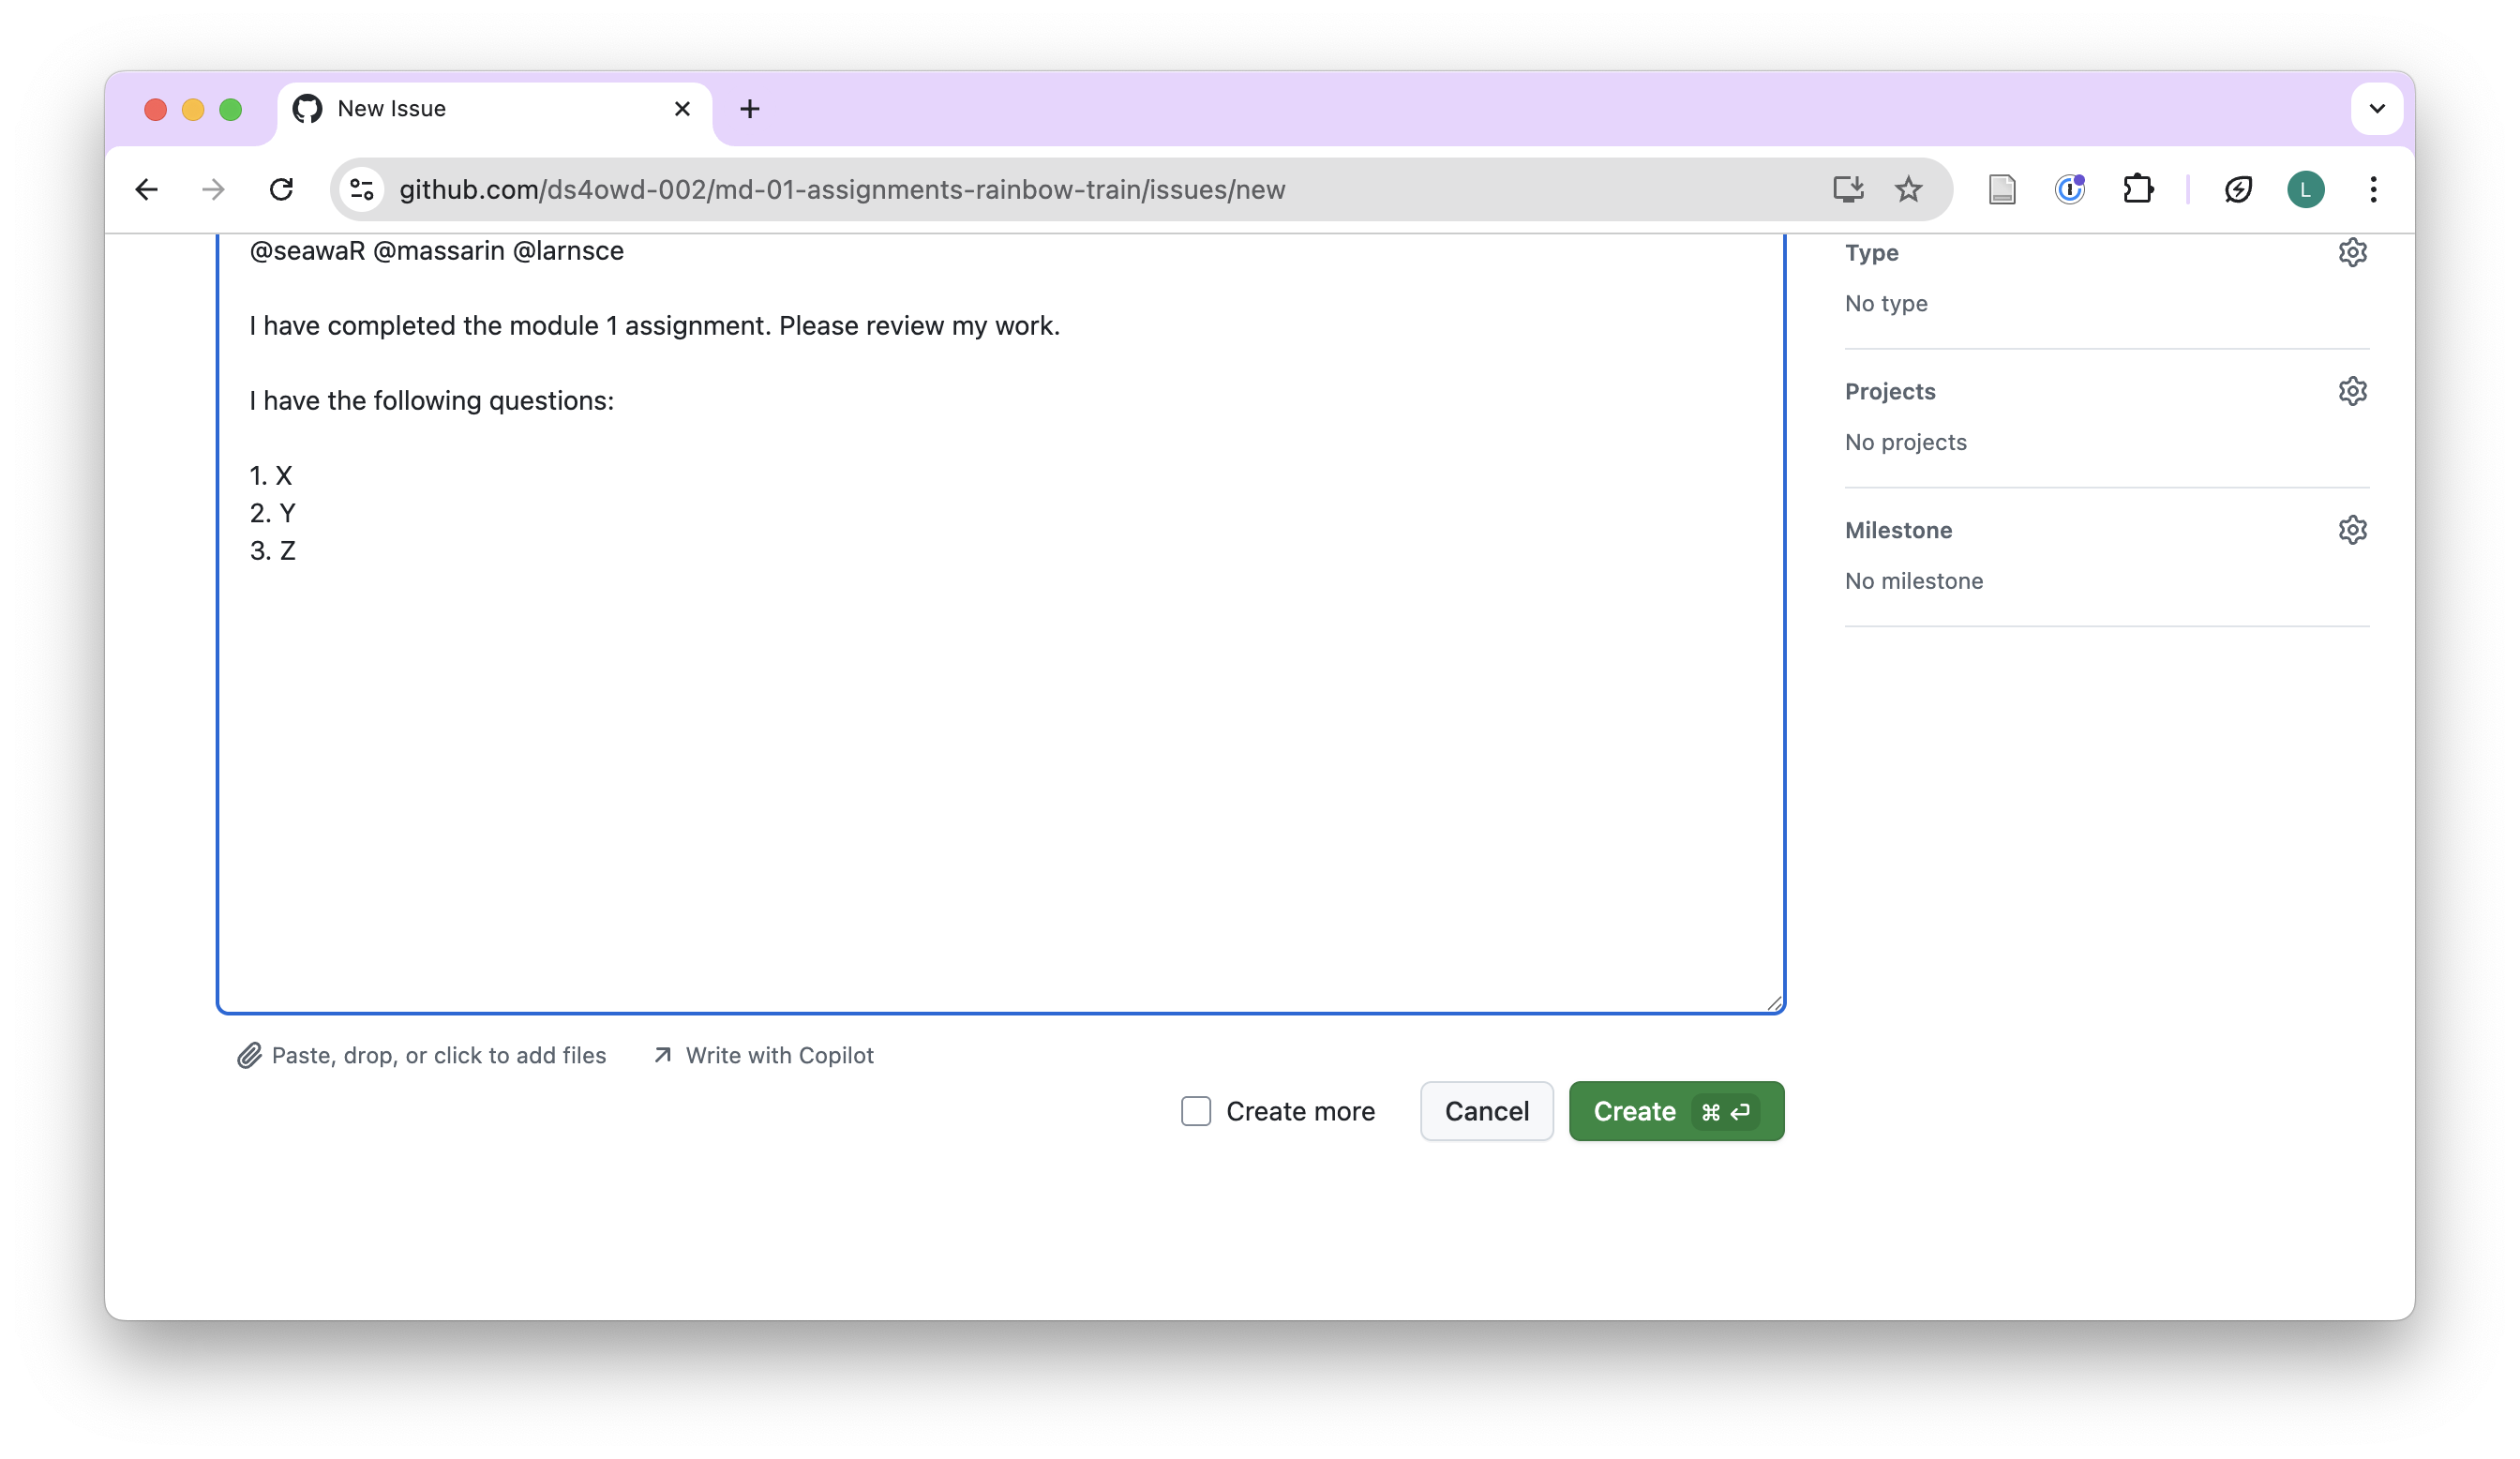
- Scroll down the page a bit and click the green Create button.
 Congratulations! You have completed the GitHub workflow assignment and you are now ready for Module 2. To conclude this module, please complete the mandatory quiz (in preparation).